How to Transfer WooCommerce Products to Another Store
Migrating WooCommerce products from one store to another can feel overwhelming, but it doesn’t have to be. Whether you’re launching a new store, rebranding, or merging multiple shops, you don’t need to spend hours manually copying product details.
Using a relevant tool, you can simply export products from your old store and import them into the new one in just a few clicks.
In this blog, we’ll walk you through how to seamlessly migrate WooCommerce products using the free version of the WooCommerce Product Import Export plugin, so you can spend less time on setup and more time growing your store and delighting your customers.
Step by Step Guide to Export WooCommerce Products
To migrate your WooCommerce products, the first step is to export them as a CSV file. With the WooCommerce Product Export plugin, this process is quick and straightforward. Just a few clicks and your products are ready to import.
Follow the guide below to export your WooCommerce products with ease.
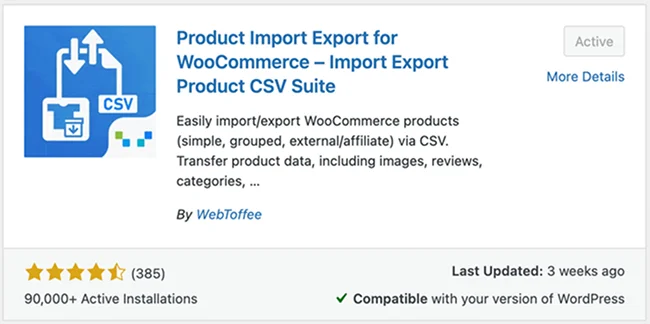
Step 1: Install a Product Import Export Plugin
From your WordPress dashboard
- Go to Plugins > Add New Plugin.
- Search for “Product Import Export for WooCommerce” plugin,
- Install and activate the plugin.
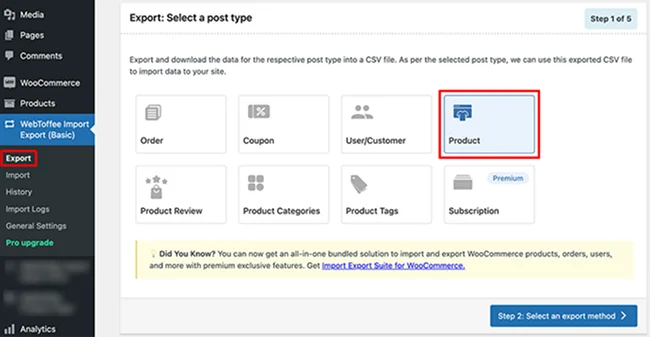
Step 2: Select Product as Post Type
After you have installed and activated the plugin:
- Go to WebToffee Import Export (Basic) > Export from your WordPress dashboard.
- Under Post Type, select Product to export your store’s products.
- Click the Select an export method button to proceed to the next step.
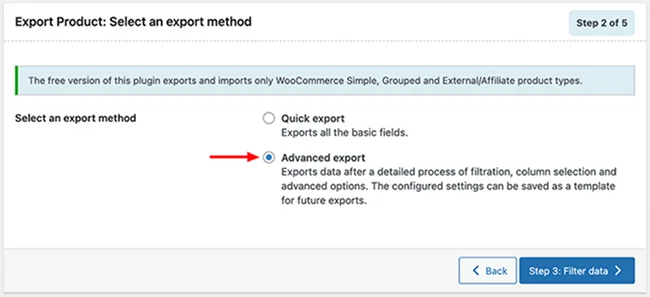
Step 3: Select an Export Method
The plugin gives you two flexible ways to export your products, depending on how much control you need:
Quick Export: Best for speed and simplicity. Instantly export all products with essential details in just one click. Perfect for fast migrations or backups.
Advanced Export: Designed for greater control and customization. Choose specific products, select the fields to export, and apply filters to fine-tune exactly what data is included.
Pick the option that fits your workflow. Whether you need a complete product export or a targeted export for specific tasks.
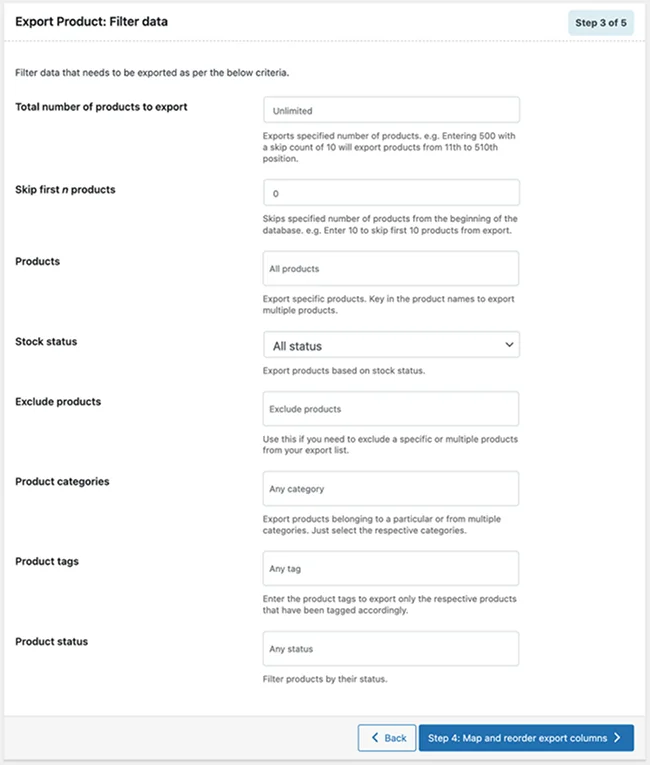
Step 4: Filter Export Data
This step allows you to precisely control which products are included in your export. Instead of exporting your entire catalog, you can apply filters to narrow down the data to only the products you need.
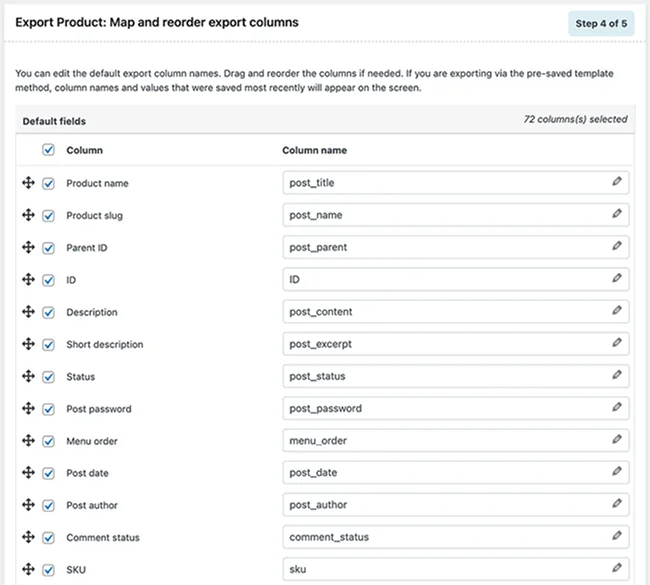
Step 5: Map & Reorder Columns
In this step, you control how your product data appears in the exported CSV file. The plugin lets you structure the file exactly the way you need.
- Select fields to export: Choose the product data you want to include, such as SKU, product name, price, stock, categories, and more.
- Customize column headers: Rename column headers to match your preferred naming conventions, especially useful when migrating to another site or platform.
- Reorder columns easily: Use the drag-and-drop interface to rearrange column order and create a clean, well-organized export file.
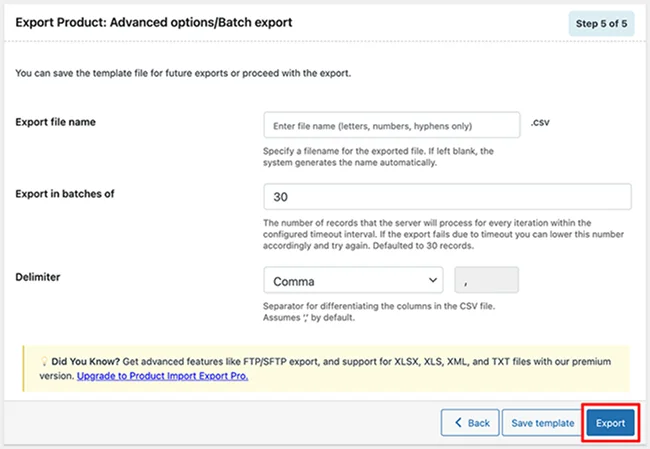
Step 6: Export Products
This is the final step in exporting your WooCommerce products. Before generating the CSV file, review and configure the following options:
- Export file name: Set a name for your exported file to easily identify it later.
- Export in batches: Choose how many products are processed per cycle. For large stores, smaller batch sizes help avoid server timeouts.
- Delimiter: Select the column separator for your CSV file (such as a comma or semicolon) to ensure compatibility with your target system.
Once everything is set, click Export. The plugin will generate the CSV file based on your settings, ready to download and import into your new WooCommerce store.
Once the export process is complete, a pop-up window appears with a Download File button. Click it to save the exported CSV file to your computer.
The downloaded file includes only the products and data columns you selected, organized exactly according to your filters, field mapping, and export settings. This CSV file is now ready to be imported into your new WooCommerce store.
Importing WooCommerce Products
Now that your products are exported, the next step is to import them into your new WooCommerce store. With the Product Import Export for WooCommerce plugin, the import process is just as quick and straightforward.
Before you begin, ensure your CSV file is UTF-8 encoded to prevent issues with product names, special characters, or descriptions during import.
Follow the step-by-step process below to successfully import your products.
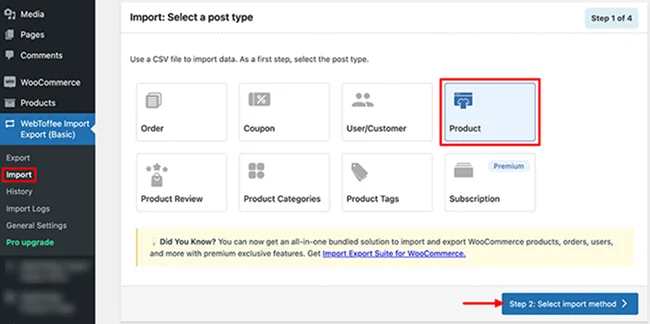
Step 1: Select Product Post Type for Import
From your WordPress dashboard:
- Go to WebToffee Import Export (Basic) > Import.
- Under Post Type, choose Product to specify that you’re importing product data.
- Click Select Import Method.
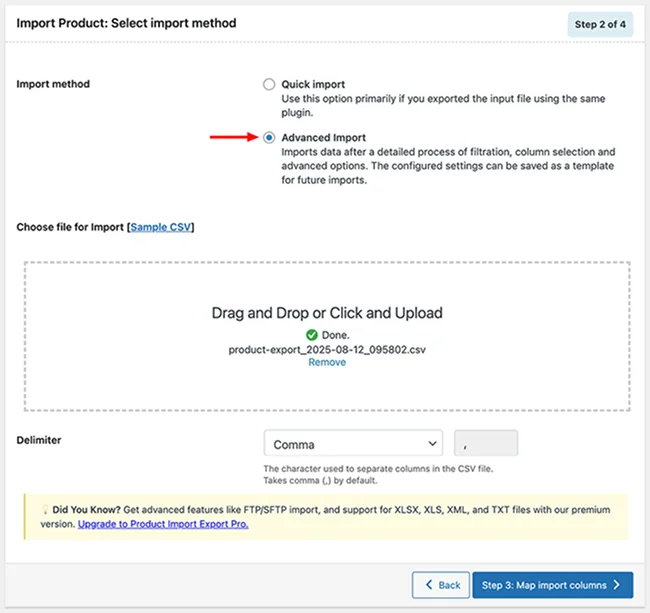
Step 2: Choose Import Method
You can import products into WooCommerce in two different ways, depending on your needs:
Quick Import: Best when the CSV file was generated using the same plugin. Simply upload the file and click import for a fast, hassle-free transfer.
Advanced Import: Ideal if you need more control over the import process. Upload your CSV file, choose the appropriate delimiter (comma, semicolon, etc.), then click Map Import Columns to match fields before completing the import.
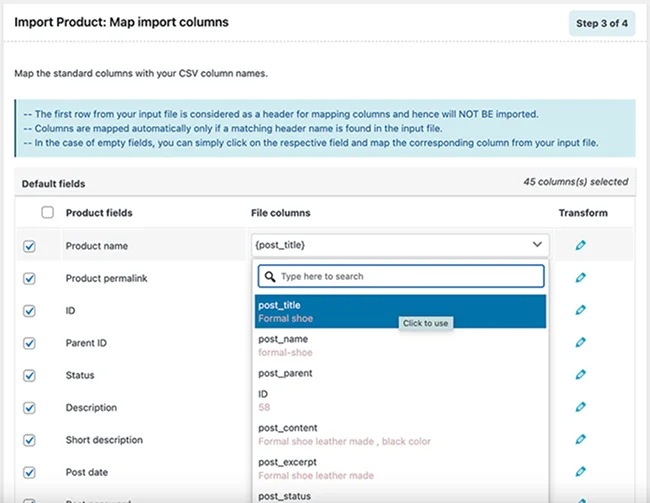
Step 3: Reorder Columns of the Products CSV File
To ensure a smooth import, make sure your CSV columns correctly match WooCommerce product fields:
- The plugin will auto-map columns when your CSV headers match WooCommerce field names.
- If anything doesn’t match, use the drop-down menus to manually select the correct field for each column.
- Scroll down and click on Advanced options/Batch import/Scheduling button to proceed to the next.
Note: Double-check your mappings before proceeding. Accurate column alignment helps prevent import errors.
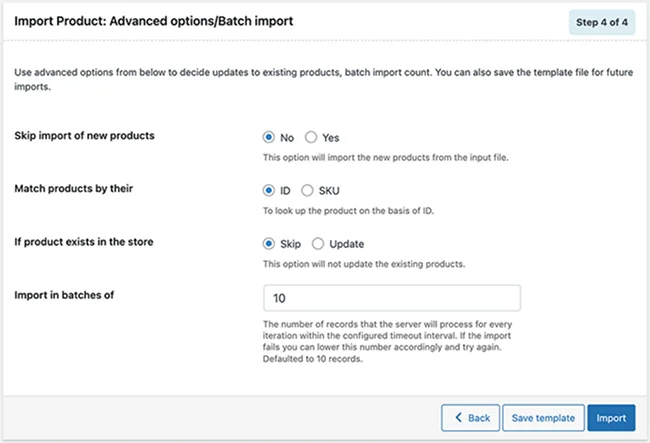
Step 4: Configure Advanced Import Options
Before starting the import, fine-tune how products should be handled:
- Choose whether to import or skip new products
- Select ID or SKU for product matching
- Decide whether to skip or update existing products
- Set the batch size for the import process
Once everything is configured, click Import to upload the products from your CSV file into your WooCommerce store.
Once the import is complete, all your WooCommerce products and their associated details will be successfully transferred to your new store, ensuring data integrity and a smooth setup process.
For greater flexibility and control, consider upgrading to the premium version of the Product Import Export for WooCommerce plugin. The premium version offers advanced features such as enhanced filtering options, scheduled imports and exports, and extended support for additional product types, making large-scale migrations and ongoing store management even more efficient.
Conclusion
Migrating WooCommerce products doesn’t have to be stressful. With the WebToffee Product Import Export plugin, you can move products between stores quickly and accurately, saving time, reducing errors, and keeping your business running smoothly.
By following the steps in this guide, you can ensure a seamless product migration and focus on growing your store and delivering great customer experiences.
You May Also Like: