How to Customize the WordPress Login Page (No-Code & Code Methods)
Most WordPress site owners use the default WordPress login page as it’s functional and simple, but the problem is, it does little to reflect your brand or protect your site.
The standard WordPress login offers almost no flexibility. No logo customization, no branded background, and no built-in CAPTCHA to stop bots and brute-force attacks. That’s exactly why we created this guide.
This blog walks you through everything, from smart plugin-based enhancements to fully custom solutions. You’ll learn how to redesign the login experience, change the login URL to improve security, and integrate CAPTCHA to harden your site against attacks. All explained clearly, step by step.
Let’s begin with the simple one.
Custom Logo & Branding
Your WordPress login page shows the WordPress logo by default. Replacing it with your own brand logo makes an immediate impression and gives your site a professional, cohesive look. This is one of the most impactful visual changes you can make to the login screen.
Changing the Logo with a Plugin
The easiest way to change the login page’s logo is with the Loginfy plugin. Loginfy integrates directly with the default WordPress Customizer, so you can see your changes in real time before saving.
Under the Logo Customization option inside the Loginfy settings, you can upload your own logo image, set a custom logo link (so clicking the logo redirects to your site instead of WordPress.org), and adjust the logo size to fit your design without any coding.
Changing the Logo without a Plugin (via Code)
If you prefer not to use a plugin, you can change the logo with a small snippet of code. Let’s know how to do it:
Step 1: Upload your logo image to your WordPress Media Library (Media > Add New), then copy the image URL.
Step 2: Open your child theme’s functions.php file. It is strongly recommended to use a child theme. Because if you ever update your main theme, changes made to the theme’s functions.php file will be overwritten and lost.
Step 3: Copy the following code and paste it into your child theme’s functions.php file. Replace YOUR_IMAGE_URL with the actual URL of the image you uploaded in the Media Library:
// Add to your child theme’s functions.php
function my_custom_login_logo() {
echo ‘<style>
.login h1 a {
background-image: url(“YOUR_IMAGE_URL”);
background-size: contain;
width: 300px;
height: 100px;
}
</style>’;
}
add_action(‘login_enqueue_scripts’, ‘my_custom_login_logo’);
Once saved, your custom logo will appear on the WordPress login page instead of the default WordPress logo.
Background (Image/Color/Video)
A plain white login background looks generic. Customizing it with a brand-relevant image, a solid color, a gradient, or even a video can dramatically improve the feel of your login screen. This is especially useful for membership sites, client portals, and SaaS platforms where the login page is the first thing users see.
Changing the Logo with a Plugin
Loginfy handles login page backgrounds through its Background option inside the WordPress Customizer.
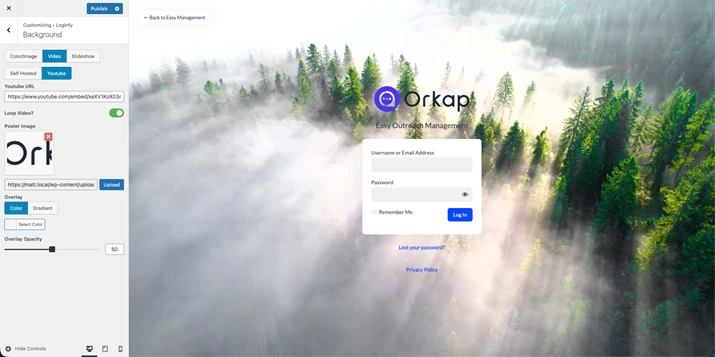
You can upload a background image directly from your Media Library, choose a solid color or gradient, or even set a video background for a more modern feel. The plugin also gives you control over background sizing, positioning, and repeat settings so you can get the look exactly right.
Changing the Login Background without a Plugin (via Code)
The setup is the same as the logo change above. Upload your background image to the WordPress Media Library and copy its URL. Then paste the following code into your child theme’s functions.php file, replacing YOUR_IMAGE_URL with the actual image URL:
// Add to your child theme’s functions.php
function my_custom_login_background() {
echo ‘<style>
body.login {
background-image: url(“YOUR_IMAGE_URL”);
background-size: cover;
background-position: center;
background-repeat: no-repeat;
}
</style>’;
}
add_action(‘login_enqueue_scripts’, ‘my_custom_login_background’);
Once the code is saved, your login page background will change to the image you uploaded.
Form Styling (Colors, Buttons, Fields)
The login form itself is just as important as the background. Unstyled input fields, a plain submit button, and default fonts can make even a well-designed background feel unfinished. With the right tools, you can customize every part of the form to match your brand.
Here, Loginfy includes a dedicated Form Customization option in the WordPress Customizer. From here, you can style the input fields, change button colors, customize button hover states, adjust field focus effects, modify label fonts, and control padding, borders, and shadows.
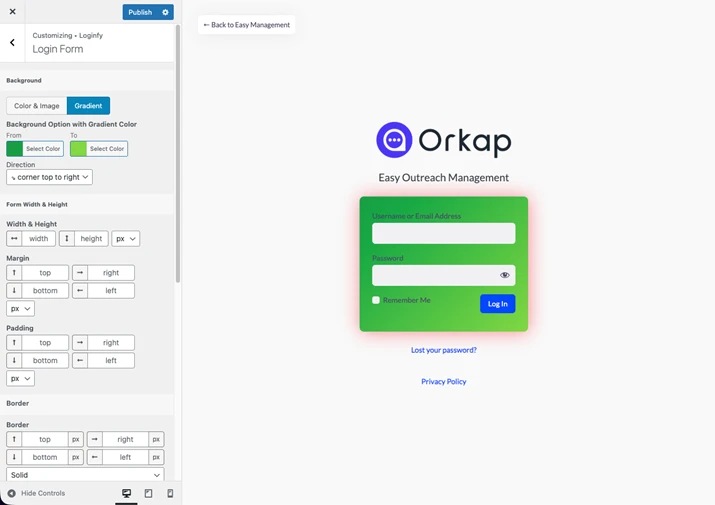
The form styling panel makes it easy to create a clean, branded login form without writing a single line of CSS. All changes are previewed live before you save.
Hide Elements (Back to WP, Lost Password)
WordPress adds several default links and elements to the login page that you may not want to display on your site. The “Back to websie” link, the “Lost your password?” link, the “Remember Me” checkbox, and the Privacy Policy page link can clutter the login screen.
For focused or restricted-access sites, hiding some or all of these gives the page a much cleaner look.
Loginfy handles this through its Extras option in the Customizer.
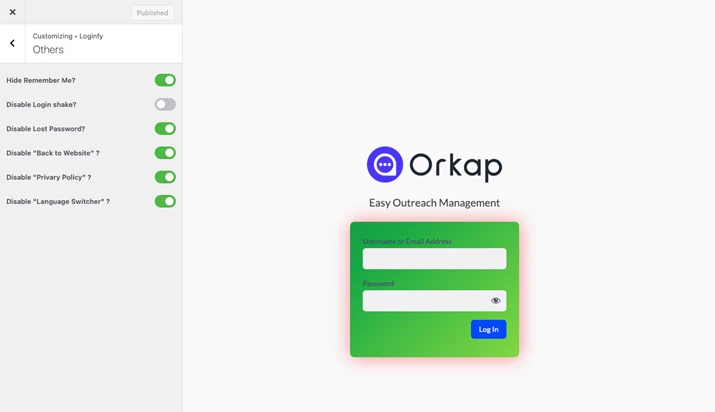
You can individually toggle the visibility of the “Back to WordPress” link, the “Lost your password?” link, and the Privacy Policy link. Each element can be turned on or off with a single click, giving you a clean, distraction-free login page in seconds.
Login URL Change
By default, the WordPress login page is accessible at /wp-login.php and /wp-admin. These are well-known addresses and are frequently targeted by brute-force bots that try thousands of username and password combinations. Changing the login URL to something custom is a simple but effective way to reduce automated attacks on your site. It also helps to know how other sites are built before you start hardening your own — running a URL through a website theme and plugin detector shows you the CMS, theme, and plugins a site relies on, which is a useful first step when planning your own setup.
How to Change Login URL with WP Adminify Plugin
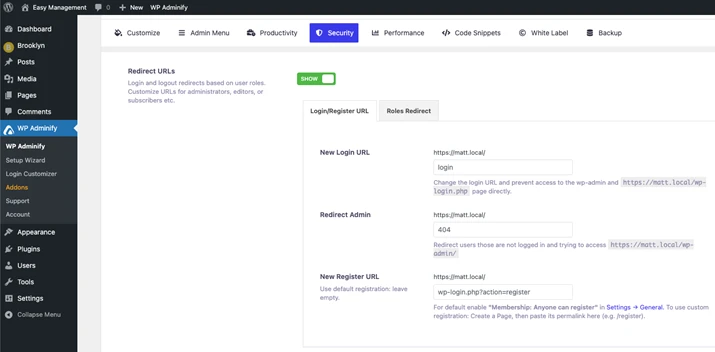
WP Adminify includes a built-in option to change the WordPress login URL. Once you activate this feature, you can set any custom slug as your new login address (for example, /my-secure-login).
Any visitor who tries to access the default /wp-login.php or /wp-admin will be automatically redirected to a 404 page or your homepage, keeping the login entry point hidden from bots and unauthorized users. This adds a meaningful layer of security to your WordPress site without requiring any code.
Redirects After Login
When a user logs in, WordPress by default redirects them to the admin dashboard. This is not ideal for all site types.
On a membership site, you might want subscribers to land on a front-end page after logging in. On a WooCommerce store, you may want customers redirected to their account page. Different user roles often need to go to different places, and logout should also redirect to the right location.
How to Set Redirect URL Using WP Adminify Plugin
WP Adminify gives you granular control over login and logout redirects. You can set redirect rules based on specific user roles, so administrators, editors, subscribers, and custom roles can each be sent to a different page after login.
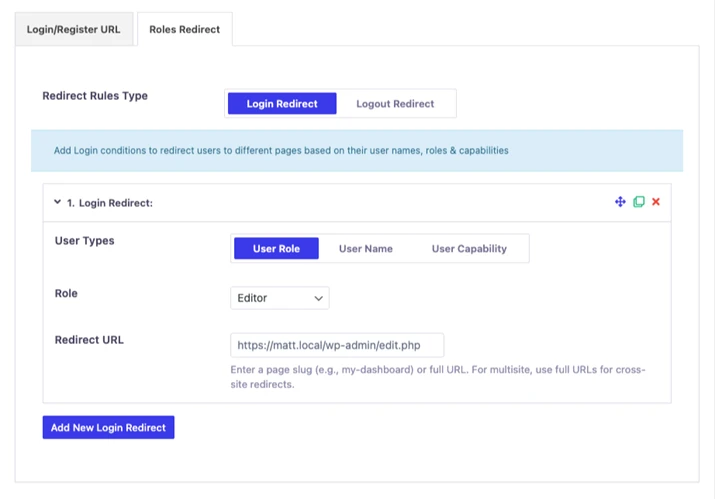
You can redirect users to any admin page, a front-end page or post, or any custom URL of your choice. The plugin also handles logout redirects, so when a user signs out, they are taken to a specific front-end page or URL instead of the default login screen.
reCAPTCHA / Security
The WordPress login form is a common entry point for automated bots running brute-force attacks. Adding a CAPTCHA challenge to the login form is one of the most reliable ways to stop bots before they ever attempt a login. The best approach is to use a CAPTCHA solution that is lightweight and does not frustrate real users with image puzzles or text challenges.
Recommended Plugin: hCaptcha for Forms and More
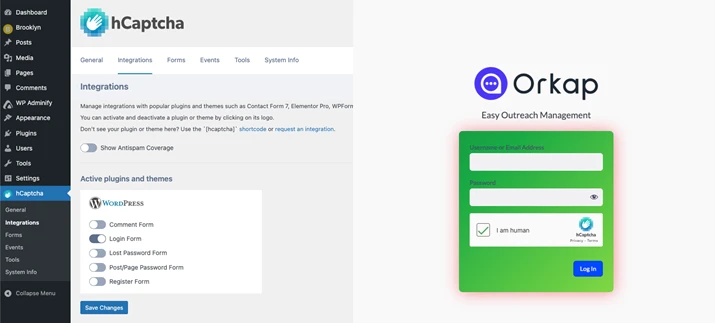
For CAPTCHA protection on the WordPress login page, we recommend the hCaptcha for Forms and more plugin, which is available for free in the WordPress plugin repository.
hCaptcha is a privacy-focused alternative to Google reCAPTCHA that is easy to integrate and works with the WordPress login form out of the box. Once installed and configured with your hCaptcha site key and secret key, it adds a challenge to the login form that stops automated bots without adding unnecessary friction for real users.
Custom CSS / JS
Sometimes, the built-in plugin options are not enough to achieve a very specific design goal. Maybe you want to animate the login form, add a custom font that is not in the default options, tweak the spacing of a specific element, or inject a small JavaScript snippet to enhance the page behavior.
Here, custom CSS and JS give you full flexibility to push the login page beyond what any preset option can offer.
How to Add Custom Code Using the Loginfy Plugin
Loginfy includes dedicated Custom CSS and Custom JS fields directly inside the WordPress Customizer.
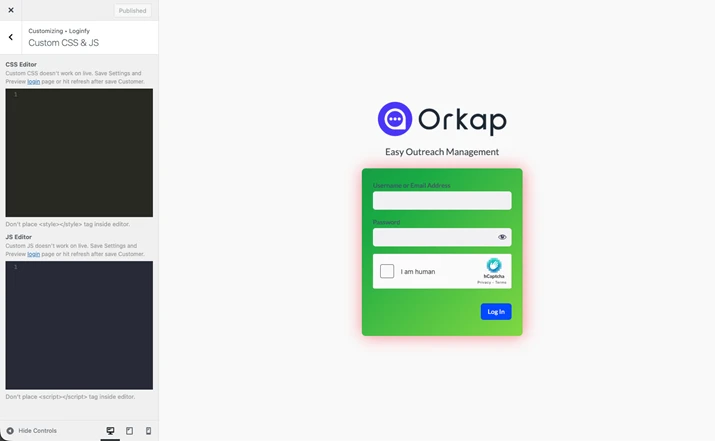
Navigate to the Loginfy section in the Customizer and you will find a Custom CSS and JS field. You can paste any CSS or JavaScript code directly into these fields, and your code will be applied specifically to the login page without affecting any other part of your site.
This is the cleanest way to add advanced login page customizations without touching any theme files.
Conclusion
Customizing the WordPress login page does not have to be complicated. With the right set of tools, you can cover every aspect of it without writing much code at all. We recommended to use Loginfy for all visual customizations including logo, background, form styling, hiding unwanted elements, and injecting custom CSS or JS.
Moreover, the plugin helps you secure and redirect the login flow by changing the login URL and setting role-based redirects on login and logout. And use the hCaptcha Forms and More plugin to protect the login form from bots without making life harder for your real users.
The plugins mentioned in this guide are focused on doing their specific job well. Together, they give you a fully customized, secure, and professional WordPress login page. Start with the visual changes that matter most to your brand, then layer in the security and redirect features to complete the setup.
You May Also Like: