
How to Create a WordPress Website Using Elementor in 2026
Building a WordPress site sure sounds exciting….until you actually start.
Because then you’ll suddenly be dealing with hosting, themes, plugins, page builders, mobile optimization and dozens of tutorials all telling you different things. Most beginners get stuck before their homepage is even finished.
The good news? Creating a professional website no longer needs coding skills or an expensive developer.
Using Elementor, you can create webpages visually using drag and drop tools, ready made templates and responsive design controls right inside WordPress itself. Pair it with Element Pack Pro, and you unlock even more widgets, layouts and customization with zero coding.
In this guide, you’ll learn how to create a WordPress website using Elementor step by step, from setting up WordPress to designing responsive pages and adding advanced functionality with Element Pack.
What You Need Before Creating a WordPress Website
Wondering what you need to get started? Look no further. Take a look below at the things you’ll need to get started before you install Elementor:
- Domain Name : It’s your internet address so keep it short and easy to remember.
- Web Hosting: Elementor runs inside WordPress so your host affects load speed and uptime. Make sure to go with a fast web hosting for better loading speed.
- WordPress: Most hosts offer one click WordPress installation. After installation, simply log in at yourdomain.com/wp-admin to go to your WordPress dashboard.
Steps to Create a WordPress Website Using Elementor
Now let’s build. This section walks through the WordPress Elementor tutorial process from choosing a template to publishing a fully designed page.
Step 1: Install and Activate Elementor
Want to get your Elementor running in just 2 minutes? Follow these steps below:
- Firstly, log in to your WordPress admin panel.
- After getting familiar with its dashboard, head over to the Plugins →Add New Plugin.
- Now search for “Elementor.”
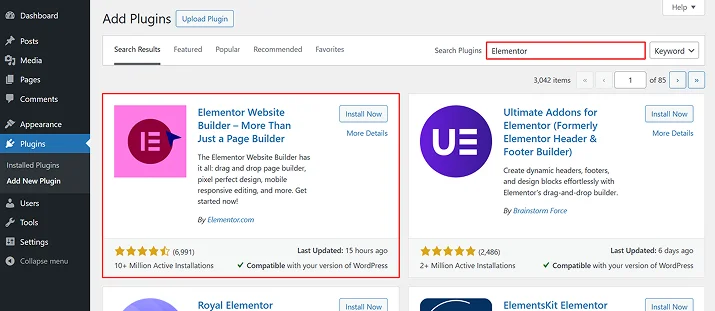
- Hit the Install Now button (the official one by Elementor.com with millions of active installs).
- After the installation, click on the Activate button, and that’s it!
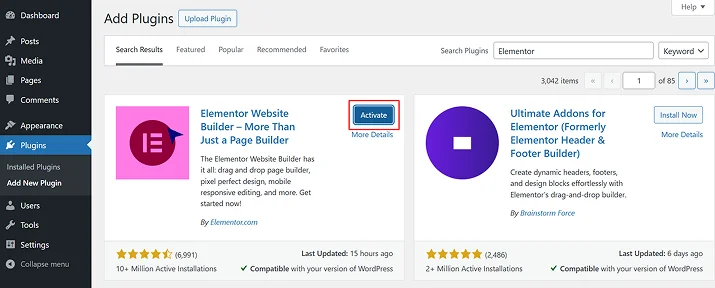
You’ll now see a new “Elementor” menu item in your dashboard sidebar.
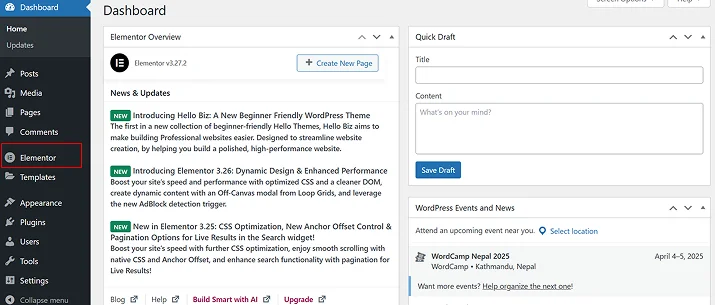
This is where you’ll be managing all your settings, start designing pages and access your template library.
Step 2: Install and Activate Element Pack
Although Elementor gives you a strong foundation, its free version has real limitations in advanced widgets, design variety and ready made content blocks.
And thus, you need an Element Pack that fills those gaps. No matter whether you start with the free Element Pack Lite or go straight to Element Pack Pro, this addon expands your design.
- In your WordPress dashboard, go to Plugins → Add New.
- Now repeat the same process – Search for “Element Pack.”
- Find the plugin by BdThemes and click Install Now.
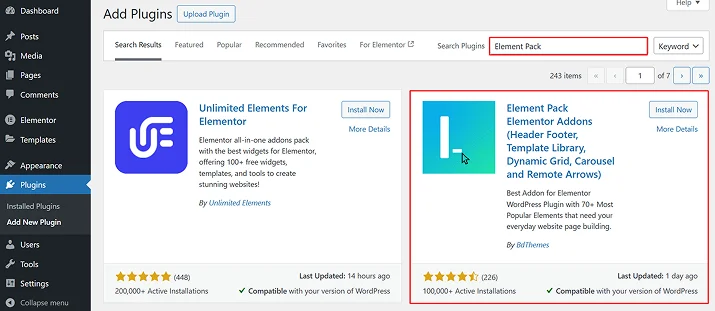
- After it’s installed, click Activate.
Starting with the free version is a perfectly reasonable first step. You can upgrade to Element Pack Pro for access to 290+ widgets, advanced templates and premium blocks as your project grows.
Step 3: Choose a Template for Your Website
Designing everything from scratch is straight off hassle, especially when you’re a beginner in the world of WordPress. So, the best way to get started is to start with a professionally designed template, and customize it to fit your brand.
Element Pack’s template library makes this fast and easy.
First, enable the Element Pack template library inside the editor:
- Go to Element Pack → Other Settings in your WordPress dashboard.
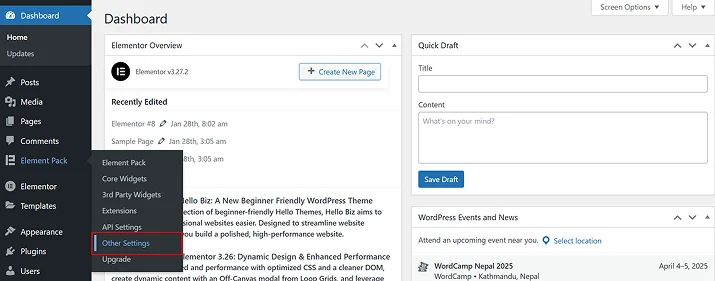
- Enable the Template Library (in Editor) option and save.
Then activate Elementor’s Container feature if it isn’t already on:
- Navigate to Elementor → Settings → Features.
- Find Container, activate it and click Save Changes.
Now the Element Pack template library is accessible inside the Elementor editor. Here’s how to use it:
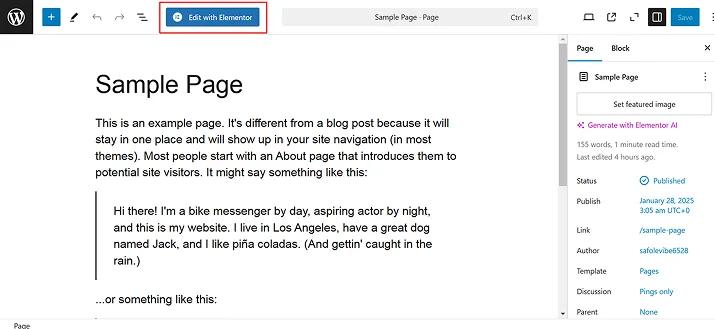
- Open or create the page you want to design in WordPress.
- Click Edit with Elementor to launch the visual editor.
- Inside the editor, click Element Pack.
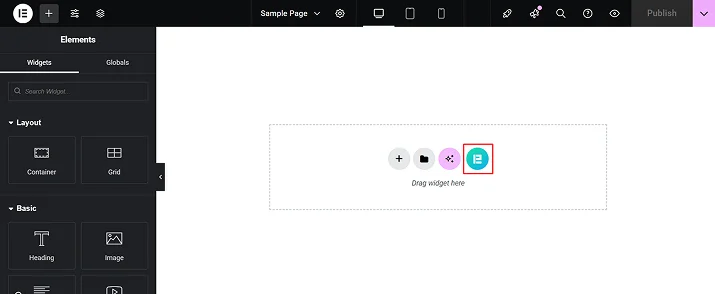
- Select Element Pack Templates.
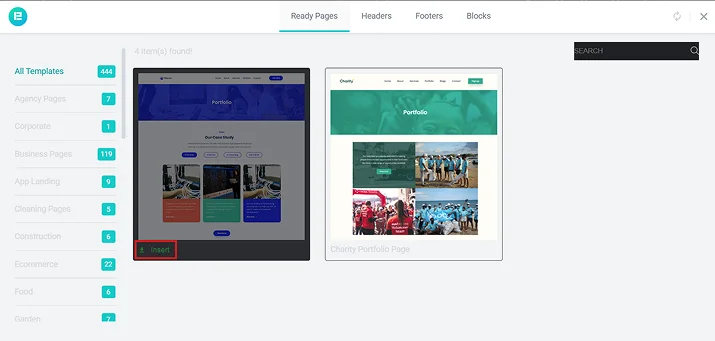
- Use the search bar or category filters to browse templates by type, such as Portfolio, Business, or E-commerce.
- Hover over any template and click Preview to inspect it in detail.
- Click Insert to apply the template to your page and wait a moment for it to load.
- Replace all placeholder text and images with your own content using the drag-and-drop interface.
Why templates save you so much time:
- They skip the blank-canvas paralysis and give you a structured starting point immediately.
- Every template is built to modern design standards and is fully responsive across devices.
- Templates cover a wide range of industries, so there’s almost always something close to what you need.
Step 4: Customize Your Website Layout
After your template is loaded, it’s time to make it yours. And Elementor and Element Pack goes hand-in-hand to give you full-power control over every element on the page.
Drag-and-drop layout customization:
- Click any section, column, or widget to select it and see its settings in the left panel.
- Drag elements to new positions anywhere on the canvas.
- Resize columns by dragging the column dividers left or right.
- Add new sections or columns by clicking the Add Section (+) button in the toolbar.
- Right-click any widget or section to duplicate, delete, or copy it.
The full Element Pack widget library includes 290+ elements. It’s worth browsing to discover widgets that fit your specific page goals.
Step 5: Set Global Colors and Fonts
Whenever you make a WordPress site or any website at all, remember design consistency is what makes a site look professional and worth browning.
Using Elementor’s Global Settings, you get to set your visual identity in one place and apply it everywhere automatically.
- Click the hamburger menu (top-left of the editor), then navigate to Site Settings.
- Select Global Colors.
- Add your brand colors and label them clearly (Primary, Secondary, Text, Accent).
- Select Global Fonts.
- Set your heading and body typefaces.
After these are saved, any update to a global color will show across every page on your website right away with zero load.
Spacing and layout tips:
- Use section padding (top and bottom) to make visual breathing room. 60-100px is best of the best for this.
- Avoid overusing widget margins. When things feel cramped, the issue is the section structure. Don’t blame your margin size.
- Use the “Content Width” setting inside sections (under Layout) to keep your readable content even when the section background spans edge to edge.
Step 6: Add Interactive Features with Element Pack
A visually beautifully designed website is important but interaction is what keeps visitors engaged.
Without interactive elements, long pages can start feeling repetitive on mobile devices where people always scroll too quickly.
This is where the Element Pack becomes useful. It adds a wide range of interactive widgets to Elementor without requiring custom code.
Add Accordions for Cleaner Content Layouts
Accordions are one of the easiest ways to organize large amounts of information.
They work well for:
- FAQs.
- Product details.
- Service explanations.
- Step-by-step instructions.
- Pricing breakdowns.
Accordions let people expand only the sections they want to read.
To add an accordion in Elementor:
- Firstly, open the Elementor editor.
- Next, search for the Accordion widget inside the Element Pack widget panel.
- Now simply drag the widget onto your page for adding titles and content.
- At last, customize typography, spacing, icons and borders from the Style tab.
You can also choose whether visitors can open multiple accordion sections at the same time or keep only one active at once.
Other Interactive Widgets Worth Exploring
Element Pack includes several widgets that help make your website feel more dynamic and modern:
- Image Comparison.
- Flip Box.
- Timeline.
Step 7: Optimize Your Website for Mobile and Tablet
Over 55% of global web traffic now comes from mobile devices. A site that looks great on a desktop but breaks on a phone loses more than half its potential audience.
Elementor and Element Pack make responsive optimization straightforward.
Using Elementor’s responsive editing tools:
- First of all, click the device icons at the bottom of the canvas to switch between Desktop, Tablet and Mobile views.
- Next, you can adjust column padding, font sizes and section spacing a little as you see fit for each breakpoint.
- Lastly, don’t forget to use the Preview option.
How Element Pack handles responsiveness:
- Widgets such as Advanced Tabs, Carousels and Pricing Tables resize and reformat automatically for different screens.
- Element Pack gives you precise control over layout at every screen size.
- Touch sensitive widgets such as sliders and accordions are optimized for swipe and tap interactions.
Practical mobile optimization checklist:
- Lower large heading font sizes for mobile. What reads well at 60px on a PC screen is mostly what needs to be 32 to 36px on a phone.
- Stack side by side column layouts vertically on small screens. Plus, don’t forget to set column direction to “Column” under the Advanced tab in “Mobile view”.
- Compress all images. Yes, you must compress large and unoptimized images because they are ones that cause speed issues.
- Make sure all buttons and tap targets are large enough to press comfortably.
- Test your site on at least two or three real devices.
Step 8: Publish and Maintain Your Website
Once your design and customization work is done, now we have to make your website go live.
But…before we actually jump in, let’s do some real quick final checks:
- Use Elementor’s responsive editing tools to verify the site looks correct on desktop, tablet and mobile.
- Click through every internal and external link to make sure nothing is broken.
- Test all interactive elements, forms, accordions, sliders and menus.
- Check page load speed using tools such as Google PageSpeed Insights or GTmetrix.
Now that we’re all set and checked, let’s publish our website by:
- Firstly, go to your WordPress Dashboard → Pages.
- Now click Edit on each page, then hit that Publish button (or Update if it was already published as a draft).
- That’s it !
Now you can see your site live with its own URL and once again check if everything shows perfectly or not in a real browser.
After publishing, the next logical step is to keep your website maintained over the period of time. To do that, you can:
- Use Elementor’s live editor to make quick content updates; no page rebuilding needed.
- Keep both Elementor and Element Pack up to date.
- Keep an eye on your site speed and stay on top of WordPress performance.
- Refresh dynamic content such as portfolio items, blog posts, testimonials and team members regularly.
Understanding Elementor Free vs Pro
Before creating, it helps to know what each version gives you. Here’s a clear quick comparison:
| Feature | Free | Pro |
| Drag-and-drop builder | Yes | Yes |
| Core widgets | 32 | 32 + 57 Pro widgets |
| Template library | Basic | Full library |
| Theme Builder (headers, footers) | No | Yes |
| Popup Builder | No | Yes |
| Built-in form builder | No | Yes |
| WooCommerce widgets | No | Yes |
| Dynamic content | No | Yes |
| Custom CSS per widget | No | Yes |
| Starting price | Free | From $59/year |
The free version is enough to create a complete professional website. Elementor Pro becomes worthwhile when you need theme-wide customization, popup or specific advanced widgets.
Element Pack Pro as an Advanced Add-on Solution
For users who want to push Elementor well beyond its defaults, Element Pack Pro by BdThemes is one of the most comprehensive solutions available.
It extends Elementor with 290+ additional widgets spanning creative portfolio layouts, advanced sliders, WooCommerce enhancements, interactive UI modules, dynamic content elements and much more.
Two parts of the product are especially useful for site builders. The widget library gives you access to a massive range of purpose-built elements covering virtually every design need. The ready blocks and templates let you import complete, professionally designed sections directly into your canvas and customize from there. For anyone building client sites or managing multiple projects, a strong block library significantly cuts down the time spent on page layout from scratch.
Element Pack Pro also includes a Live Copy Paste feature that lets you copy entire design sections from one WordPress install to another in a few clicks, a genuine time-saver for agencies and developers managing multiple sites.
It works alongside Elementor rather than replacing it, which means your existing pages, templates and design work stay completely intact. If you find Elementor’s default widget set limiting for what you’re trying to build, Element Pack Pro is worth exploring seriously.
Conclusion
In closing, creating a WordPress site with Elementor is easier than most WordPress users think. All it takes is just simple drag and drop to create a professional-looking website design with zero coding.
No custom code. No need to hire expensive developers.
To wrap this up, here’s a quick overview of this guide:
- Elementor’s drag-and-drop editor, template library and responsive controls give you a perfect kick-start foundation for making any kind of website. The free version is a solid starting point and Elementor Pro unlocks advanced capabilities when you’re ready.
- Element Pack Pro extends what Elementor can do with 290+ widgets, a large ready-blocks library and design tools that help you build more distinctive, functional pages faster.
- Build for usability first. A site that loads fast, works on mobile and makes it easy for visitors to take action will always outperform a visually complex one that creates friction. Performance and simplicity are features, not limitations.
You may also like:
- Top 3 Tips on How to Incentivize Your Website Visitors to Use the Web Forms
- Why Your Website Needs a Form Builder: Examples by Industry
- 8 Best Free Landing Page WordPress Themes and Plugins
FAQs
Is Elementor good for beginners?
Yes, consistently. The WordPress Elementor beginner guide experience is genuinely approachable: the drag-and-drop interface is intuitive, the template library gives you a strong starting point and real-time editing means you see results without touching code.
Do I need Elementor Pro to build a website?
Not at all! The free version of Elementor is more than enough to build a complete website. It comes with 32 widgets, responsive editing tools and a complete drag and drop builder alongside a massive template library. However, Elementor Pro adds the Theme Builder, Popup Builder, additional widgets and native form submissions.
Can I create a website without coding using Elementor?
Absolutely, Yes! You can create a complete website without any coding using Elementor because every layout and styling decision in Elementor is made through visual controls. Custom CSS is supported if you ever want it, but it’s fully optional and never needed to get great results.
How do I add forms to Elementor pages?
You can add forms to Elementor pages using its built-in form widget. If you’re on the free version or want more advanced form functionality, a dedicated plugin like ARForms integrates directly with Elementor through its own widget. Once you’ve created your contact form in WordPress, drag the ARForms widget onto the Elementor canvas, select your form from the dropdown and publish. Adding Shortcode is also available if you like it that way.
What are the best add-ons for Elementor?
For expanded design capabilities, more widgets and a large block library, Element Pack Pro is a good option. For creating online forms, whether it’s a contact form, survey form, login form or popup form, ARForms gives you far more control compared to a basic form widget.