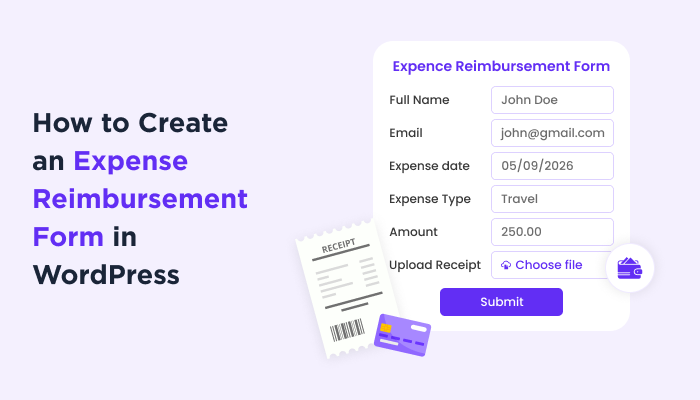
How to Create an Expense Reimbursement Form in WordPress


An employee submits a receipt. Someone checks the amount. Another person looks for approval. Then the details get entered into a spreadsheet.
Sounds like you? If so, now’s the time to create an expense reimbursement form.
Because handling expense claims this way can quickly become messy. Missing receipts, unclear expense details and delayed approvals all start to pile up before you can even blink. Plus, it can make a simple reimbursement take much longer than it should.
An expense reimbursement form gives your team one clear place to collect everything. And the best part? You can create an online form so your employees can fill in their expenses, upload receipts, and submit their claims for review, using WordPress.
Here in this guide, we’ll show you how to create an expense reimbursement form in WordPress.
So without any further ado…..
What Is The Expense Reimbursement Form?

An expense reimbursement form is an online form which employees use to ask their company to pay them back for the work money they spent out of pocket.
In other words, an expense reimbursement form is just like any other online form on your WordPress website. The only difference is using this, your employees can ask for their money back which they’ve spent on your company tasks, be it:
- Travel costs like flights, trains or rental cars
- Lodging and hotel stays during business trips
- Client dinners or team lunch meetings
- Office supplies bought in an emergency
Thus employees can use it to claim repayment for any of these business costs. Here, workers submit receipts and details for work related purchases such as travel, client meals or office supplies so the company can review and refund their out-of-pocket spending.
The reason most companies use it is to:
- Track spending for company taxes and budgets
- Stops fraud by making sure proof exists
- Keeps things fair so workers do not lose their own money for doing jobs
What Should An Expense Reimbursement Form Include?
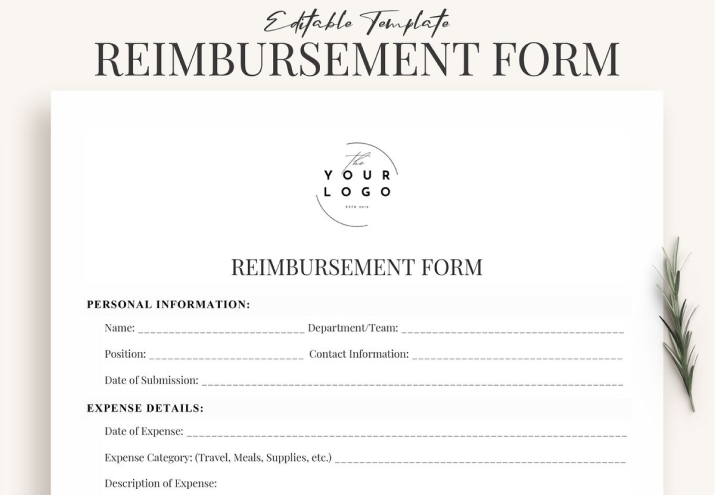
An expense reimbursement form is important to ensure all employees get paid right away while keeping your company’s financial records accurate.
Thus expense form for reimbursement must include:
All the basic employee details
- Full name of the person who spent the money
- Employee ID
- Department
- Manager name
Detailed itemized purchase logs
- Dates
- Categories
- Vendors
- Amounts
- Description
- Project/client linked to cost (If applicable)
- Tax
Proof and Totals
- Receipt attachments
- Total of all money owned
- Currency (If made purchase in international currency)
Approvals
- Employee signature
- Manager signature (Optional)
- Finance Sign-off
How to Build An WordPress Expense Reimbursement Form
If you got a WordPress business website, creating a WordPress expense reimbursement form is even easier. All you gotta do is use a WordPress form builder plugin. Among the tons of options claiming to be easy-to-go plus cost effective, ARForms stands out as the best form builder plugin for WordPress.
Trusted by 10,000+ businesses, ARForms allows you to create a complete expense reimbursement form using a simple drag and drop interface.
What makes it so much better than others is you’re never stuck with recurring pricing plans. Yes, the ARForms Pro version is a lifetime deal you can get. Means you never have to pay again and again just to use it.
You can also start with its free version as well – ARForms Lite.
Step 1. Install and Activate ARForms
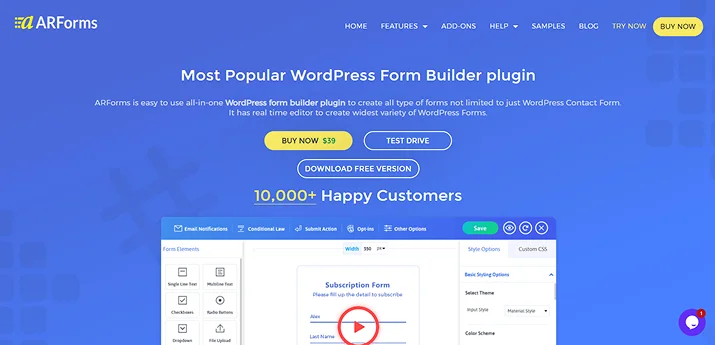
First of all, install and activate the ARForms on your WordPress website.
For that, you simply have to go to ARForms official website from where you can download either ARForms Lite or ARForms Pro. We’d suggest you to go with ARForms Pro as its only one-time cost, plus gives you way to:
- 33+ Advanced Form Fields
- 24+ Third Party Integrations
- Premium Conversational Form Options
- Payment Gateway Integrations
- Additional Functionality Addons
- And a lot more!
After downloading ARForms zip file, go to WordPress → Plugins → Add New Plugin, and upload the zip file of your plugin. Hit the Install Now, followed by Activate.
After the plugin is activated, you’ll see the ARForms menu in your WordPress dashboard. You can use it to create and manage your expense reimbursement form.
Step 2. Create a New Expense Reimbursement Form
Now, it’s time to create your form.
Go to ARForms → Manage Forms → Add New Form from your WordPress dashboard.
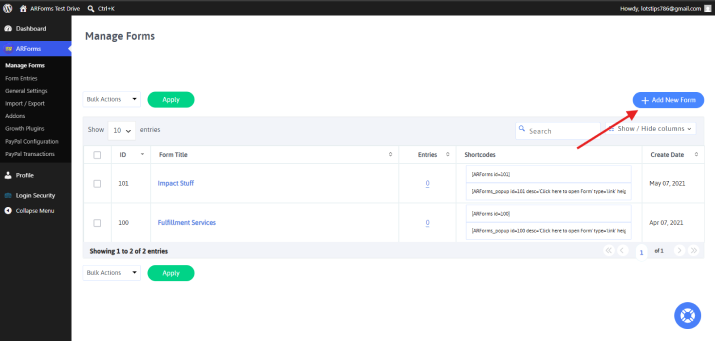
Here you can start with a blank form, or if you wanna avoid the hassle of creating everything from nothing, ARForms has a set of 50+ professional pre-built templates. Simply pick whatever fits close to your goal.
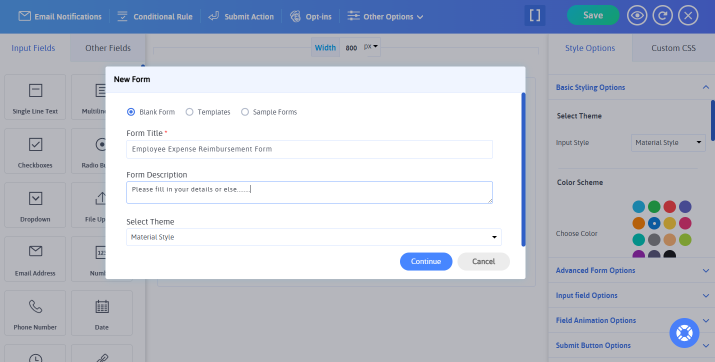
For an expense reimbursement form, start with a simple layout that gives employees enough space to provide their expense details.
Give your form a clear form title, form description and theme. We’re here going to pick a title such as Employee Expense Reimbursement Form so it’s easy to recognize later.
Step 3: Add an Expense Details Section
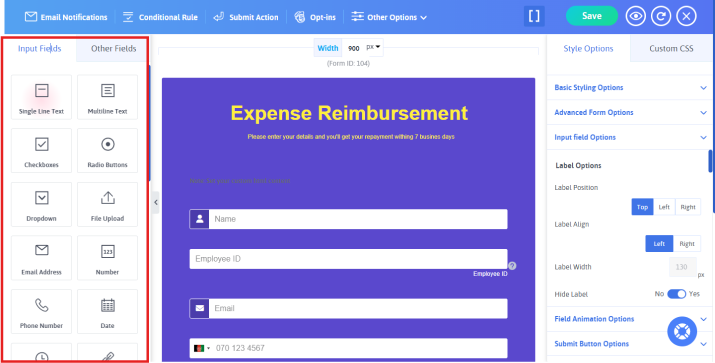
Next, add the fields employees need to describe their expenses.
Earlier if you remember, we’ve discussed the fields that should be included in an expense reimbursement form. So simple start adding all those fields here such as:
- Employee name
- Employee ID
- Department
- Manager name
- Expense date
- Expense category
- Vendor or merchant name
- Expense amount
- Currency
- Expense description
- Project or client name
The best part? ARForms has 33+ advanced fields, and you have to drag a field from Input Fields then drop it on the form.
Make important fields required so employees don’t accidentally submit incomplete expense claims. For example you can make Expense Date, Expense Category, Amount, and Description required fields.
If employees can submit multiple expenses in one request you can also add a repeating section so they can enter each expense separately.
Step 4: Add a Receipt Upload Field
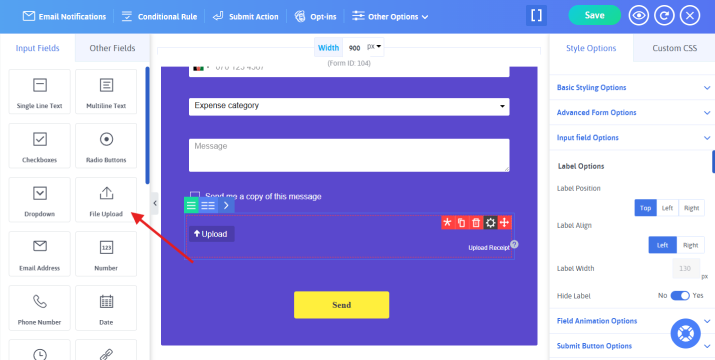
As we all know receipts are an important part of the reimbursement process because they give your finance team proof of the expense before approving the claim.
Thus to collect receipts, add a File Upload field to your form.
You can ask employees to upload receipts in formats such as PDF, JPG, or PNG. Plus, set appropriate file size and file type restrictions as you see fit.
Furthermore, make sure to add a clear label such as Upload Receipt and make the field required if you want proof for every expense.
Step 5: Add an Approval or Signature Field (Optional)
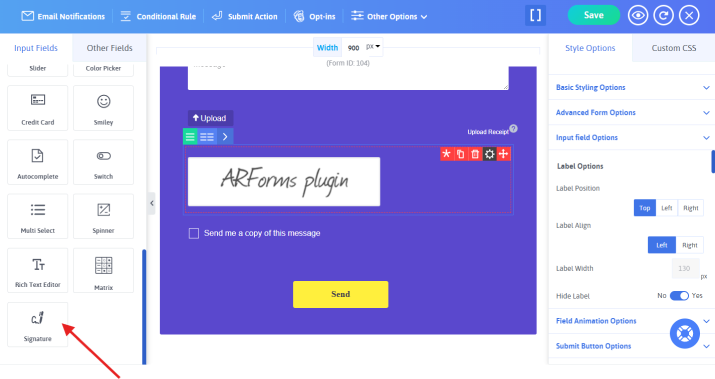
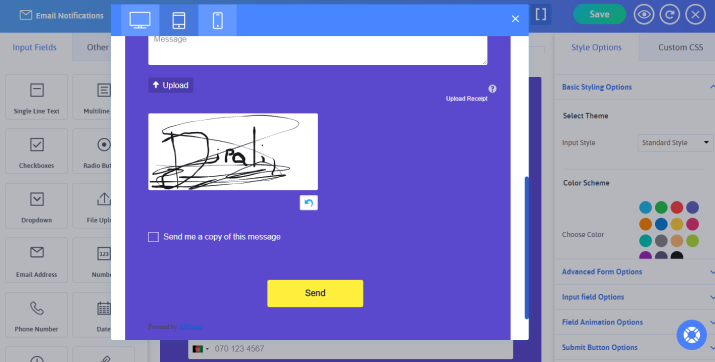
After your employees have filled in their expenses and uploaded their receipts, you can add an approval or signature field at the last. This field works as a proof and makes your form more valid than ever.
For example, you can add an employee signature field to confirm that the submitted information is accurate.
If your reimbursement process needs manager approval, you can also add a section for the manager or finance team to review the request.
You don’t have to add this field if your company handles approvals separately. It’s completely optional and depends on your internal reimbursement process. But if your team does want a signature, you’ll be glad to know ARFoms allows it too.
The best part? You can also test and see how the Signature option works yourself. Simply click on the eye icon on the top-right corner to see how their signature field works.
Step 6: Configure Email Notifications
At last, after you created your first expense form in WordPress, it’s now time to set automatic email notifications. So the right people know right away when a reimbursement request is submitted.
Setting automatic email confirmation notification in ARForms is super easy. All you have to do is click on Email Notification in the above tab, inside your form builder interface.
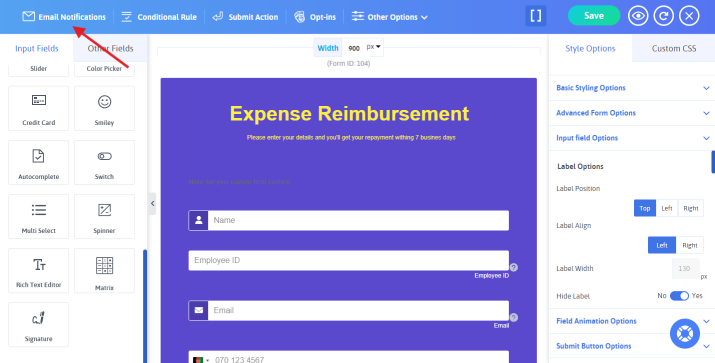
Further to configure, you have to tick on “Send an automatic response to users after form submission”. This will send a confirmation message to employees. And next, tick on “Send an automatic response to admin user after form submission”, which will send a reminder to you or the HR.
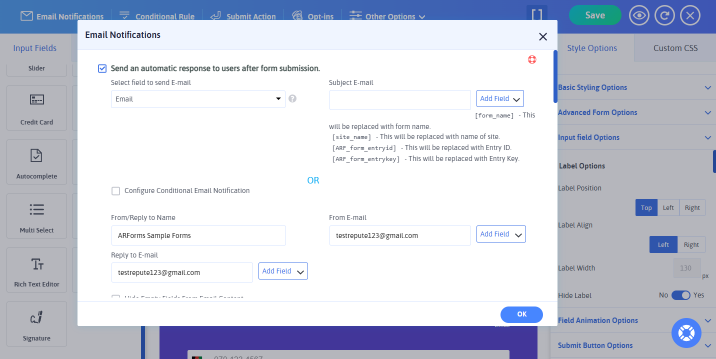
After enabling both, you select the send email field, subject of email, and more details. Lastly, you can add your email notification message . Your notification message can include important submission details such as:
- Employee name
- Expense amount
- Expense category
- Submission date
- Receipt details
This helps your team respond to reimbursement requests faster without manually checking the WordPress dashboard for every new submission.
Step 7: Add the Form to Your WordPress Website
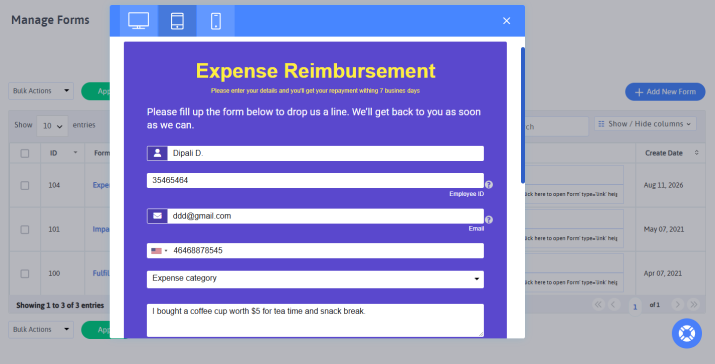
Your expense reimbursement form is now ready.
All left to do is one final step which is simply to publish it on your WordPress website. And to do that, you can either create a dedicated page such as Expense Reimbursement or Submit an Expense, or add this form in any existing WordPress page or post.
After you’re done, simply add your ARForms form to the page using a simple shortcode from the Manage Forms.
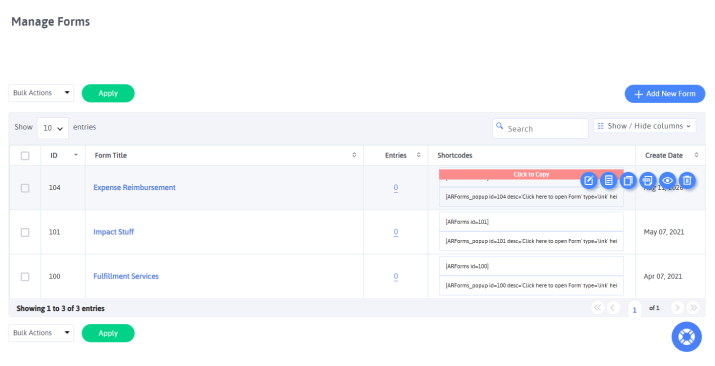
If you wanna test your expense reimbursement form in WordPress before making it live, you can easily Preview it – seeing how it appears across smart phone, PC, and tablet.
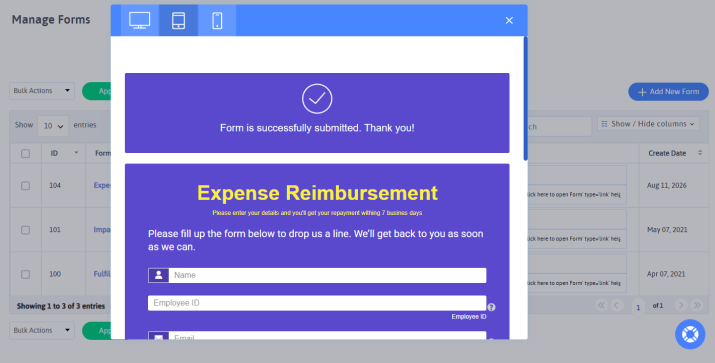
You can submit a test reimbursement request yourself and check that:
- All required fields work correctly
- Receipt uploads work
- The total amount is captured correctly
- Email notifications are delivered
- The confirmation message appears
- The form looks good on mobile devices
And that’s it! Now your form is finally ready to accept reimbursement requests.
In Conclusion: Create Your Expense Reimbursement Form In WordPress
No more digging through emails. No more chasing employees for missing receipts. And no more messy spreadsheets just to process a simple expense claim.
With ARForms, you can bring the complete reimbursement process into one easy to use WordPress form. Employees can fill in their expenses, upload receipts, add signatures and submit everything in one go.
The best part? ARForms makes creating your own expense reimbursement form just as easy as filling it out. It’s a drag and drop builder. It means you don’t need any coding skills or a complicated setup.
Thus if you’re looking for the best WordPress form builder to create an expense reimbursement form, ARForms has you covered.
Build your form. Collect expenses. Keep reimbursements moving.
You may also like
- 9 Best Contact Form Plugins for WordPress in 2026
- HIPAA Release Form: Everything you need to know!
- Client Consultation Form vs Intake Form: Key Differences Explained
FAQs
What is an expense reimbursement?
Expense reimbursement is when a company pays an employee back for work related stuff they bought using their own personal money. Some of the common examples of this include travel costs, food cost during a meeting or buying office tools.
What expenses can be reimbursed?
Expenses that can be reimbursed are:
- Flight, train ticket, tax or gas for work trip
- Hotels bill if employee travels away for work
- Meals eaten while working for business related stuff
- Work supplies like pen, paper, software or tools
- Cost for work classes or job training
- A part of phone bills if you use it for work
What documents are needed for expense reimbursement?
For an expense reimbursement, you need documents such as an expense report along with item receipts, proof of payment and a clear note explaining the business needs of each cost.
What are the IRS requirements for expense reimbursement?
If you want to make your expense reimbursement tax-free, the IRS needs an accountable plan.This simply means the cost must be for real business. You have to show proof of receipts on time, and must return any advanced money.
How to create a reimbursement form?
You can create a reimbursement form for your WordPress site using a WordPress form builder like ARForms. ARForms lets you create your own reimbursement form in a simple drag and drop interface using extensive styling options. After creating a reimbursement form, you can easily add it to any page or post of your site using a simple ARForms shortcode.