
Simple Steps to Connect Authorize.Net to WordPress Forms
Today, with the emerging trends of purchasing things online, there is a high demand for selling the products or services.
Now, if you are using the WordPress platform for your online business, then you might be thinking of WooCommerce integration for selling your products, right!
But, what if you are out there to sell your services to some limited range of products through your WordPress website?
In such a scenario, selling such products and services through your online WordPress website through another great method of creating an online order or payment WordPress form can prove to be a more reliable option to secure payment in a hassle-free manner!
Hence, creating WordPress forms with the payment gateway is a great way to get paid directly from your customers and clients.
So, if you are looking to create a payment WordPress form with the use of the payment WordPress form create and build a stunning WordPress form of your desire, then you should better keep your eye on some of the ultimate WordPress form builder plugins that has all the advanced features along with the ability to create and build the payment form for WordPress.
However, on the other hand, you will require an ultimate WordPress form builder plugin that lets you integrate with the most popular payment gateways that can let you accept payments from your WordPress form.
Let’s first understand the reasons behind using WordPress Online payment form for your business!
Why Use WordPress Online Payment forms to sell Products / Services?
First off, payment forms are the easiest way to sell your services or products online!
The WordPress online payment forms take into consideration these following important things:
Back and forth, when it comes to accepting online payments through your WordPress forms, you got to use a WordPress form builder plugin.
Having said that, there are WordPress form builder plugins that not just allow you to seamlessly integrate with the most renowned payment gateways in simple and easy ways!
But, our takes are on ARForms WordPress form builder plugin, which is an ultimate WordPress form builder plugin that offers you seamless integration of various popular payment gateways like Authorize.Net, PayPal, PayPal Pro, Stripe, and more to your WordPress forms.
So, today, here in this article, we are going to show you the easy integration of Authorize.Net payment gateway for your WordPress form using ARForms WordPress form builder plugin.
So, without any time delay, let’s jump into it!
Creating a WordPress Form with Authorize.Net option in ARForms WordPress form builder plugin
Creating a New WordPress Payment Form
Initially, if you want to add a new WordPress payment form on any of your WordPress website pages, then firstly, you have to download and install the ARForms WordPress form builder plugin. You can easily find that from the Installation, Activation, and update steps of ARForms WordPress form builder plugin.
As soon as you are done with the ARForms WordPress form builder plugin installation steps, then you need to start up with creating a WordPress payment form of your choice from scratch.
For that, you need to navigate to the Add New form tab that can be found under ARForms > Add New Form easily from your WordPress admin panel.
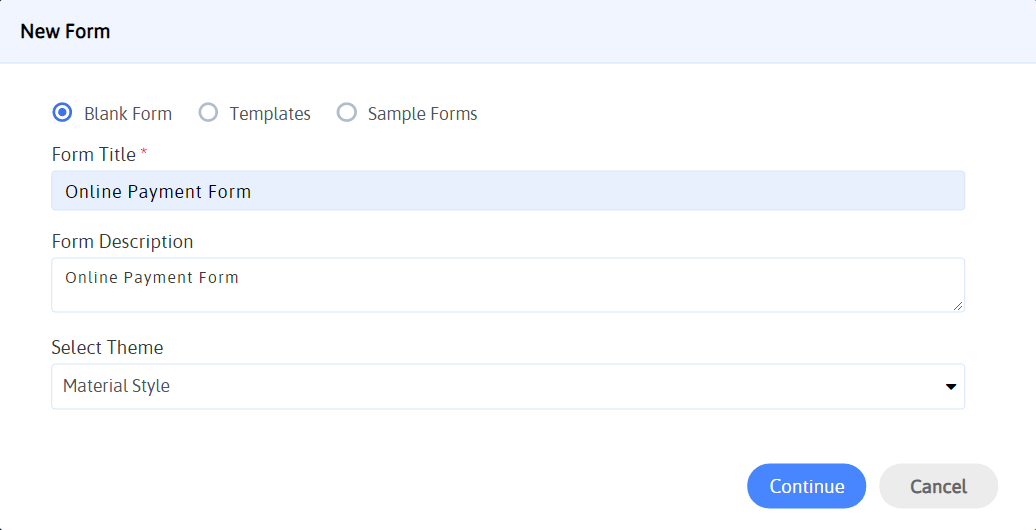
Just when you click on the Add New Form in ARForms WordPress form builder plugin, the next thing you will require to do is to select the Blank Form radio button option from the new screen you see.
This option will ultimately allow you to create and build your kind of WordPress payment form from scratch itself!

Step 1: Creating the required form fields in ARForms WordPress form builder plugin
To name some important form fields that you must add to your WordPress online payment form includes asking the personal info of the customer like:
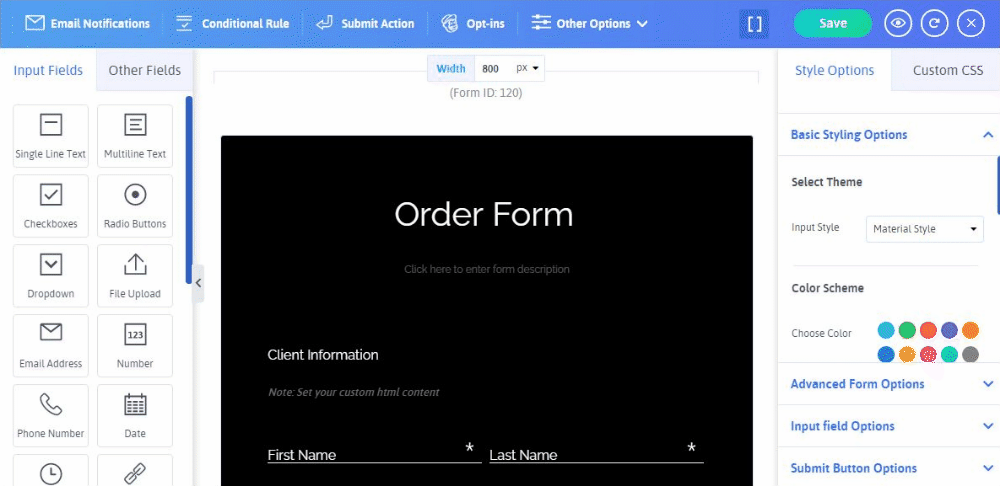
Let’s have a look at the image that shows the WordPress form fields for a payment form for WordPress:
Apart from that, even you can add the product fields to display with the items that your customers can purchase.

For setting up that, you will require to use the color variants of your different products, with different color variants, and with the option of total quality (Number of pieces) your customers want to purchase through your online order WordPress form. Once you have completed adding the form fields and other options in your WordPress payment form, then finally, you need to make sure about the payment method configuration.
For that, Let’s move on to an Order form that you can select from the pre-defined sample forms in ARForms WordPress form builder plugin!
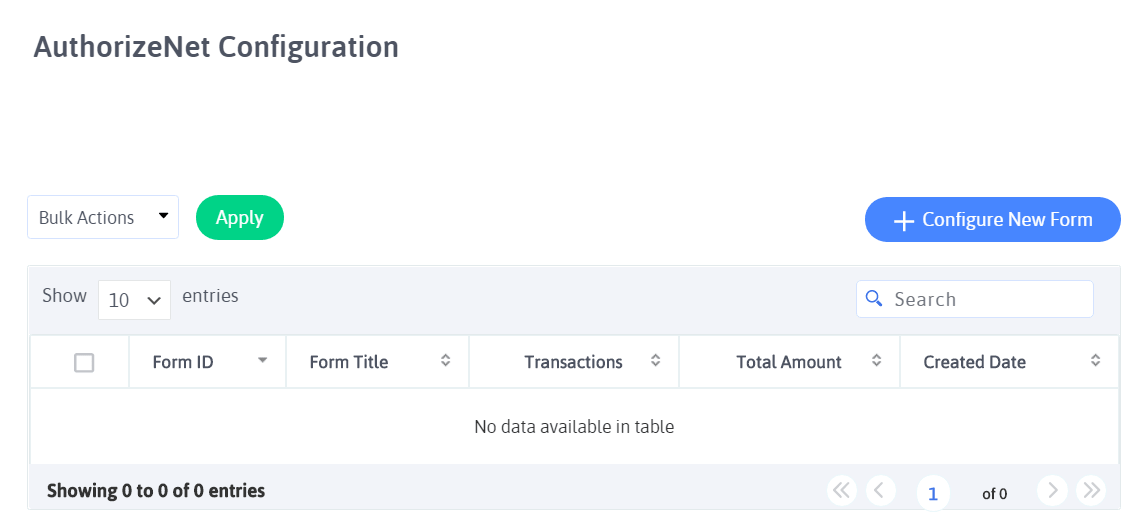
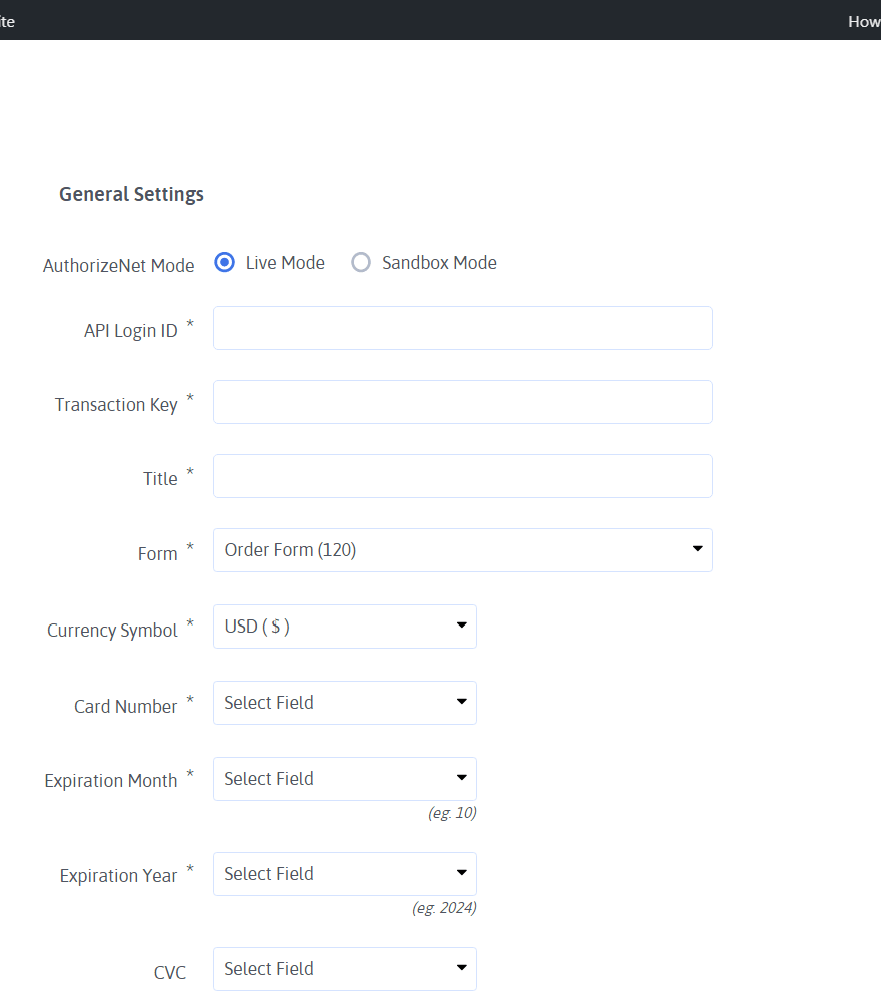
Check the below image for the Authorize.Net Configuration screen you will see when you select the above option!

Further, you will require to click on the Configure New Form blue colored button that will take you to the Authorize.Net Configuration screen. Now, this is the screen where you can easily configure your saved Order form with Authorize.Net with various settings of your choice!

Further, we will discuss more on the different types of settings and payment type options that you can set for your WordPress order form from the Authorize.Net configuration in ARForms WordPress form builder plugin.
Step 2: Setting up and Configuring the Authorize.Net Settings
To say it to the best, ARForms WordPress form builder plugin offers multiple payment gateway integrations. But, here, we are going to cover up the WordPress payment form configuration for the payment gateways like Authorize.Net with the various types of settings and payment type.
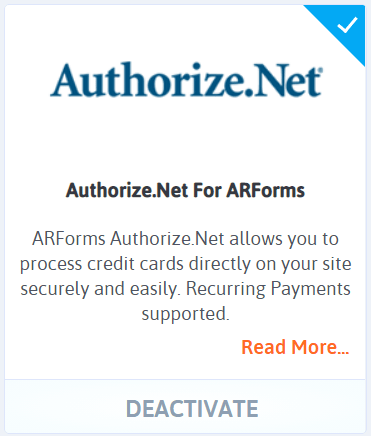
The Authorize.Net in ARForms WordPress form builder plugin comes as an Add-on that you can install and activate easily.
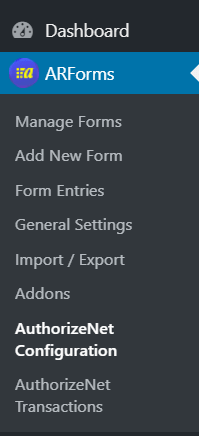
So firstly, you need to ensure that the Authorize.Net Add-on has been activated, you can easily do that by navigating to the ARForms> Addons, and then you will find the Authorize.Net Addon option.

Further, the Authorize.Net payment gateway will help you with the options to seamlessly integrate your created WordPress payment form entries and other fields to work great while your customers are opting for the items they want to buy through your online payment form and securely pay for it.
We will show you exactly how the Authorize.Net configuration and other settings work in ARForms WordPress form builder plugin!
This Authorize.Net Configuration gives you the various General Settings options like entering your API Login ID, Transaction Key, and title. Then, there is an option to select your saved order form that you want to integrate with Authorize.Net. Also, you can select the currency symbol, card number, expiration month, expiration year, and CVC to map it to your saved Order Form.

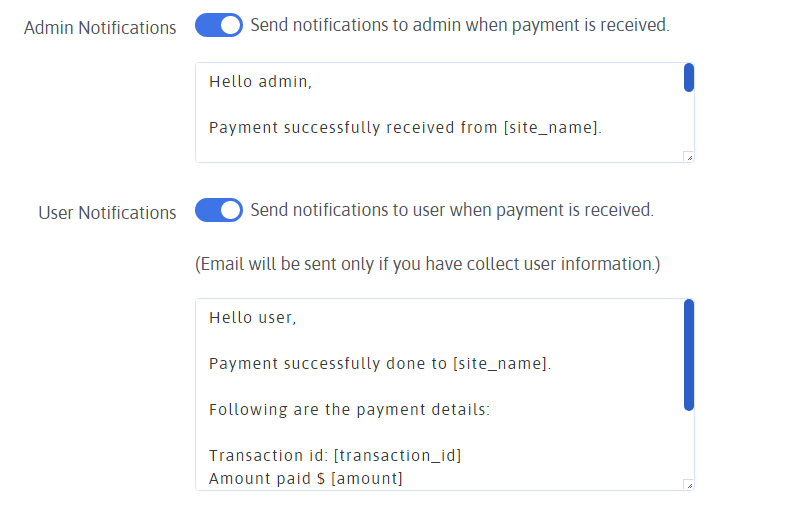
Plus, there is a toggle option to send a notification to the admins and users when payment is received!
Have a look at the image given below:

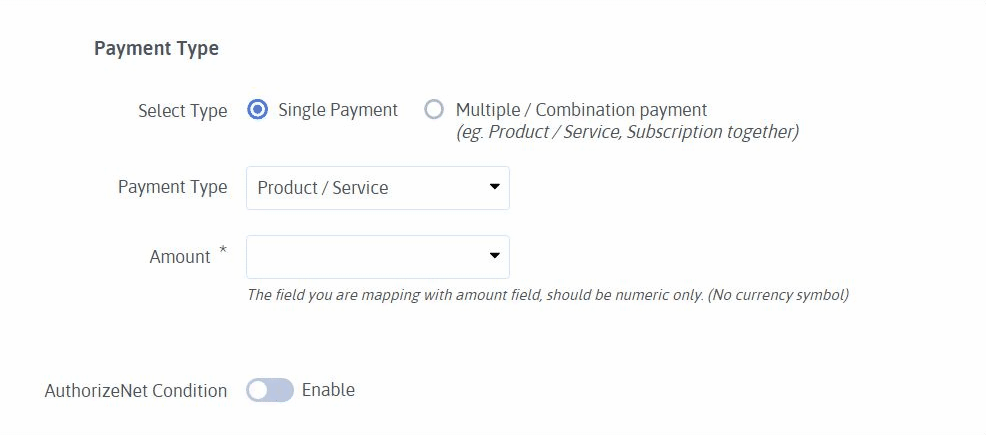
Interestingly, with ARForms Authorize.Net integration, you get this amazing payment type option that lets you accept payments in these two ways:

For more details of how the payment type in ARForms Authorize.Net works, you can check the ARForms Authorize.Net documentation
Step 3: Checking the Authorize.Net configured forms transactions
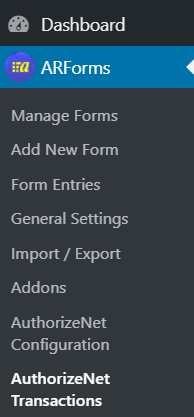
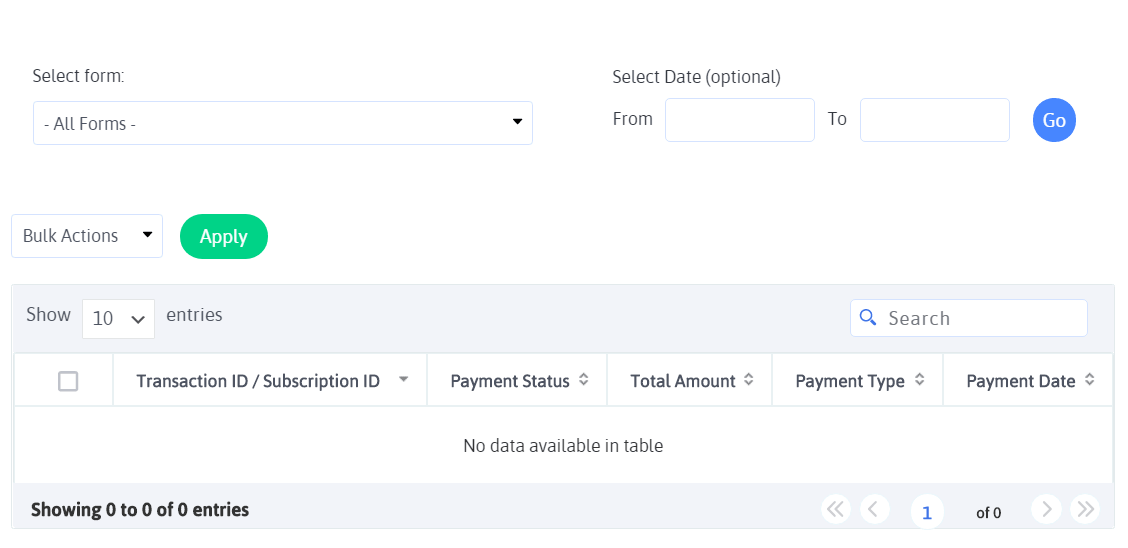
At last, if you want to see the transactions that have been occurred for your Order Form in ARForms WordPress form builder plugin, then you can simply go to ARForms> Authorize.Net Transactions.

This is how the Authorize.Net Transactions screen appears where you can select your created order or payment form and see its transactions details like Transaction ID, Payment Status, Total Amount, Payment Type, and Payment date.

Final Wrapping
That’s it for this article! After going through all the above-mentioned steps, you can easily configure the Authorize.Net in ARForms WordPress form builder plugin and get more conversions for your created WordPress order or payment forms.
If this article has helped you out for what you have been looking for, then do share on your social media channels!
Now, if you are using the WordPress platform for your online business, then you might be thinking of WooCommerce integration for selling your products, right!
But, what if you are out there to sell your services to some limited range of products through your WordPress website?
In such a scenario, selling such products and services through your online WordPress website through another great method of creating an online order or payment WordPress form can prove to be a more reliable option to secure payment in a hassle-free manner!
Hence, creating WordPress forms with the payment gateway is a great way to get paid directly from your customers and clients.
So, if you are looking to create a payment WordPress form with the use of the payment WordPress form create and build a stunning WordPress form of your desire, then you should better keep your eye on some of the ultimate WordPress form builder plugins that has all the advanced features along with the ability to create and build the payment form for WordPress.
However, on the other hand, you will require an ultimate WordPress form builder plugin that lets you integrate with the most popular payment gateways that can let you accept payments from your WordPress form.
Let’s first understand the reasons behind using WordPress Online payment form for your business!
Why Use WordPress Online Payment forms to sell Products / Services?
First off, payment forms are the easiest way to sell your services or products online!
The WordPress online payment forms take into consideration these following important things:
- It tends to collect the necessary information about the customers and their purchase.
- Ability to accept the payments from the customers in a highly secured way!
- A WordPress payment form can work great when you have multiple options for a variety of products/services with multiple payment selections such as the subscription option as well as to select the product/services at the same time.
- With the numerous customization options, such WordPress forms can accept recurring payments and subscriptions from the customers.
Back and forth, when it comes to accepting online payments through your WordPress forms, you got to use a WordPress form builder plugin.
Having said that, there are WordPress form builder plugins that not just allow you to seamlessly integrate with the most renowned payment gateways in simple and easy ways!
But, our takes are on ARForms WordPress form builder plugin, which is an ultimate WordPress form builder plugin that offers you seamless integration of various popular payment gateways like Authorize.Net, PayPal, PayPal Pro, Stripe, and more to your WordPress forms.
So, today, here in this article, we are going to show you the easy integration of Authorize.Net payment gateway for your WordPress form using ARForms WordPress form builder plugin.
So, without any time delay, let’s jump into it!
Creating a WordPress Form with Authorize.Net option in ARForms WordPress form builder plugin
Creating a New WordPress Payment Form
Initially, if you want to add a new WordPress payment form on any of your WordPress website pages, then firstly, you have to download and install the ARForms WordPress form builder plugin. You can easily find that from the Installation, Activation, and update steps of ARForms WordPress form builder plugin.
As soon as you are done with the ARForms WordPress form builder plugin installation steps, then you need to start up with creating a WordPress payment form of your choice from scratch.
For that, you need to navigate to the Add New form tab that can be found under ARForms > Add New Form easily from your WordPress admin panel.
Just when you click on the Add New Form in ARForms WordPress form builder plugin, the next thing you will require to do is to select the Blank Form radio button option from the new screen you see.
This option will ultimately allow you to create and build your kind of WordPress payment form from scratch itself!
Step 1: Creating the required form fields in ARForms WordPress form builder plugin
To name some important form fields that you must add to your WordPress online payment form includes asking the personal info of the customer like:
- First Name
- Last Name
- Email Address
- Phone Number
- Shipping Address
Let’s have a look at the image that shows the WordPress form fields for a payment form for WordPress:
Apart from that, even you can add the product fields to display with the items that your customers can purchase.
For setting up that, you will require to use the color variants of your different products, with different color variants, and with the option of total quality (Number of pieces) your customers want to purchase through your online order WordPress form. Once you have completed adding the form fields and other options in your WordPress payment form, then finally, you need to make sure about the payment method configuration.
For that, Let’s move on to an Order form that you can select from the pre-defined sample forms in ARForms WordPress form builder plugin!
- First, you will need to select the pre-built sample form from the ARForms WordPress form builder plugin. You can easily select it from ARForms> Add New Form> Sample Forms.
- You will be able to find the kind of payment form or order form that suits you best with the customizations thereby.
- After you select the order form, thereafter when you finished with customizing your order form, you will need to save that form by clicking the save button.
- Once you are done with that, finally, you can now navigate to the ARForms> Authorize.Net Configuration option.
Check the below image for the Authorize.Net Configuration screen you will see when you select the above option!
Further, you will require to click on the Configure New Form blue colored button that will take you to the Authorize.Net Configuration screen. Now, this is the screen where you can easily configure your saved Order form with Authorize.Net with various settings of your choice!
Further, we will discuss more on the different types of settings and payment type options that you can set for your WordPress order form from the Authorize.Net configuration in ARForms WordPress form builder plugin.
Step 2: Setting up and Configuring the Authorize.Net Settings
To say it to the best, ARForms WordPress form builder plugin offers multiple payment gateway integrations. But, here, we are going to cover up the WordPress payment form configuration for the payment gateways like Authorize.Net with the various types of settings and payment type.
The Authorize.Net in ARForms WordPress form builder plugin comes as an Add-on that you can install and activate easily.
So firstly, you need to ensure that the Authorize.Net Add-on has been activated, you can easily do that by navigating to the ARForms> Addons, and then you will find the Authorize.Net Addon option.
Further, the Authorize.Net payment gateway will help you with the options to seamlessly integrate your created WordPress payment form entries and other fields to work great while your customers are opting for the items they want to buy through your online payment form and securely pay for it.
We will show you exactly how the Authorize.Net configuration and other settings work in ARForms WordPress form builder plugin!
This Authorize.Net Configuration gives you the various General Settings options like entering your API Login ID, Transaction Key, and title. Then, there is an option to select your saved order form that you want to integrate with Authorize.Net. Also, you can select the currency symbol, card number, expiration month, expiration year, and CVC to map it to your saved Order Form.
Plus, there is a toggle option to send a notification to the admins and users when payment is received!
Have a look at the image given below:
Interestingly, with ARForms Authorize.Net integration, you get this amazing payment type option that lets you accept payments in these two ways:
- Single Payment for Product / Services Or Subscription payment type
- Multiple payments where you can use both Product / Services and Subscription payment type both by setting conditions of your choice.
For more details of how the payment type in ARForms Authorize.Net works, you can check the ARForms Authorize.Net documentation
Step 3: Checking the Authorize.Net configured forms transactions
At last, if you want to see the transactions that have been occurred for your Order Form in ARForms WordPress form builder plugin, then you can simply go to ARForms> Authorize.Net Transactions.
This is how the Authorize.Net Transactions screen appears where you can select your created order or payment form and see its transactions details like Transaction ID, Payment Status, Total Amount, Payment Type, and Payment date.
Final Wrapping
That’s it for this article! After going through all the above-mentioned steps, you can easily configure the Authorize.Net in ARForms WordPress form builder plugin and get more conversions for your created WordPress order or payment forms.
If this article has helped you out for what you have been looking for, then do share on your social media channels!