Home > Authorize.net
Authorize.net
ARForms has a new extension that accepts payment via Authorize.Net Payment Gateway. ARForms Authorize.Net is just another WordPress plugin that you can install and manage just like other WordPress plugins.
ARForms Authorize.Net plugin integrates your form entries and payment in a single process. You can charge customers with Dynamic amount directly after form submission from ARForms.
Note: Please meet the minimum requirement of PHP version 5.6 and WordPress version 4.5
ARForms – Authorize.Net Addon Key Features
- Configuration for Authorize.Net page
- Easy installation
- Dynamic Pricing
- Product / Service and Subscription Payment Methods
- Multiple Payment Method Selection ( Product/Service and Subscription together )
- Conditional Payment – Accept payment only after defined condition becomes true
- Sandbox Facility
- Facility for displaying actual payment gateway error
- Transaction Notifications
- View and Search Transactions
- Export Transactions Facility
- Multilingual
Steps For Installation And Activation
You can install plugin either of these two methods.
- New install via FTP
- New install via the WordPress Uploader
a. Download the plugin from CodeCanyon, and extract it. You should find a directory arformsauthorizenet.
b. In your WordPress installation, upload arformsauthorizenet to wp-content/plugins/
c. Activate the "AuthorizeNet For ARForms" plugin through the Plugins menu from WordPress admin panel.
a. Download the plugin from CodeCanyon
b. Log in to your WordPress admin panel
c. go to Plugins -> Add New -> Upload
d. Click on choose file and browse the download package from CodeCanyon. When the plugin uploads successfully, click on Activate Plugin link.
After activating the plugin, you will be able to see “AuthorizeNet Configuration “ & “AuthorizeNet Transactions” links under “ARForms” menu in admin menu list.
Authorize.Net Configuration
You can configure existing forms with Authorize.Net from this page. You can get a list of all forms which are already configured with Authorize.Net from this page.
You can get form list along with Total transactions from this form, Total Amount of all successful transactions, etc.
You can edit the existing form’s Authorize.Net configuration option by clicking on the “Edit Configuration” icon. You can view all transactions of any specific form by clicking on the “Transaction” icon from the list, and if you want to delete the configuration for any form, just click on “Delete” icon.
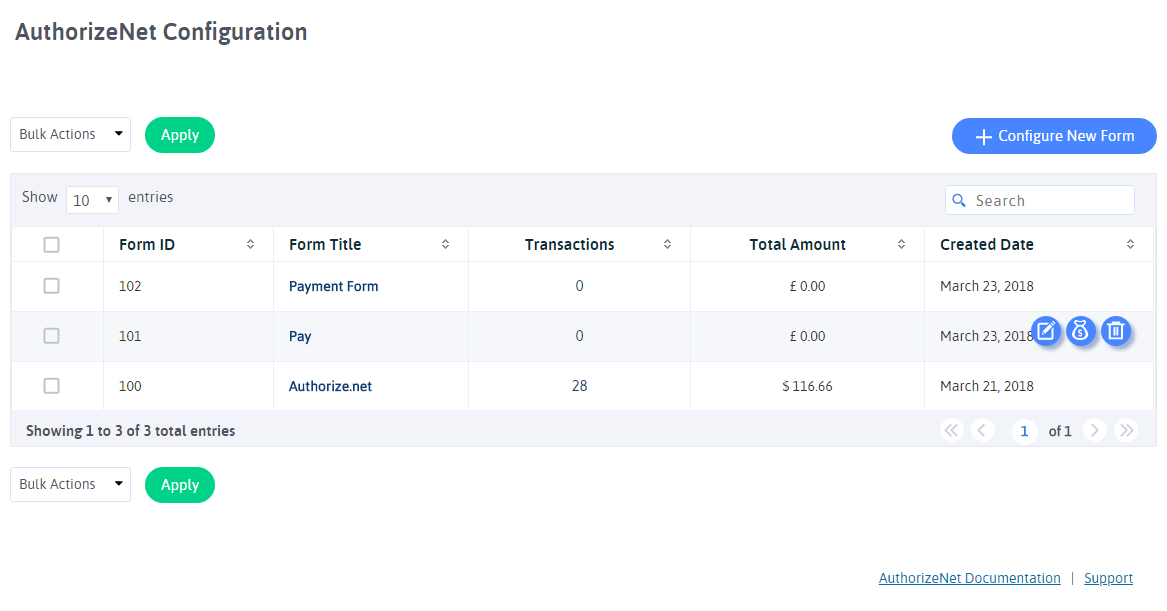
You can configure a new form by clicking on the “Configure New Form” button from the top right corner.
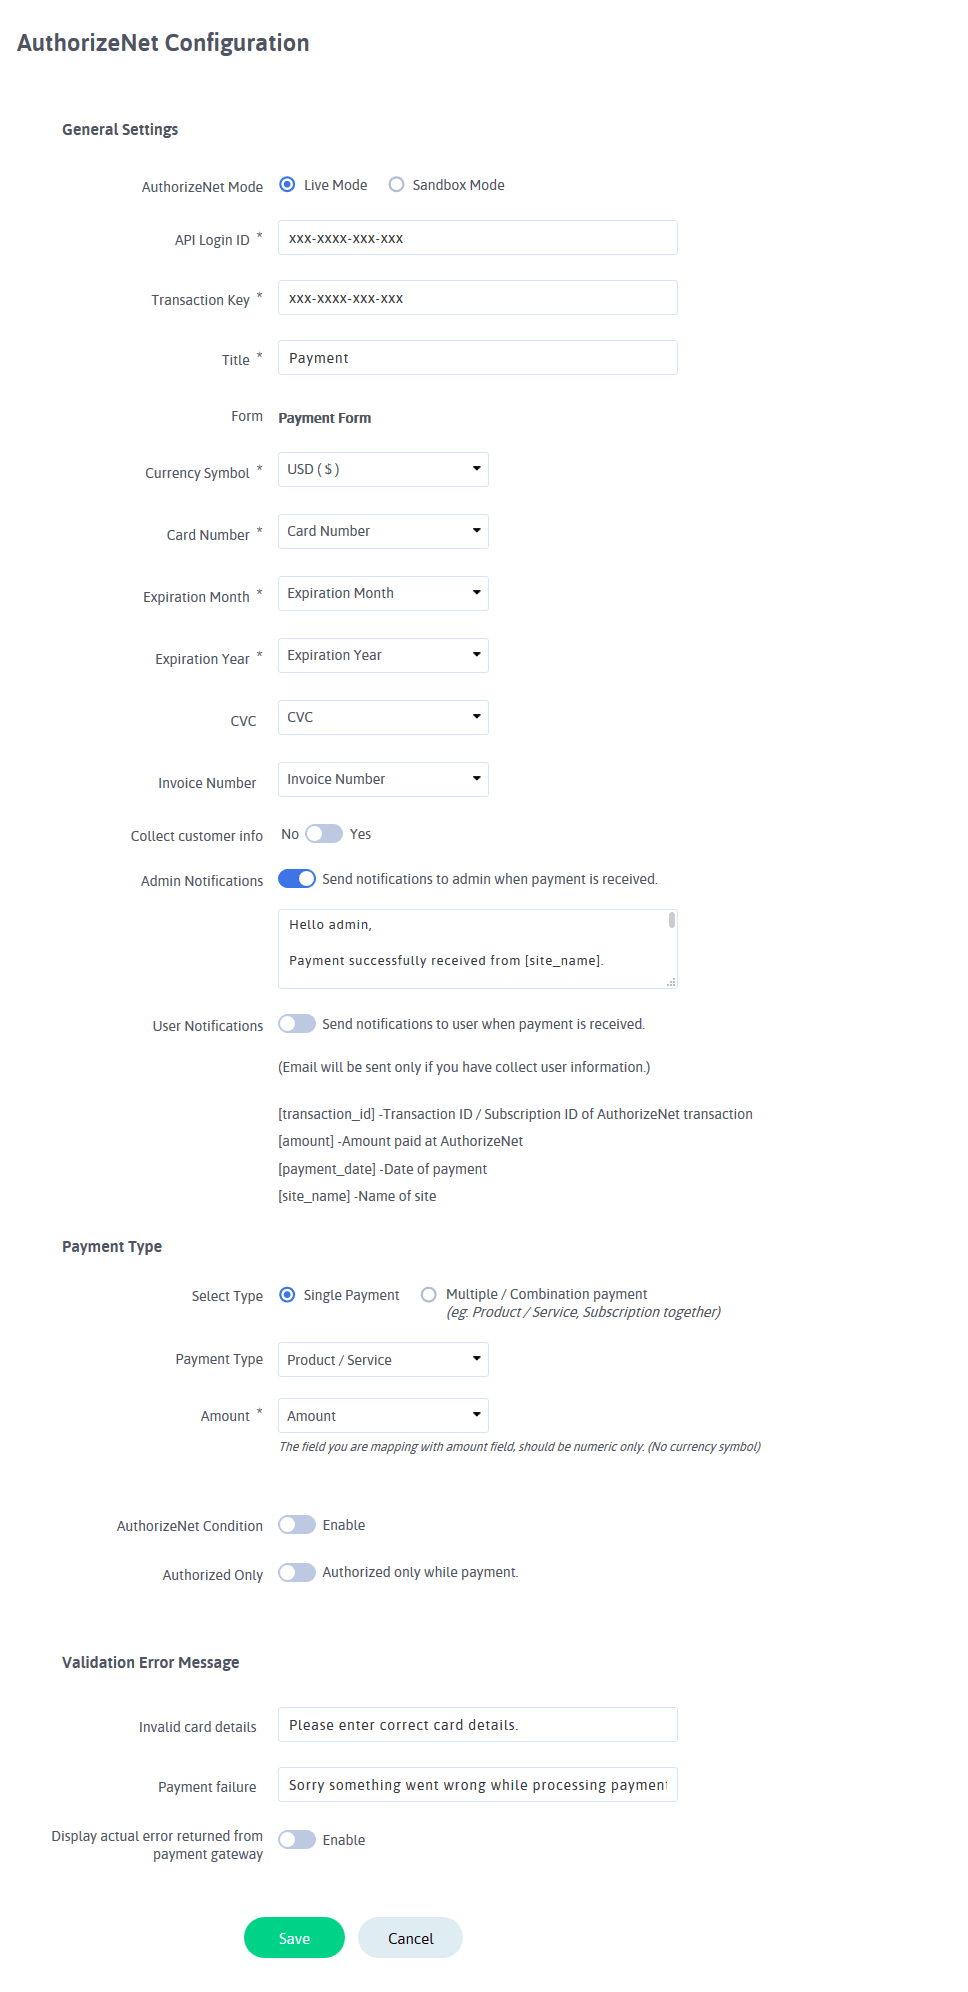
You can configure your existing form with Authorize.Net from this page. You can select a form from the dropdown with the form list. You need to provide API Login ID and Transaction Key and select Payment mode from this page. Select “Test” to check transactions with sandbox mode.
ARForms Authorize.Net plugin supports multiple currencies. You can get all transactions in your native currency. If you want to collect shipping information from the customer while payment, check “Collect Customer info” option.
- Payment Type
- Payment Notification
You can set multiple payment methods together conditionally. That means, If you want to accept payment through Product/Service as well as Subscription, you can set a condition for that and based on user selection, You can accept payment.
If you want to accept payment without any condition, Select the “Single Payment” option and configure the “Product / Service” Or “Subscription” Payment method.
If you want to accept payment conditionally for “Product/Service” and “Subscription”, Select “Multiple / Combination payment” and then set conditions for “Product/Service” and “Subscription”.
For example, If the user will select One Time Payment from the form, than accept payment through “Product/Service” and set Amount field there, And if user will select Recurring Payment then accept payment through “Subscription”.
You can set multiple conditions for the subscription payment method.
If you have multiple Billing Cycle for subscription and you want to accept payment based on user selected plan, you can set conditions there.
For example, If the user will select a Monthly plan, Than set condition according to that. Accept payment through Plan “XXX” if field “XXX” has Value “XXX” and likewise.
You can get more ideas regarding multiple Payment Method conditions from the above image.
You can also send a notification to the site administrator after a successful transaction.
Authorize.Net Transactions
You will see all Authorize.Net transactions from this page. You can view all transactions from all forms or you can select already configured form from the dropdown of form list.
You can see Transaction ID, Payment Status, Payment Type, Total Amount of transaction, Transaction Date for all transactions.
You can filter transactions by selecting a date range. That means you can filter transactions base on the selected time period. The default will show all transactions within the system.
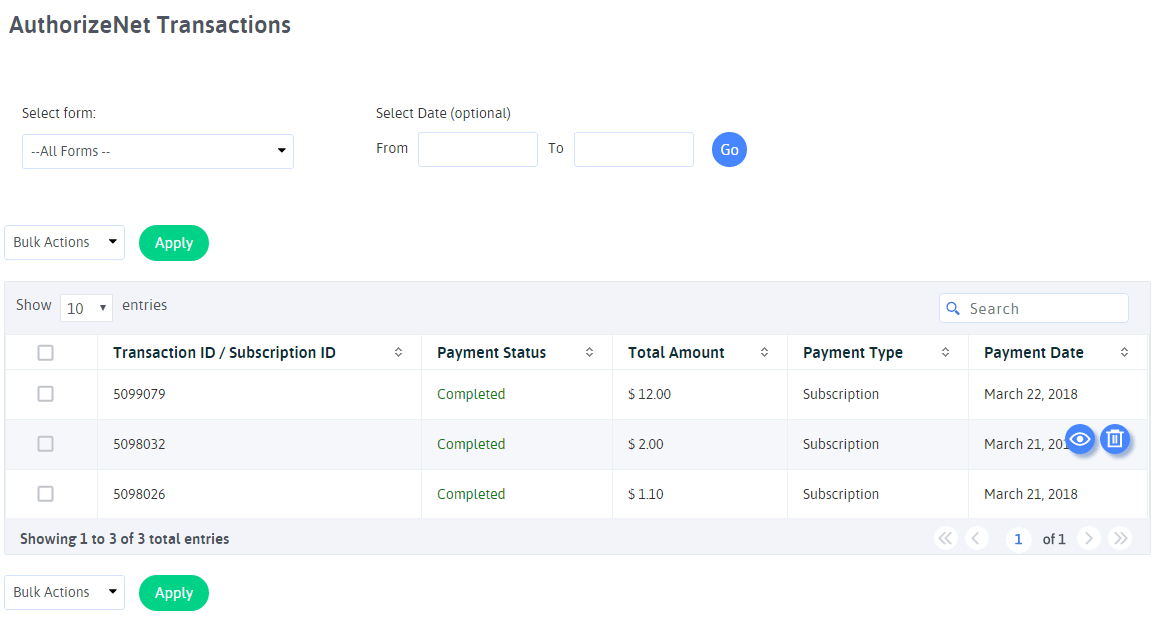
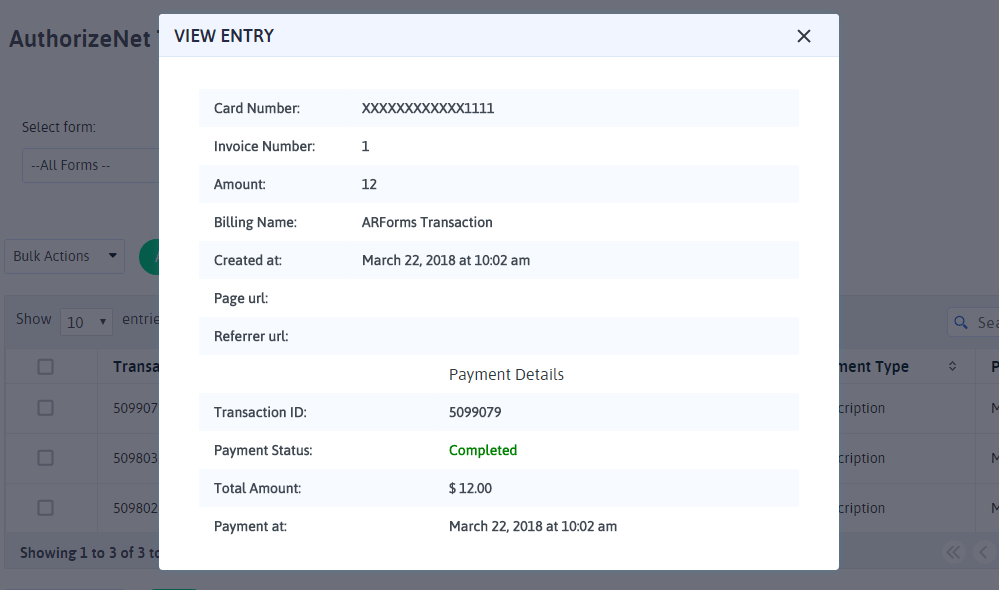
You can view complete transaction detail by clicking on the “View” icon from the list. You will get complete details of form entry data and Authorize.Net transaction detail. You can see at below screenshot.
You can delete the transaction by clicking on the “Delete” icon from the list. Please note that by deleting transactions you will not lose form entry data. You are deleting just Authorize.Net transaction for that form entry from here.
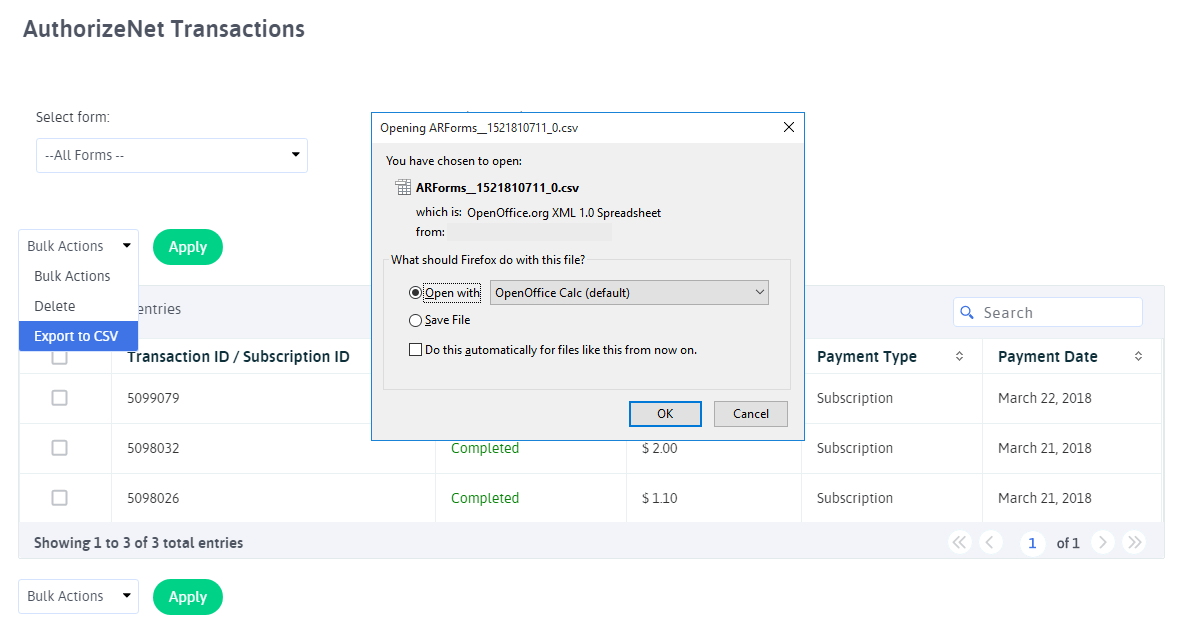
Export Transactions
Now, With ARForms Authorize.Net plugin, you can manage Authorize.Net transactions even better. You can download your Authorize.Net Transactions into CSV format and manage those transactions in your own way.
Changelog
Version 2.3 (16 Dec, 2020)
- Added compatibility for PHP version 8
- Added compatibility for WordPress version 5.6
- Minor bug fixes
Version 2.2 (23 November, 2020)
- Minor bug fixes
Version 2.1 (06 August, 2020)
- Minor bug fixes
Version 2.0 (29 May, 2020)
- Minor bug fixes
Version 1.9 (01 April, 2020)
- Minor bug fixes
Version 1.8 (02 January, 2020)
- Added compatibility to ARForms version 4.0
- Minor bug fixes
Version 1.7 (21 December, 2018)
- Added compatibility to Gutenberg Editor
- Minor bug fixes
Version 1.6 (17 April, 2018
- Compatibility changes with ARForms version 3.3 related to email notifications after payment.
- Displayed whole response in debug mode instead of just error message.
- Minor bug fixes
Version 1.5 (23 March, 2018)
- Fixed bug related to email notification when same form mapped with Authorize.net and PayPal
- Fixed bug related to double transaction for Authorize.net subscription
- Other Minor bug fixes.
Version 1.4 (28 November, 2017)
- Added compatibility to ARForms Version 3.0.
- Other Minor bug fixes.
Version 1.3 (16 November, 2016)
- Added facility to set infinite recurring option for subscription payment.
- Added facility to display actual payment gateway error.
- Other Minor bug fixes.
Version 1.2.2 (28 October, 2016)
- Minor bug fixes.
Version 1.2 (21 March, 2015)
- Added support for select Multiple Payment Methods conditionally ( Product/Service and Subscription together ).
- Other Minor bug fixes.
Version 1.1 (03 November, 2014)
- Added Math Logic Support ( Running Total ).