Home > Cloud Storage
Cloud Storage
Using Cloud Storage With ARForms Add-On, you can upload your files which are uploaded to the file upload controls of your ARForms to different cloud storage platforms after form submission.
You can upload one or more than one file to the cloud storage platforms.
ARForms Cloud Storage Addon provide 4 different cloud storage platforms to upload your files after form submission.
To upload files to cloud storage, Create a form that included the file upload field and enable Configure Cloud Storage option and enable the cloud storage platform and select the folder name from your cloud storage account from Submit Action block of ARForms editor for which you want to integrate with ARForms. Here you have Google Drive, DropBox, One Drive, and Amazon S3 cloud storage platform options. You can also able to upload your files to multiple cloud storage platforms at the same time after form submission.
Note:Please meet minimum requirement of PHP version 5.6, WordPress version 5.0 and ARForms version 5.6
ARForms – Cloud Storage Addon Key Features
- Automatically upload files to cloud storage platform when a form is submitted.
- Upload audio, video, image, text or any other type of media files to cloud storage platforms.
- Upload files with any size to cloud storage platforms.
- 4 different cloud storage platform configuration facility.
- Easy process of file upload to cloud storage platforms.
Steps For Installation And Activation
You can install plugin either of these two methods.
- New install via FTP
- New install via the WordPress Uploader
a. Download the plugin from CodeCanyon, and extract it. You should find a directory arformscloudstorage.
b. In your WordPress installation, upload arformscloudstorage to wp-content/plugins/
c. Activate the "Cloud Storage For ARForms" plugin through the Plugins menu from WordPress admin panel.
a. Download the plugin from CodeCanyon
b. Log in to your WordPress admin panel
c. go to Plugins -> Add New -> Upload
d. Click on choose file and browse the download package from CodeCanyon. When the plugin uploads successfully, click on Activate Plugin.
you will able to see “Cloud Storage Configuration” links under “ARForms” menu in admin menu list.
Cloud Storage Configuration
After activating the plugin, you will be able to see links under “ARForms” → “Cloud Storage Configuration” where you can configure Cloud Storage Platforms as per your requirement.
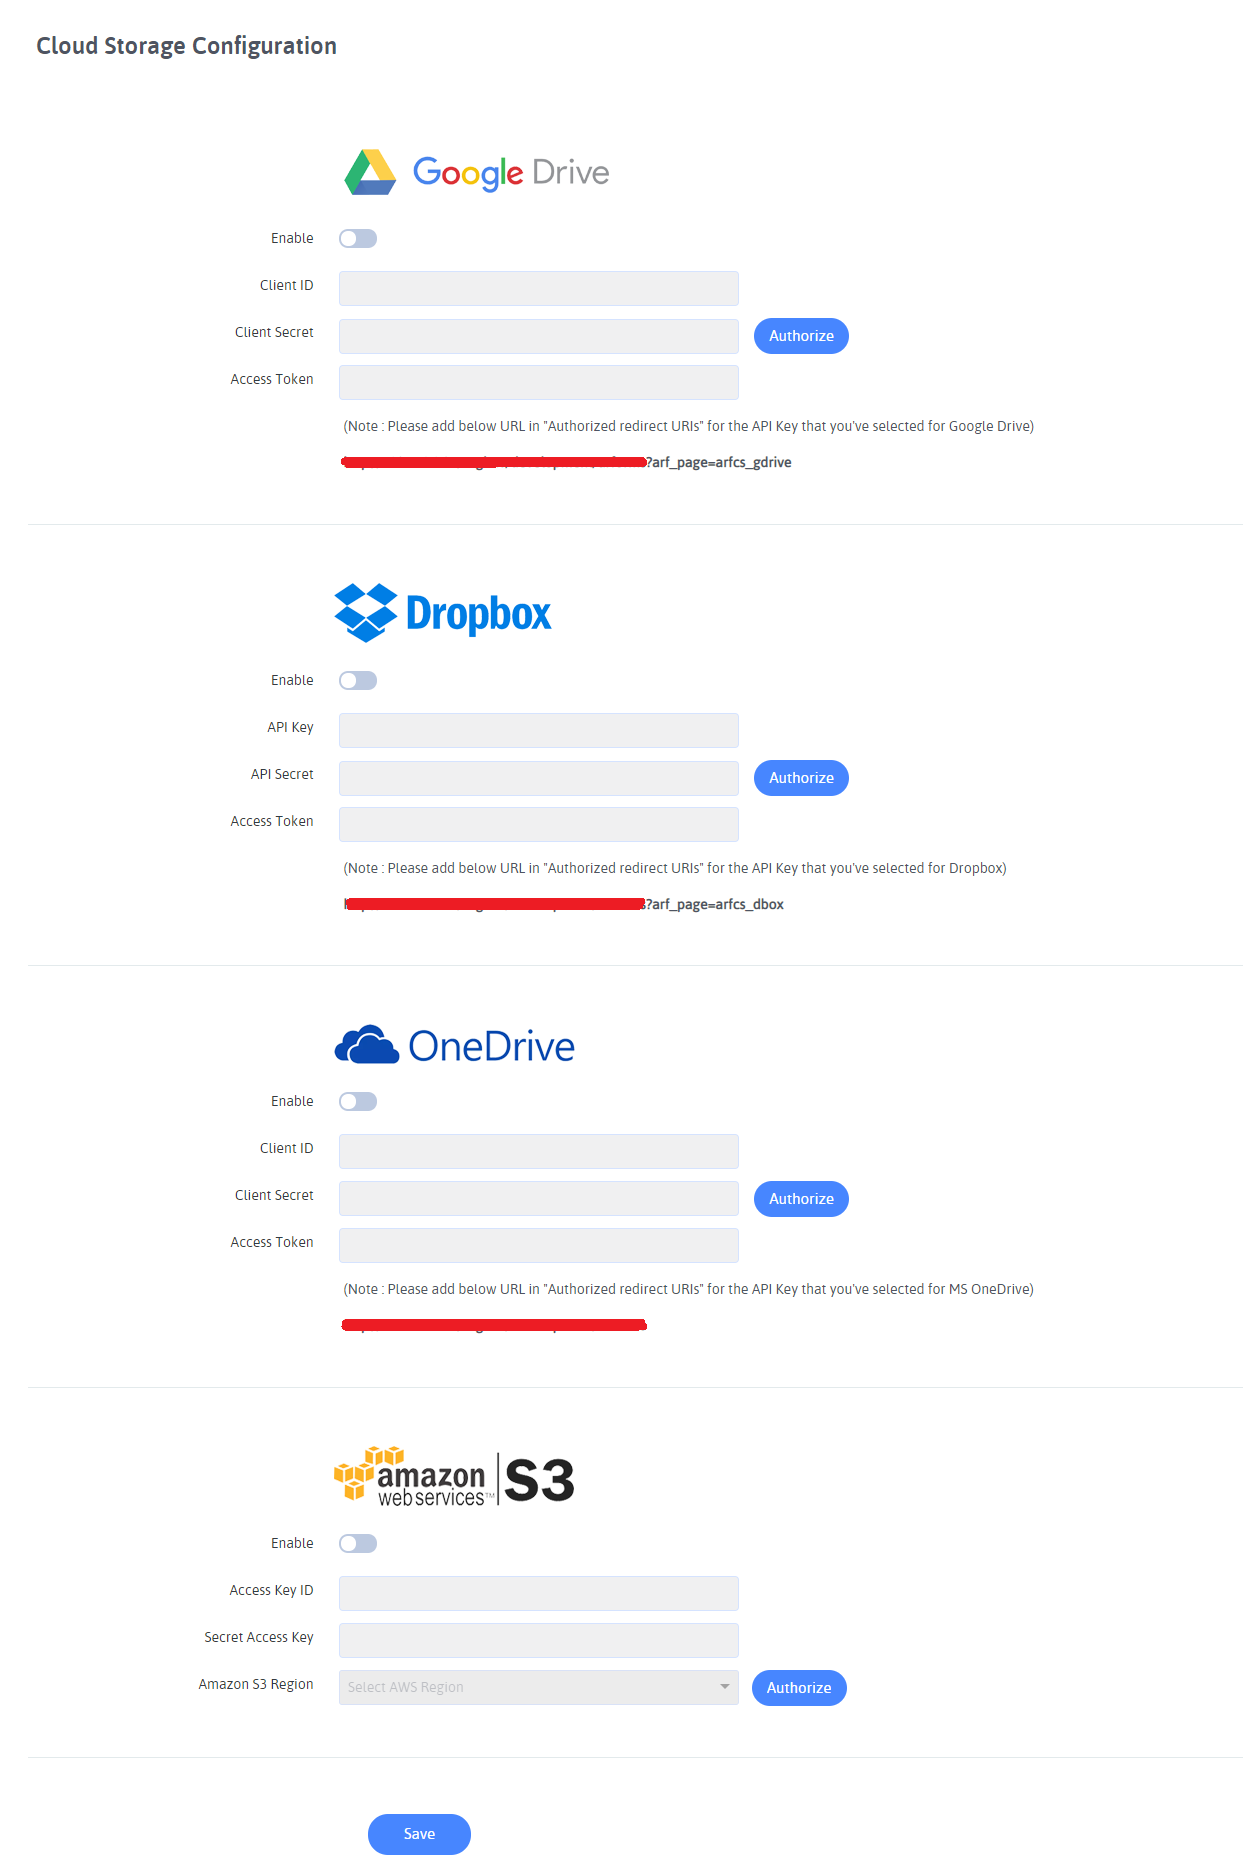
If you want to upload files to any cloud storage platforms, get your required details from your cloud storage platform account and enter require fields like Client ID, Client Secret, Access Token, etc. according to your cloud storage platform in the dropdown or text boxes of the specific cloud storage platform settings.
Below are the Available Cloud Storage Platforms:
- Google Drive
- DropBox
- One Drive
- Amazon S3
Google Drive Configuration
After activating the plugin, you will be able to see Google Drive Configuration from “ARForms” → “Cloud Storage Configuration” .
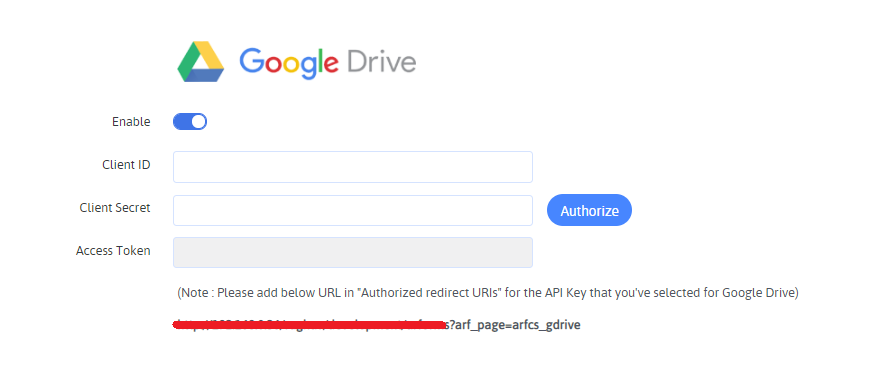
In order to upload files to google drive you have to follow Google API configuration steps.
- Add Client ID.
- Add Client Secret.
- Click Authorize to generate Access Token.
You have to generate Access Token by clicking Authorize link after configuring your Client ID, Client Secret of your required Google Account from this page.
Enable Google Drive API by follow the steps given below
To get the Client ID, Client Secret and Access Token you need a Google Drive Account. If you don’t have a Google Drive Account then you need to create a new Goole Drive Account and create a new app regisration from here
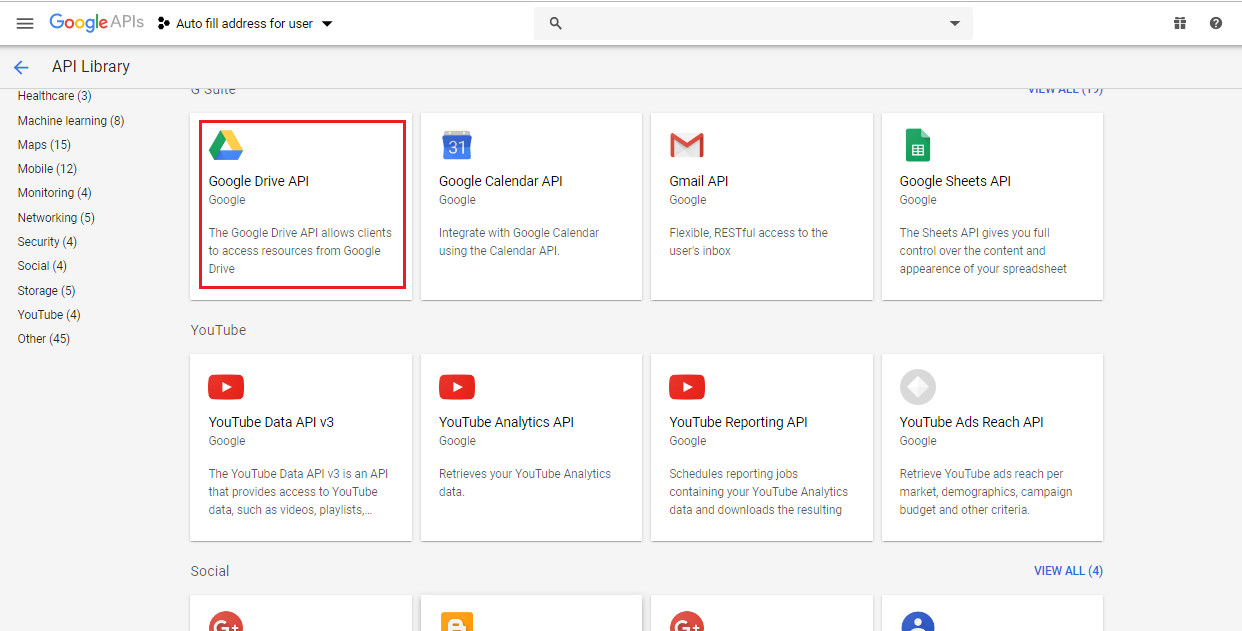
- Go to the and search Google API ConsoleGoogle Drive API from Library option.
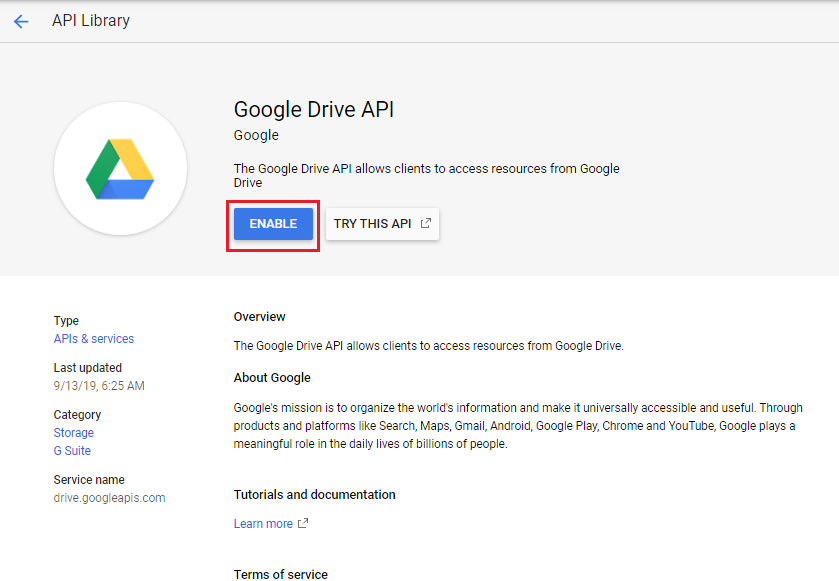
- Enable Google Drive API
To get Client ID, & Client Secret please follow the steps given below.
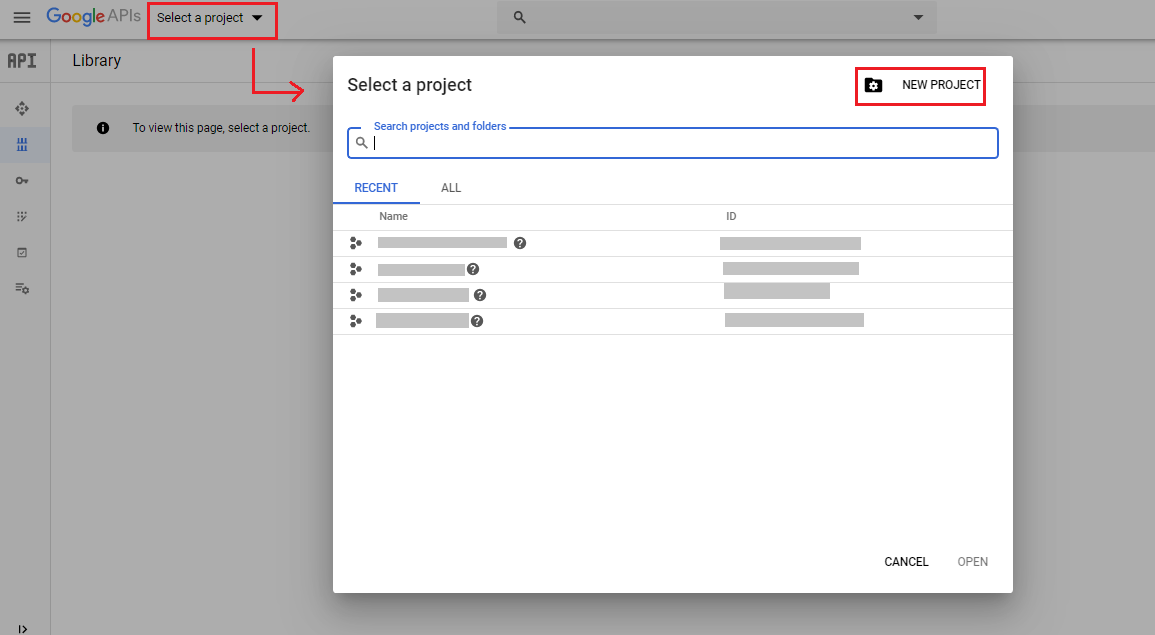
- Go to the Google API Console
- From the project drop-down, select an existing project , or create a new one by selecting Create a new project.
- In the sidebar under “API & Services”, select Credentials, then select the OAuth consent screen tab. Choose an Email Address, specify a Product Name, and press Save.
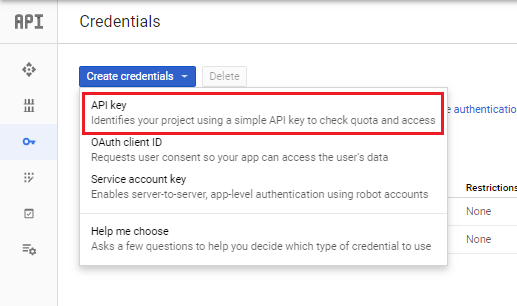
- In the Credentials tab, select the Create credentials drop-down list, and choose API Key to get API Key.
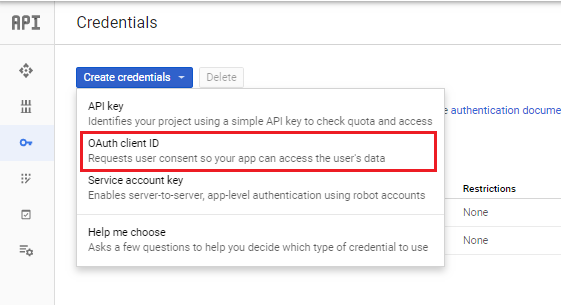
- Then follow the same steps and choose OAuth Client ID.
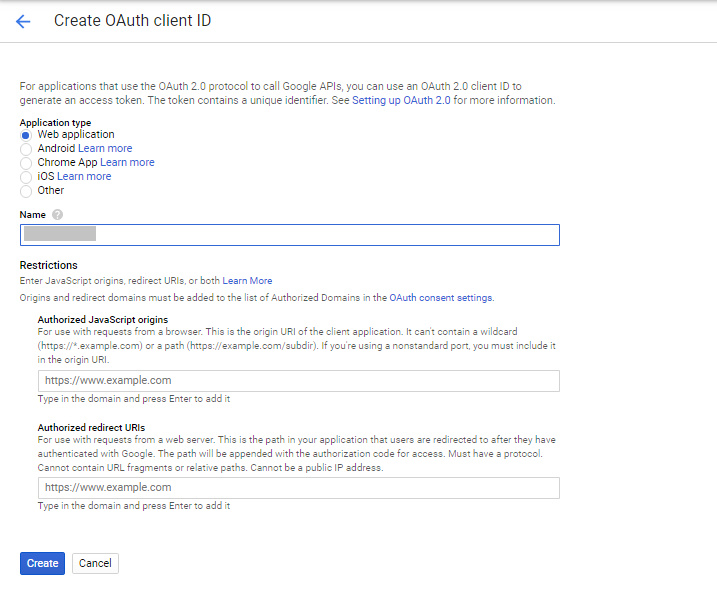
- Under Application type, select Web application.Register the origins from which your app is allowed to access the Google APIs, as follows and set redirect URIs. An origin is a unique combination of protocol, hostname, and port.
- From the resulting OAuth client dialog box, copy the Client ID & Client secret.

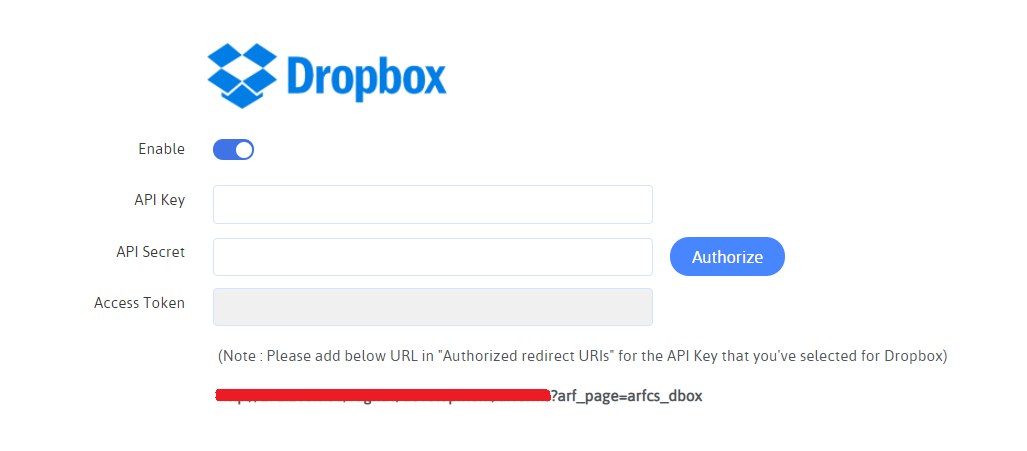
Dropbox Configuration
After activating the plugin, you will be able to see Dropbox Configuration from “ARForms” → “Cloud Storage Configuration” .
After activating the plugin, you will be able to see links under “ARForms” → “Cloud Storage Configuration” where you can configure Cloud Storage Platforms as per your requirement.
Follow these quick steps to get these Dropbox API details.
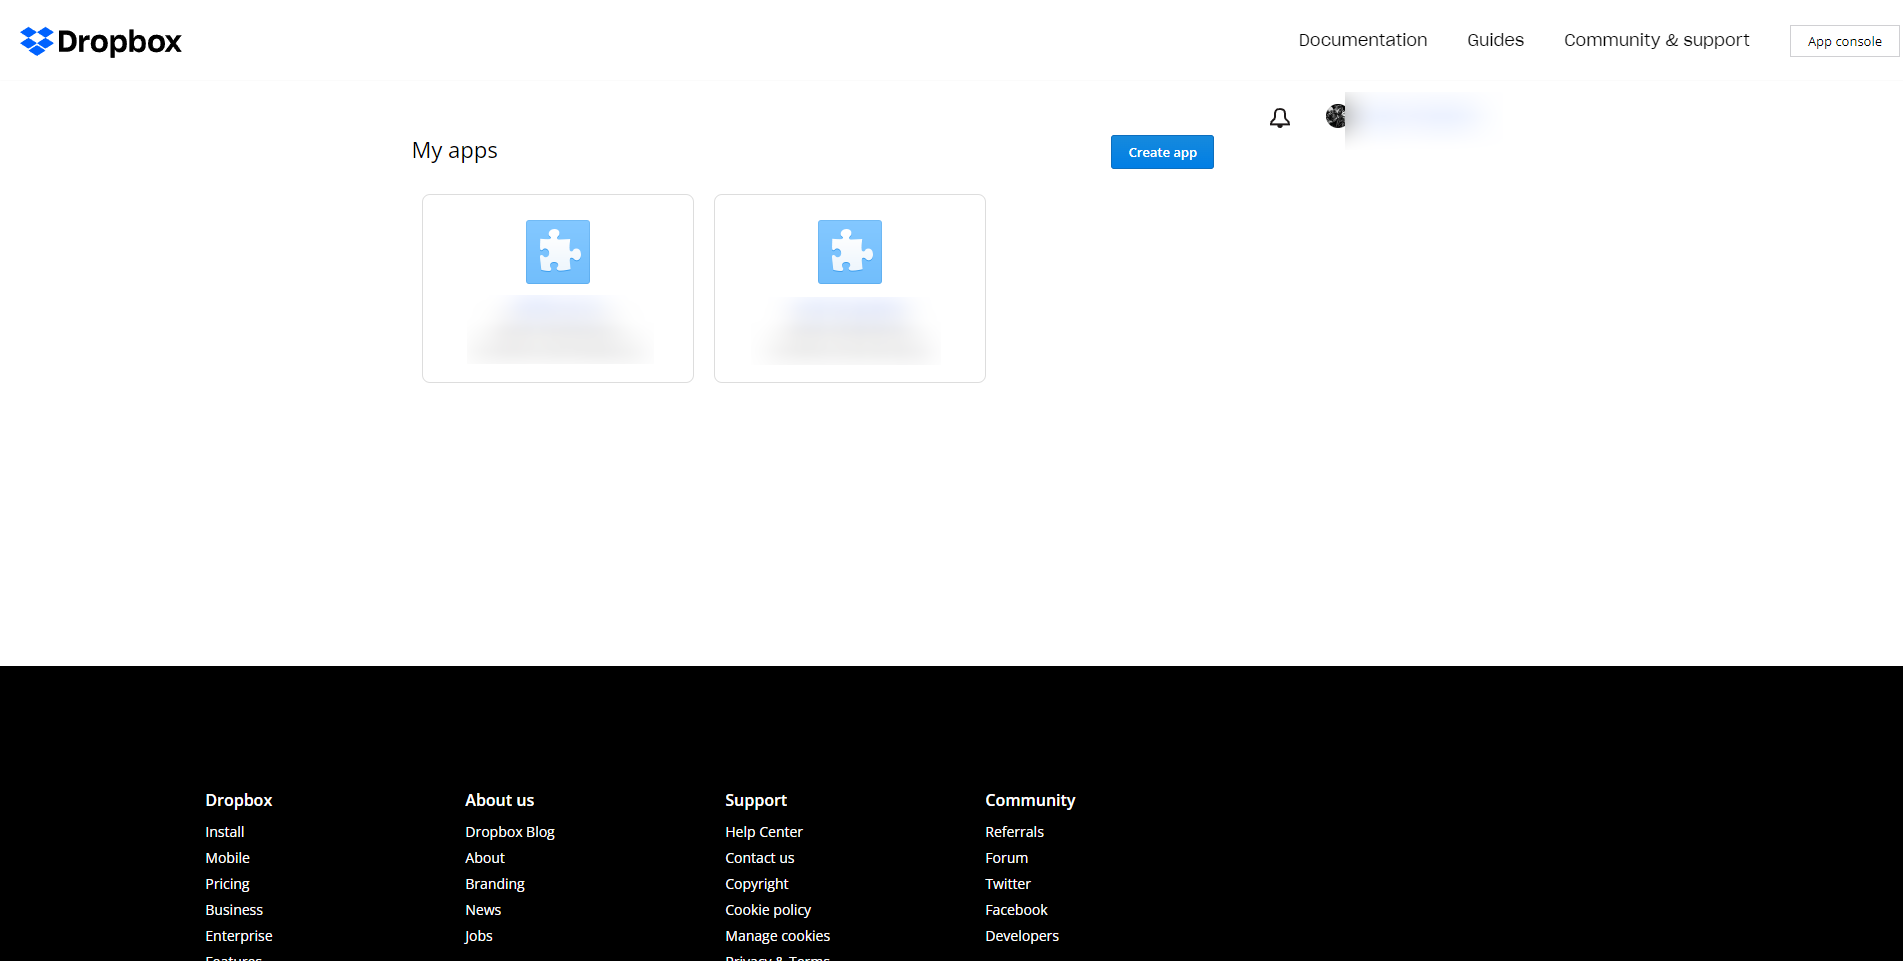
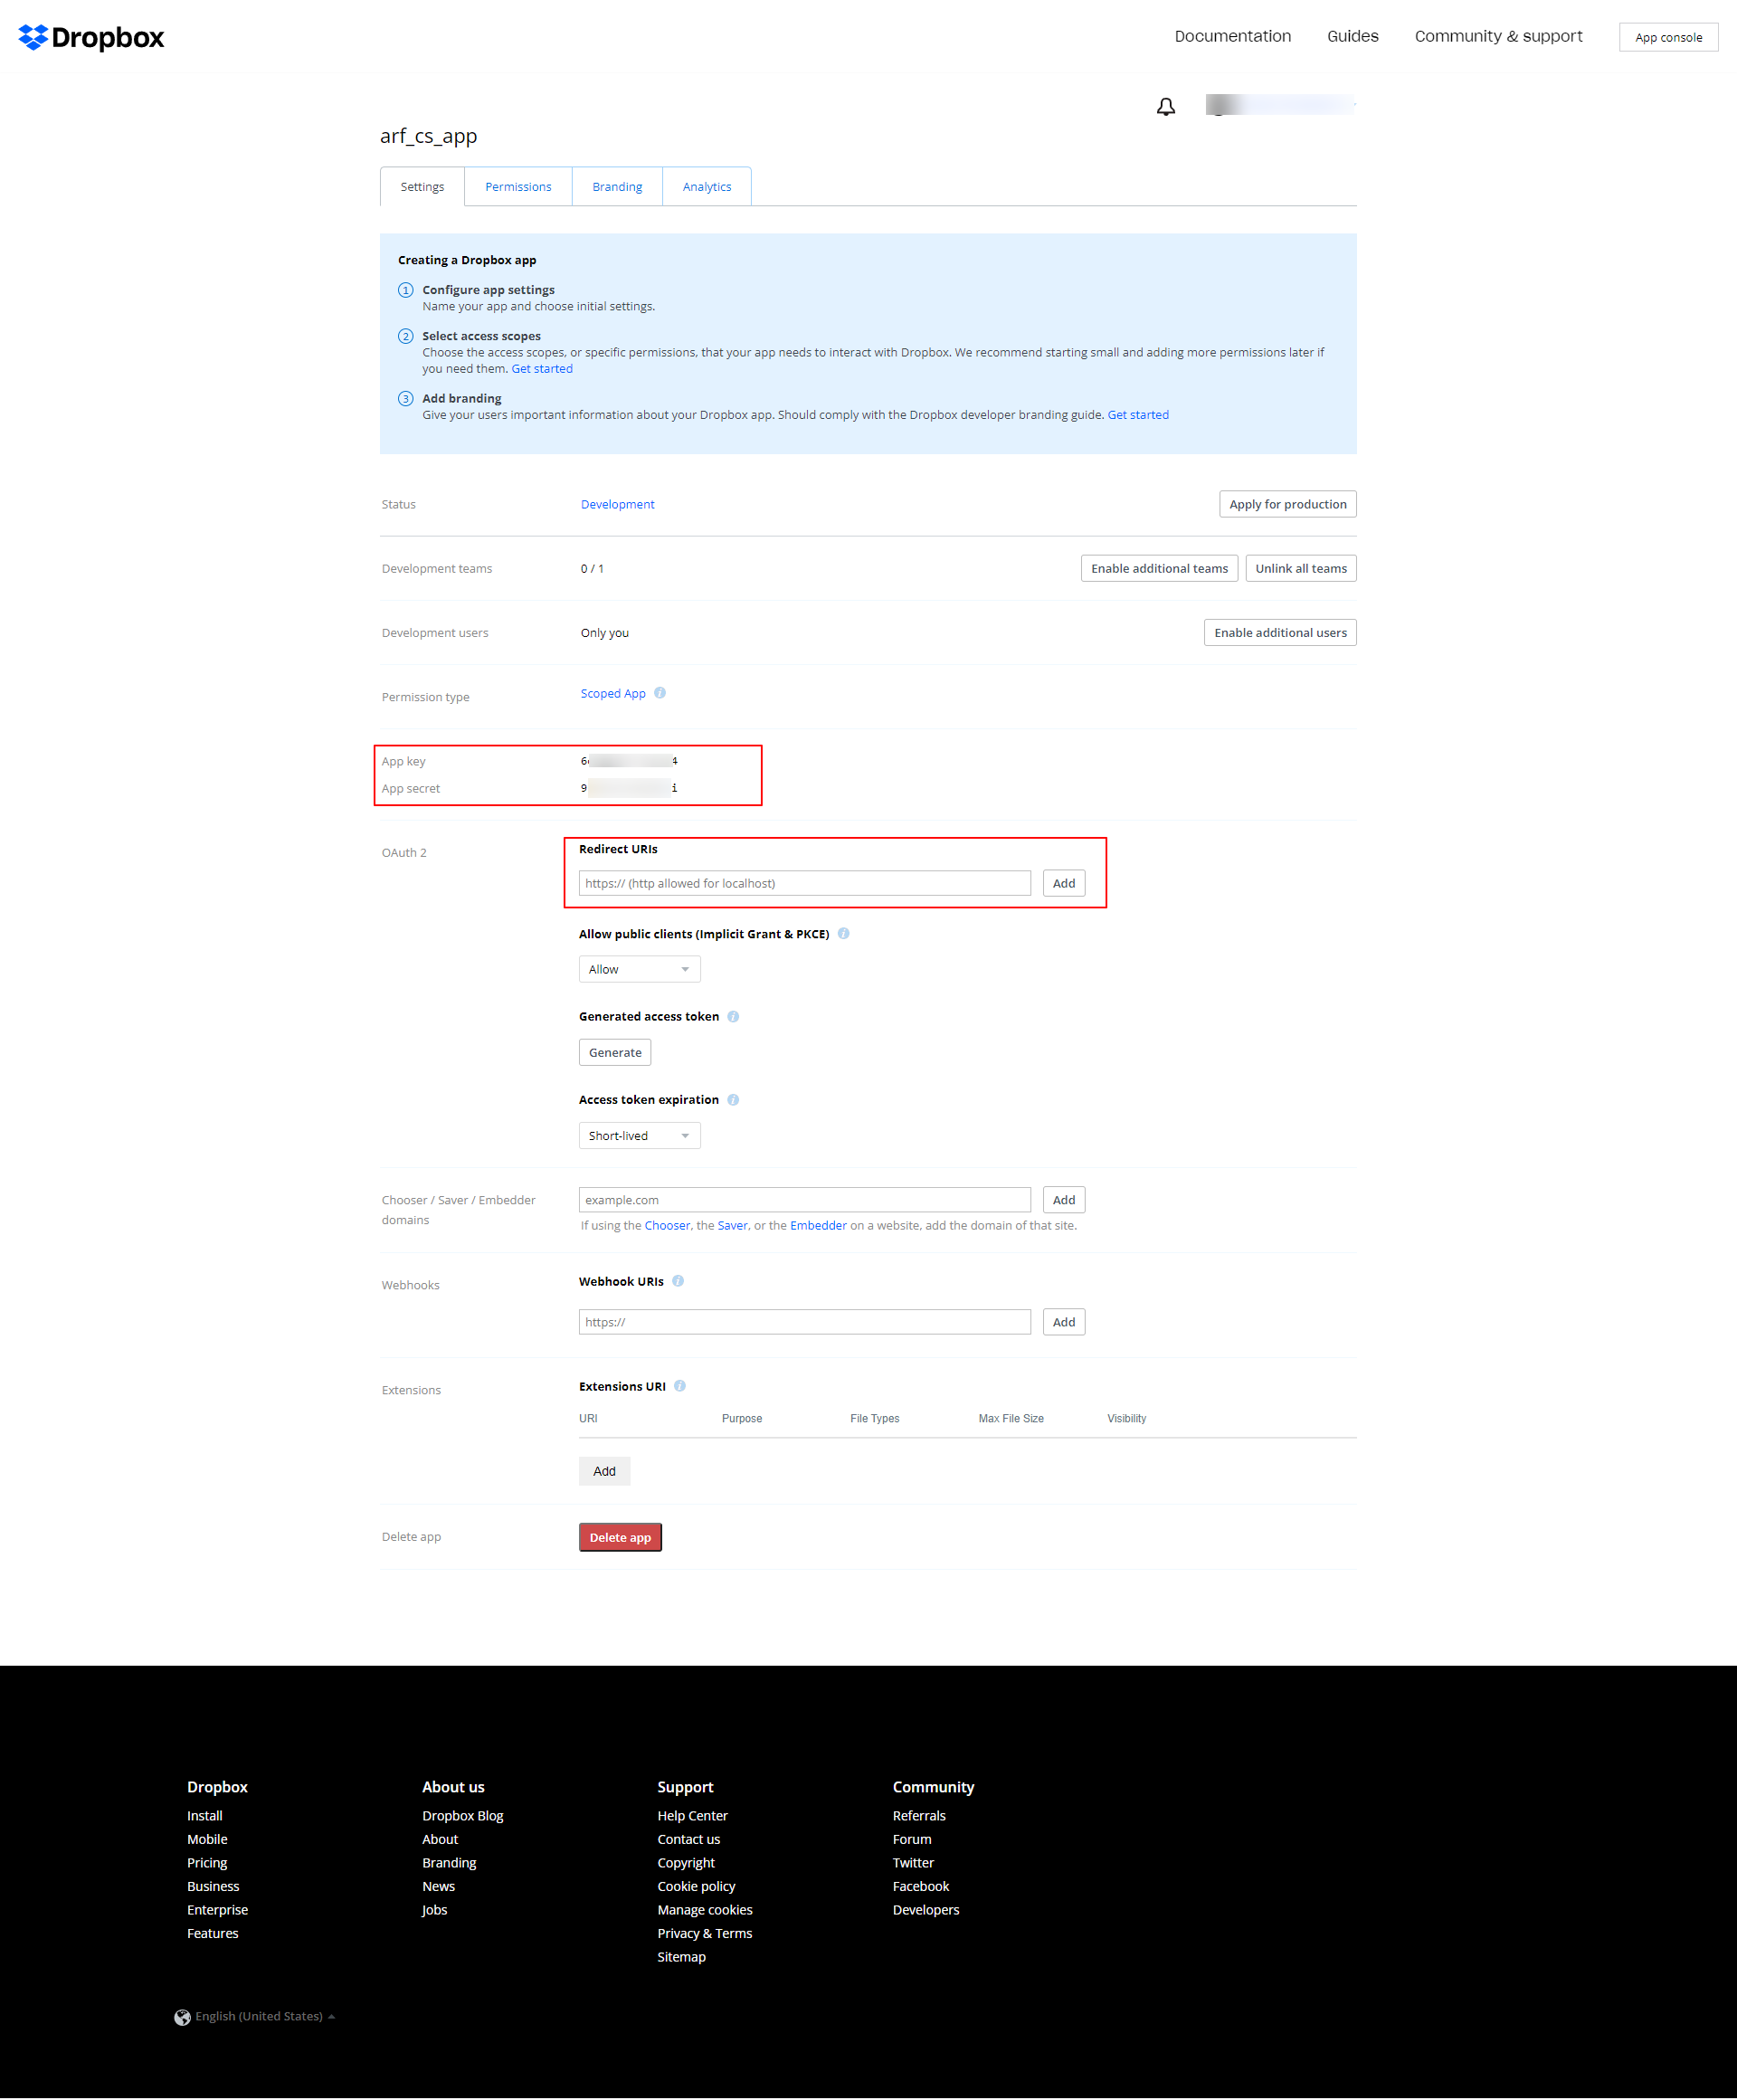
- Go to the Dropbox Developer Website.
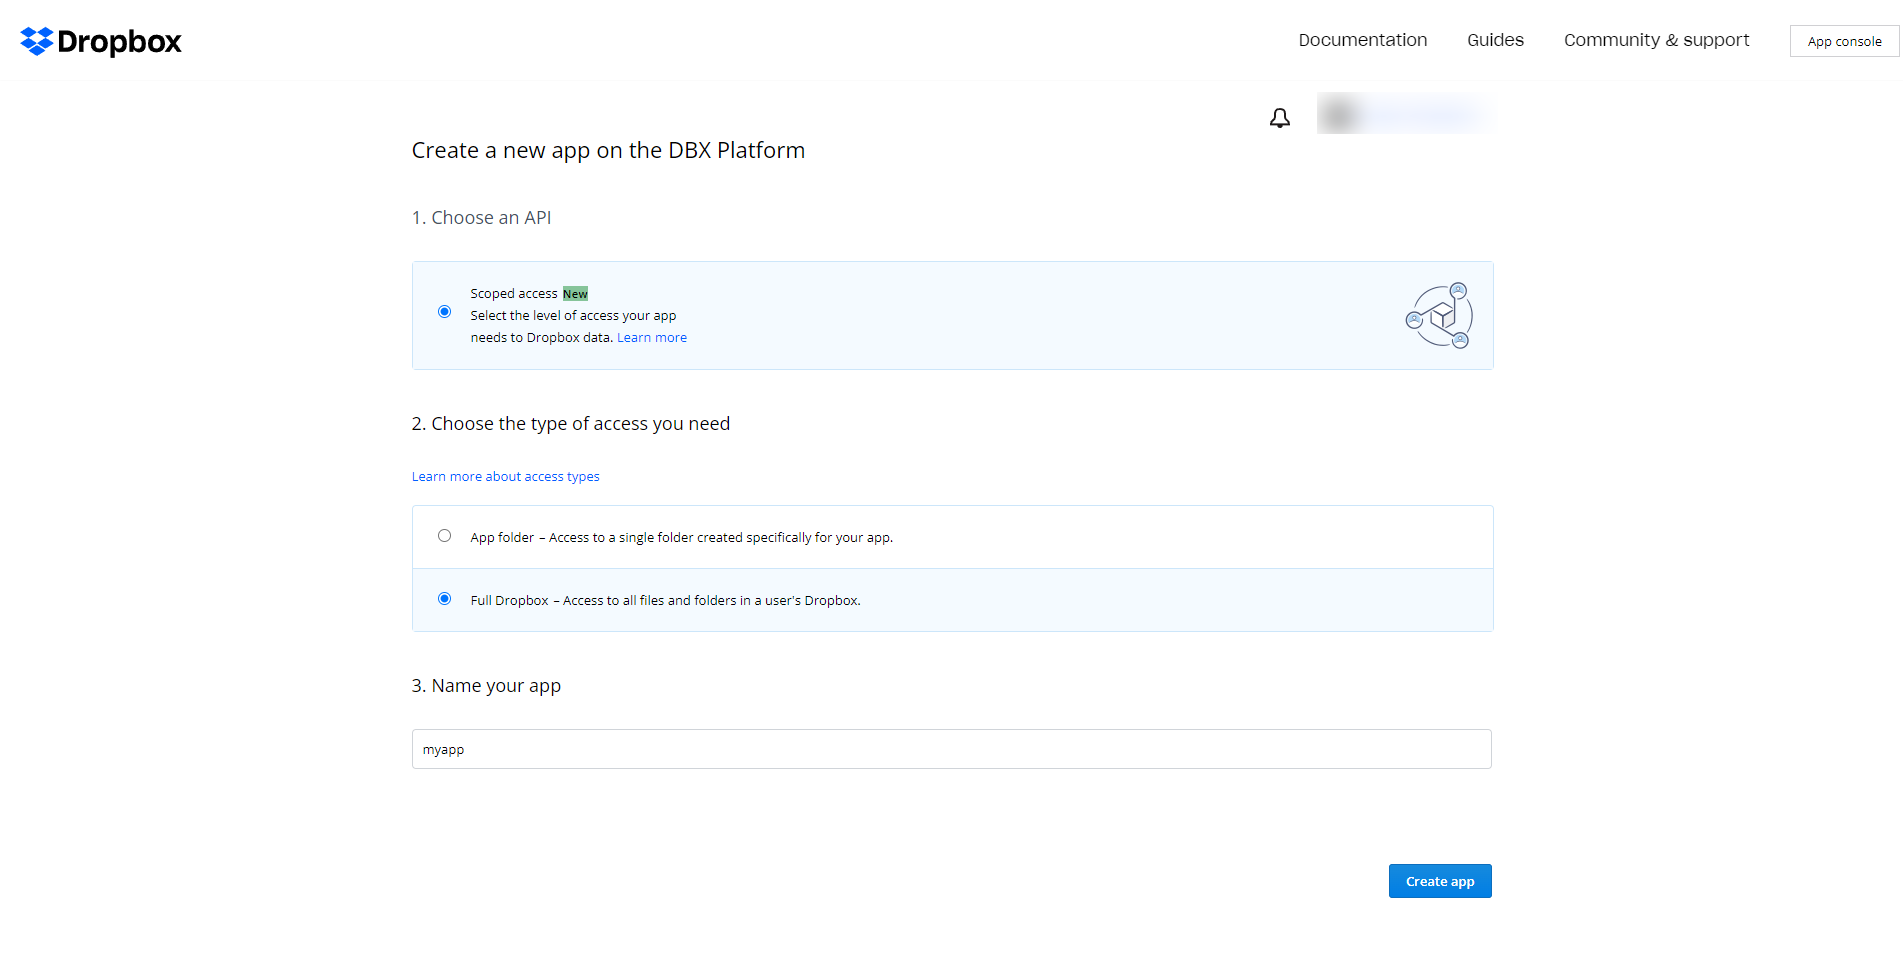
- Click On the Create App button on the first screen that appears.
- Provide a name for your Application
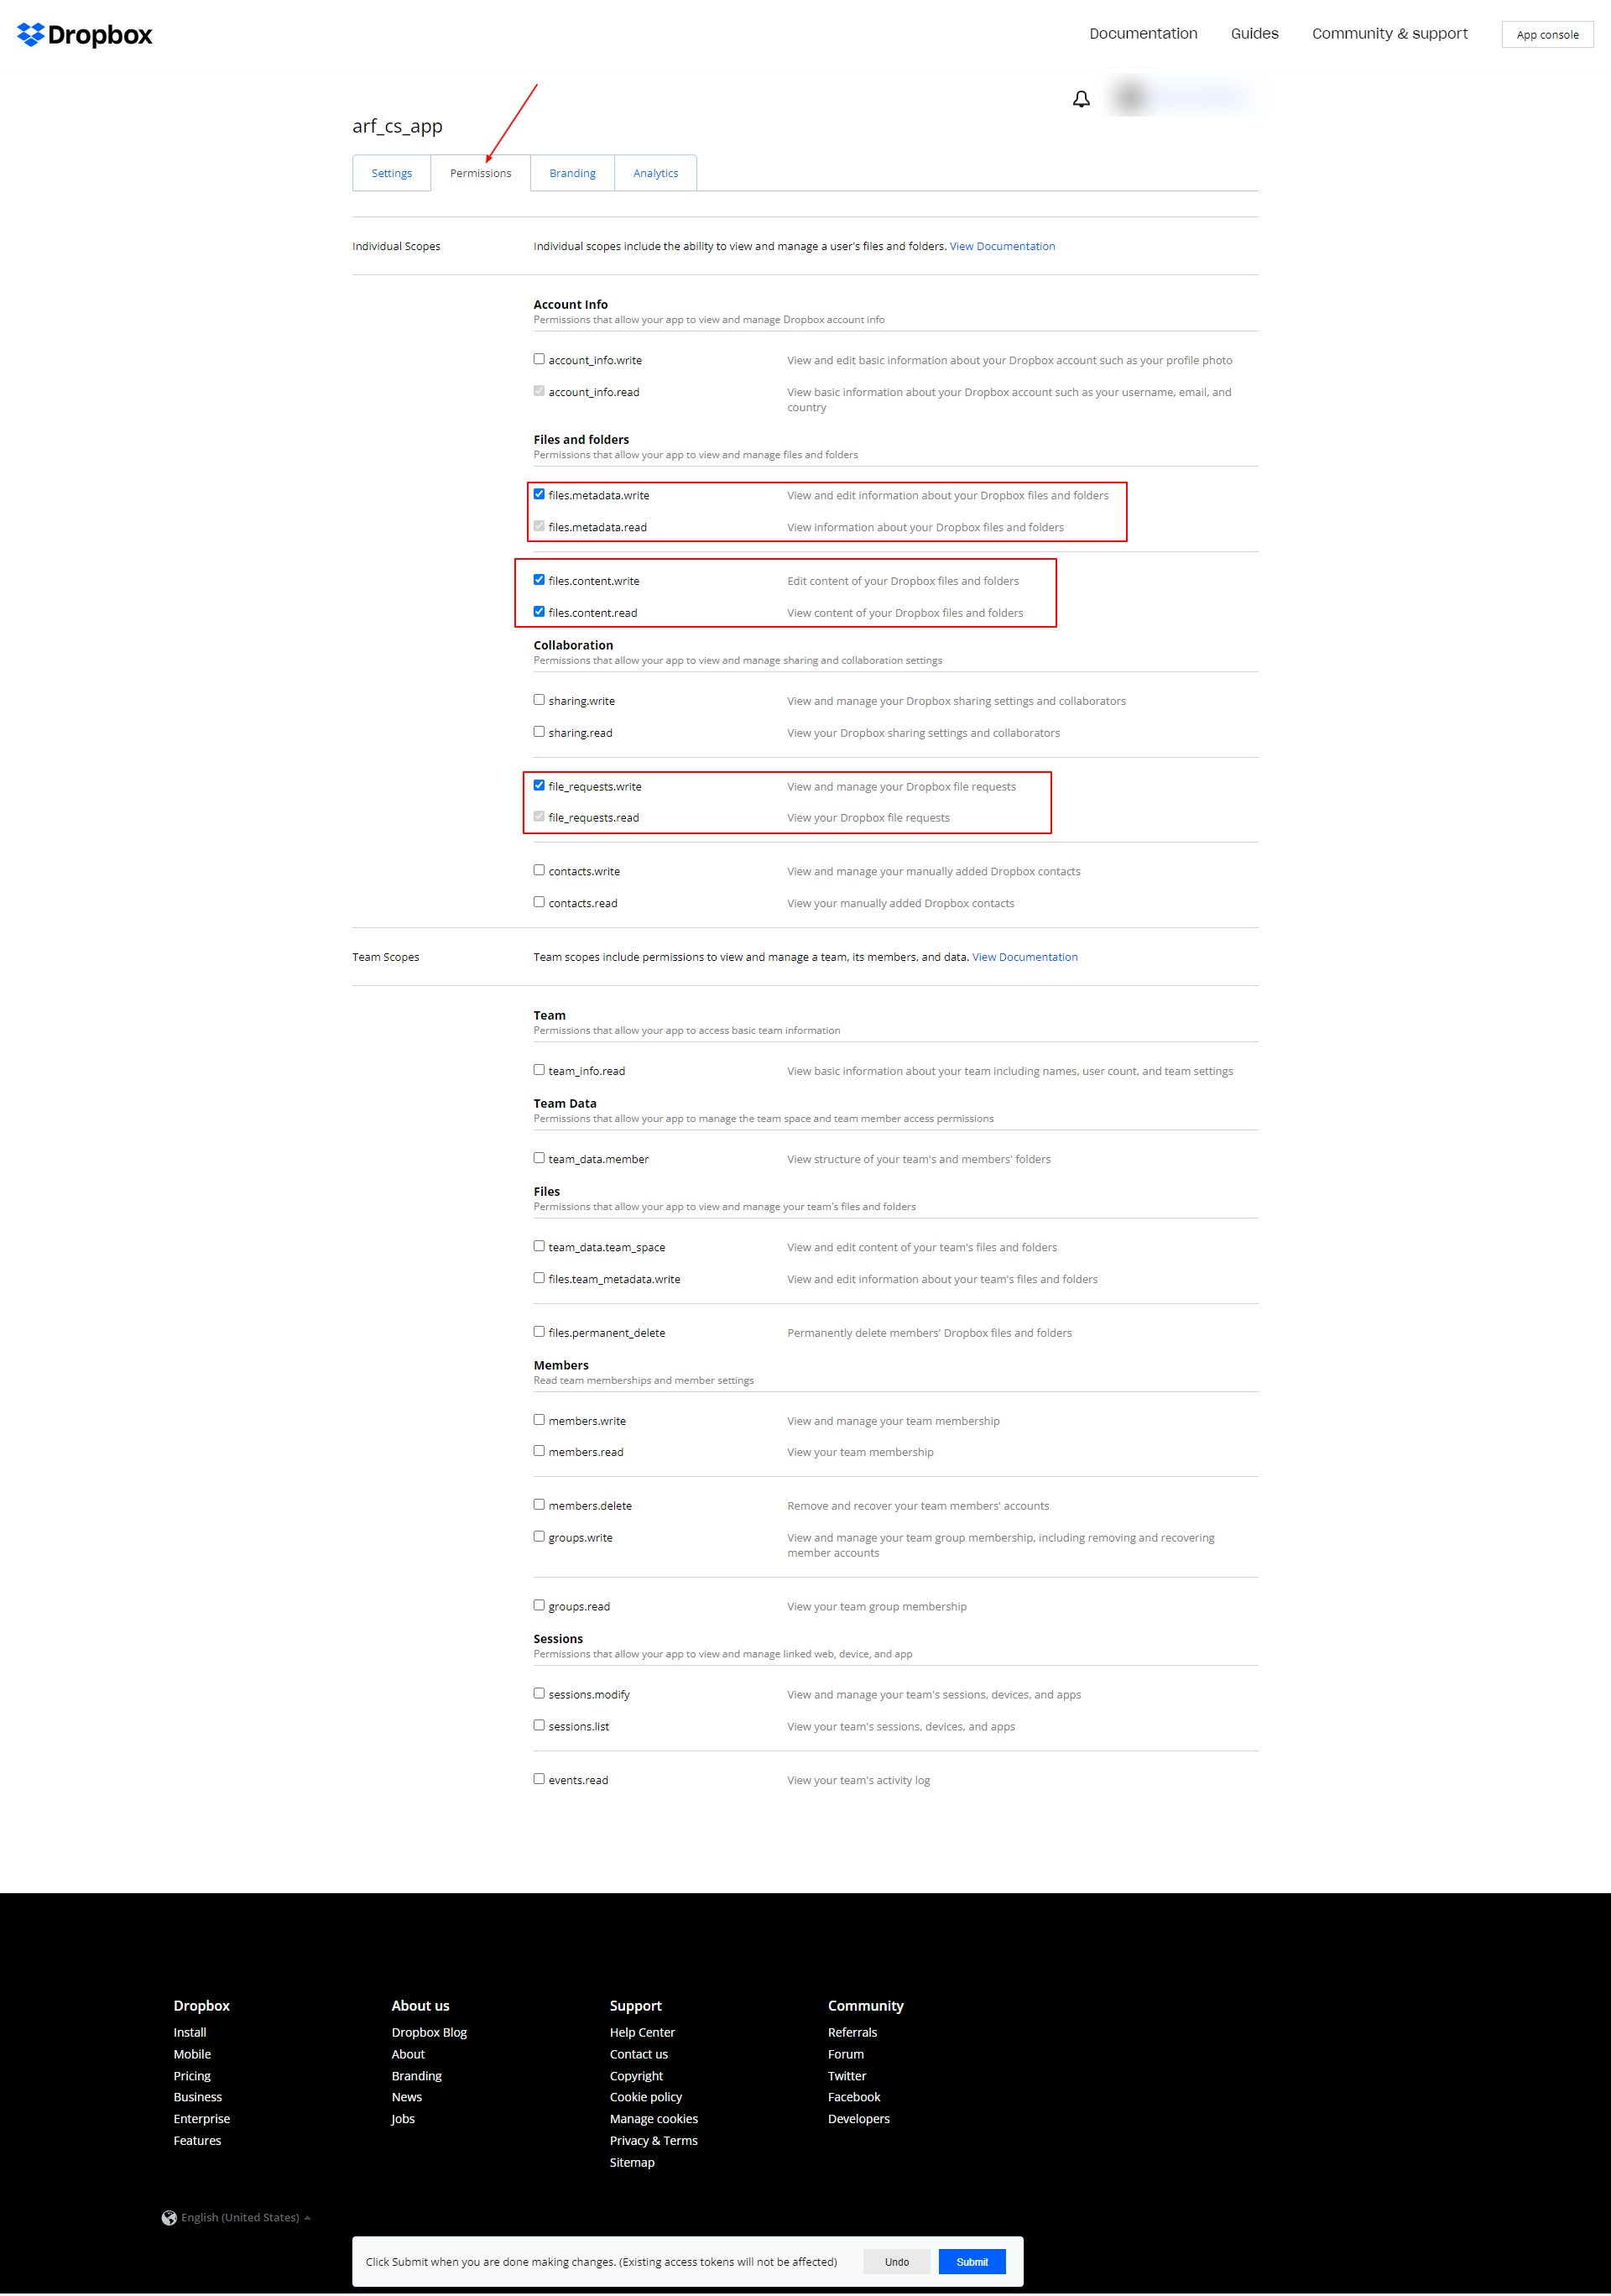
- Enable the file related permissions as displayed in above image.
- Fill up the details in the next screen, set redirect URL and save the settings Here you will get the API key and API Secret. Copy the API key and API Secret and fill it in the arforms cloud storage dropbox configuration.
One Drive Configuration
After activating the plugin, you will be able to see One Drive Configuration from “ARForms” → “Cloud Storage Configuration”.
In order to upload files to one drive you have to follow One Drive API configuration steps.
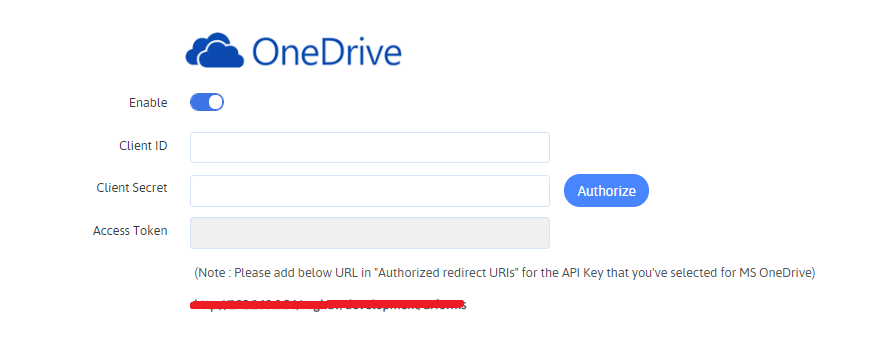
- Add Client ID.
- Add Client Secret.
- Add Client Secret.
You have to generate Access Token by clicking Authorize link after configuring your Client ID, Client Secret of your required One Drive Account from this page.
To get the Client ID, Client Secret and Access Token you need an One Drive Account. If you don’t have an One Drive Account then you need to create a new One Drive Account and create a new app regisration from here
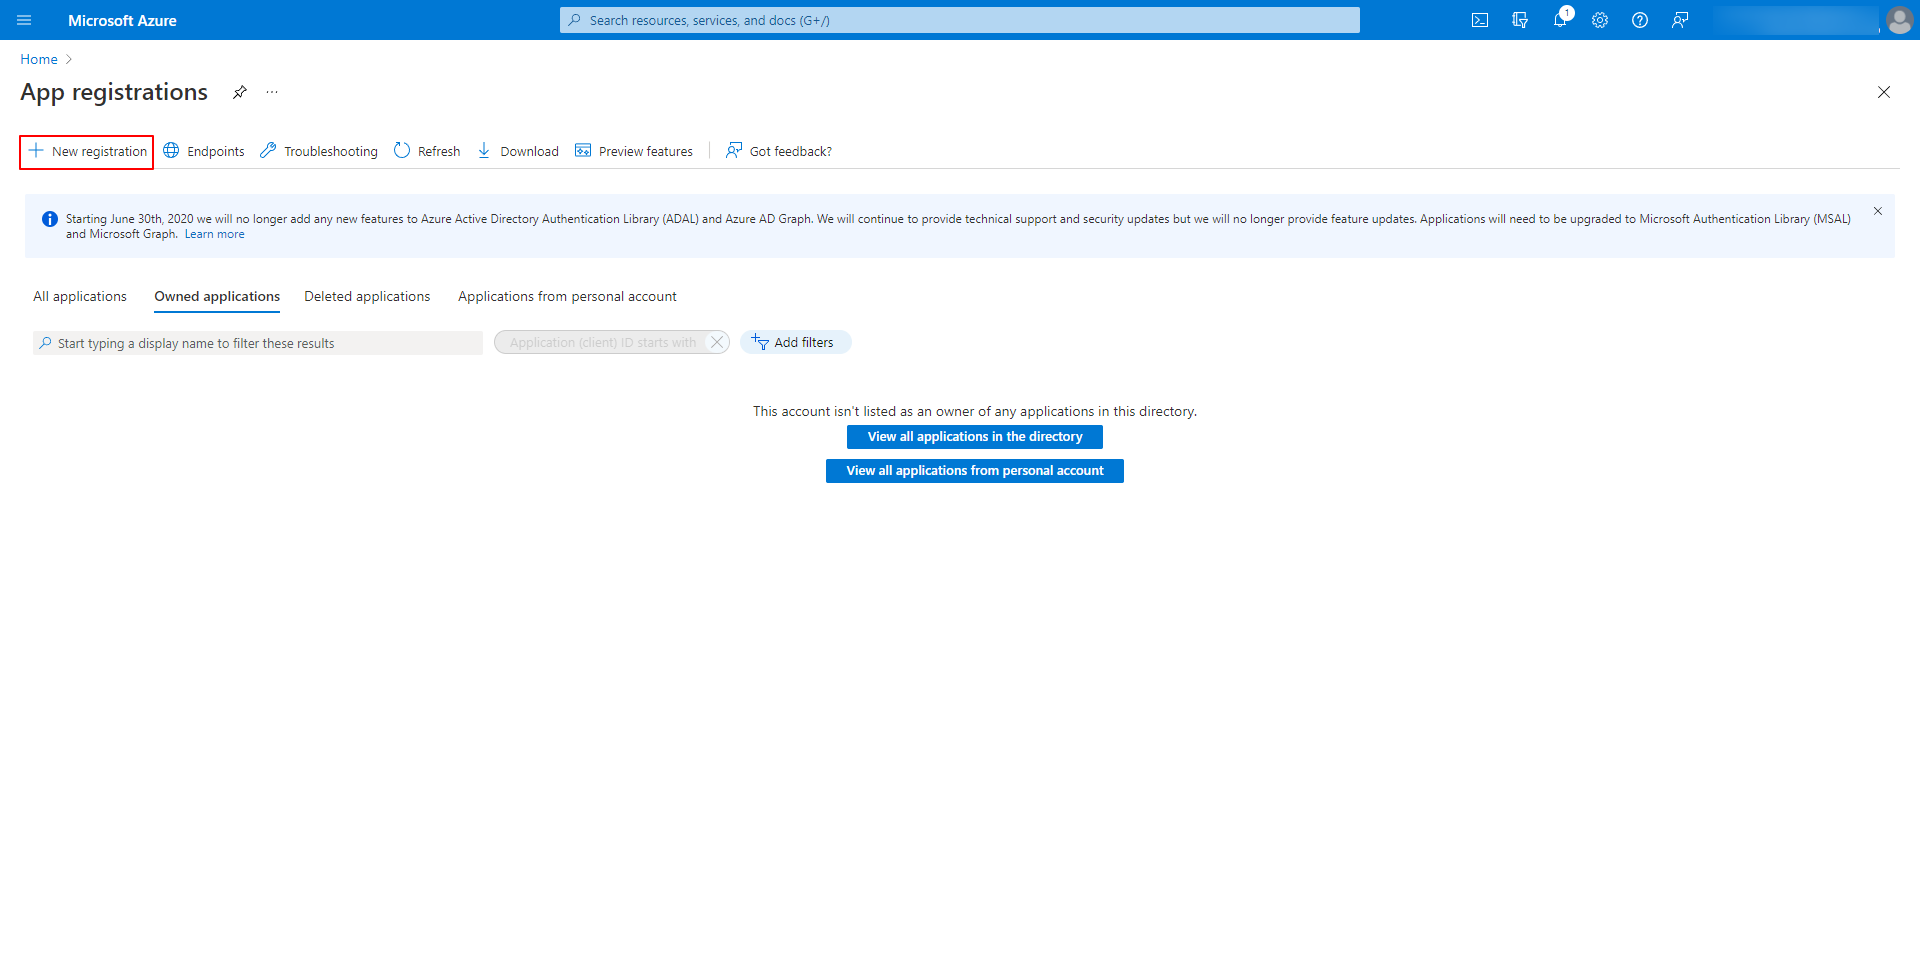
Click on New Registration as displayed in image above.
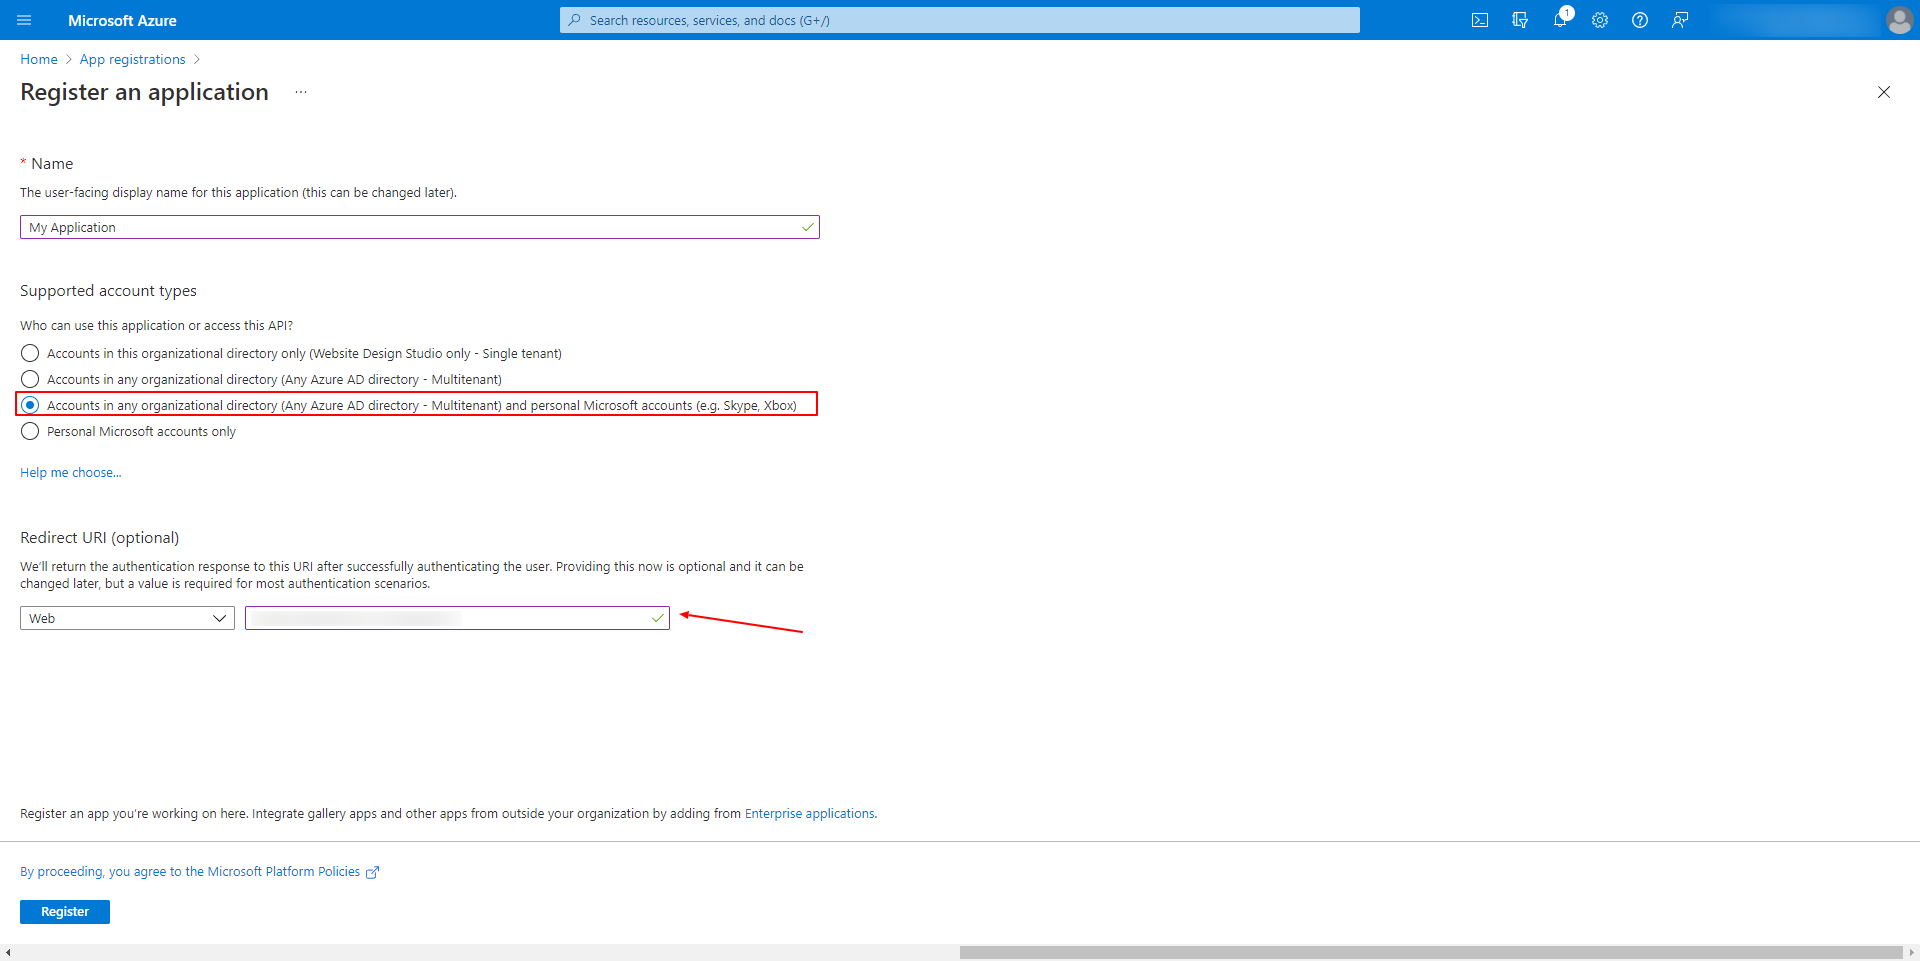
After clicking on New Registration you have been redirected to the page displayed in above image. Here you need to enter Name of new appliccation in the Name textbox.
From Supported Account Types you have to select Accounts in any organizational directory (Any Azure AD directory – Multitenant) and personal Microsoft accounts (e.g. Skype, Xbox) option. Copy the Redirect URL from arforms cloud storage settings one drive configuration and paste it to the Redirected URL as displayed in above image.
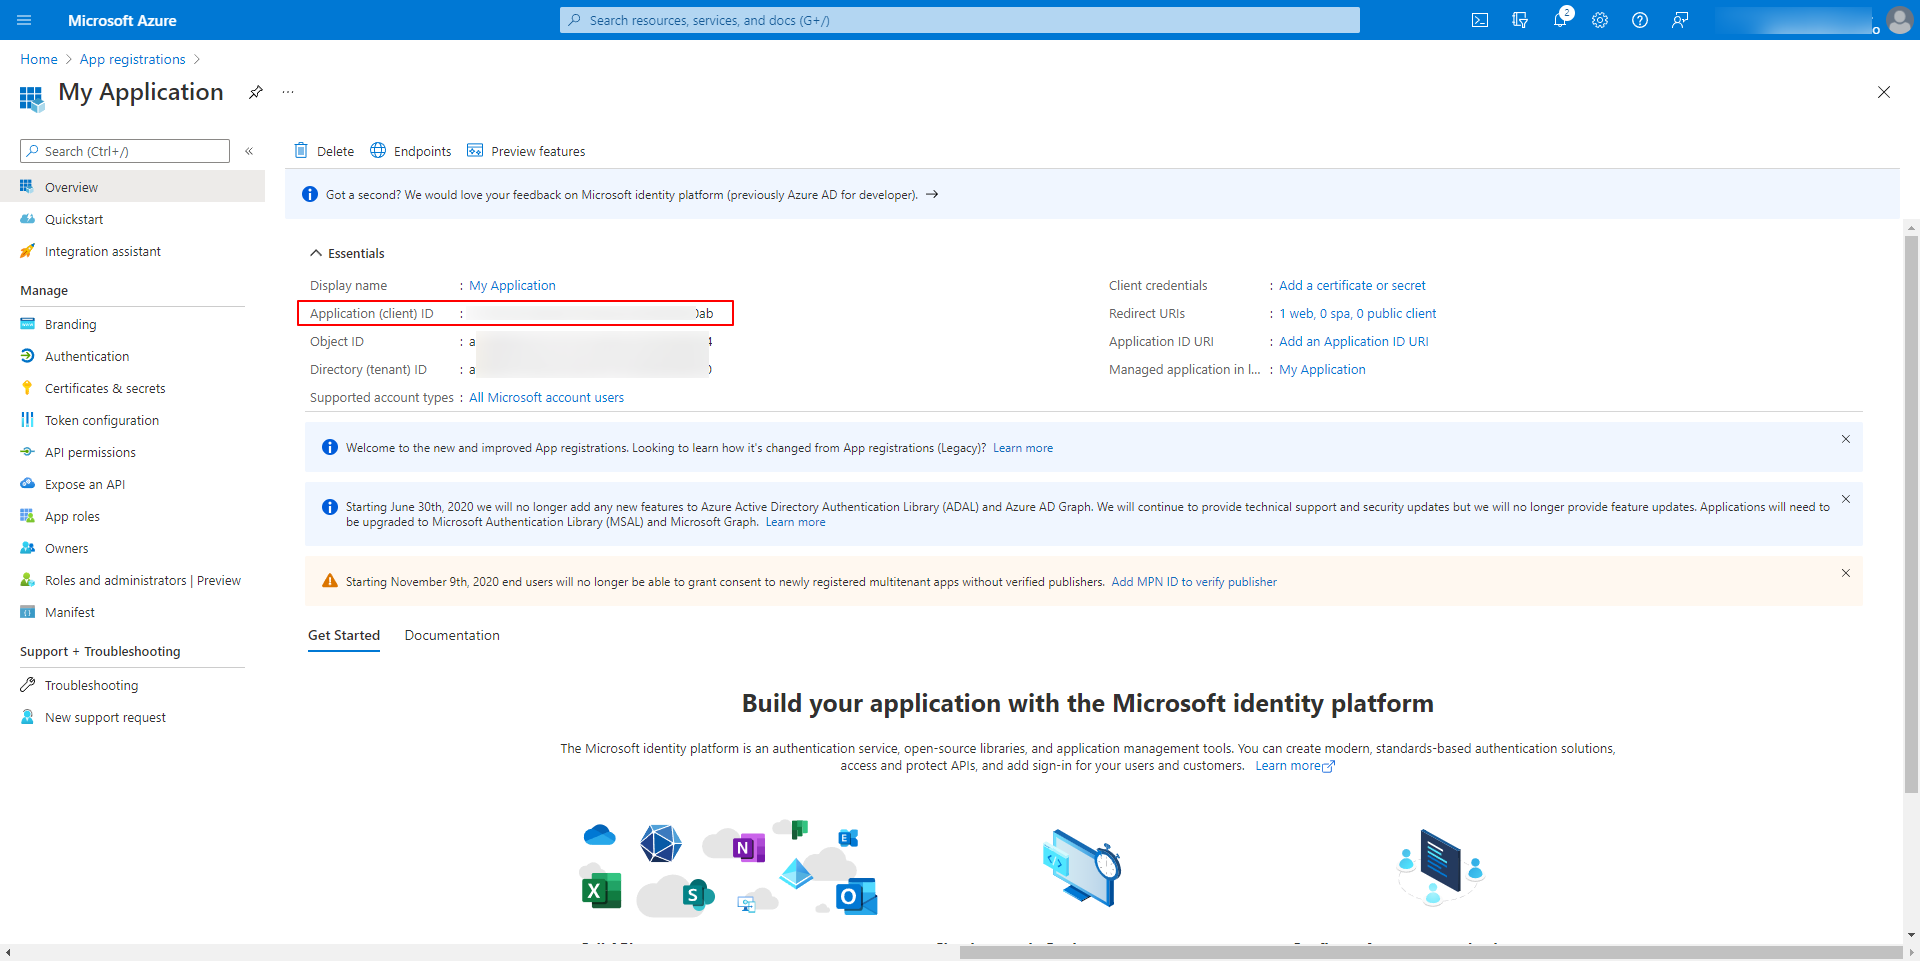
Here you get your Client Id by copying it from Application (client) ID as displayed in above image.
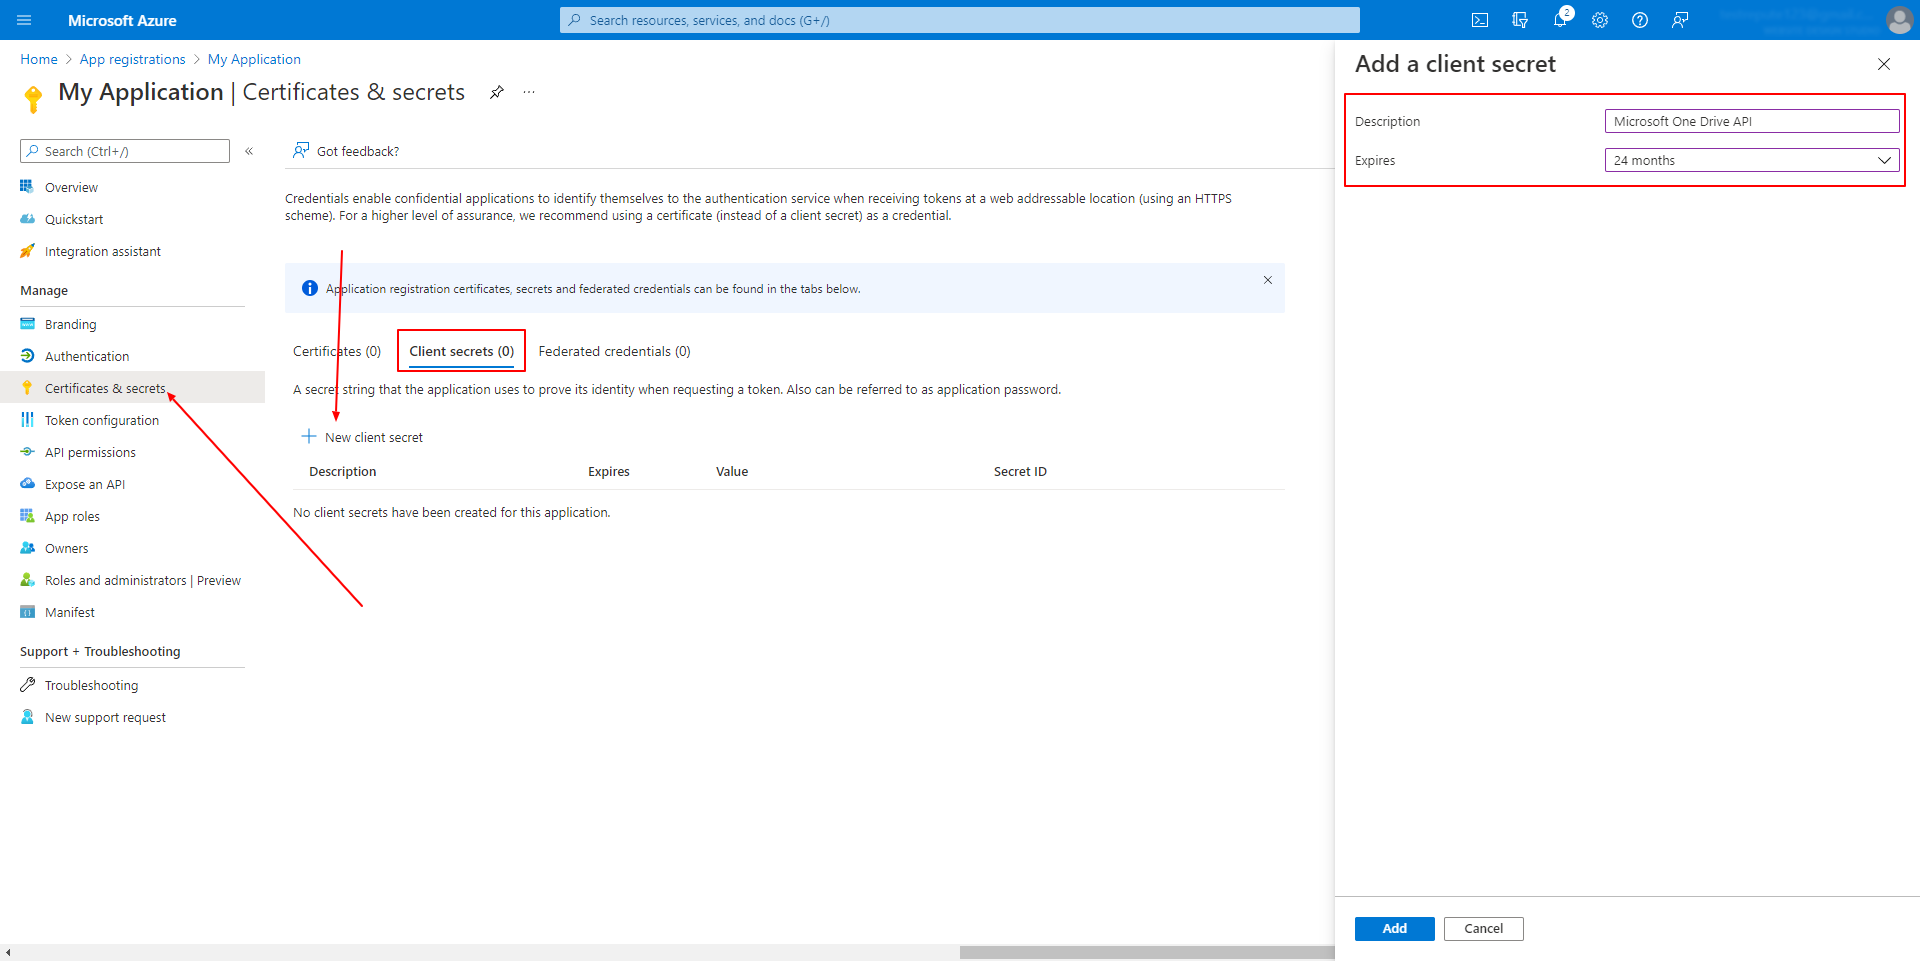
After you get the Client ID, click on Certificates & Secrets and you will see the page as displayed in above image. Move to the Client Secrets section and click on New Client Secret you will see the Add a client secret section in the right side of the page where you need to enter discription in the Description textbox and need to select expiry time from Expires Dropdown then click on Add button at the bottom of this section.
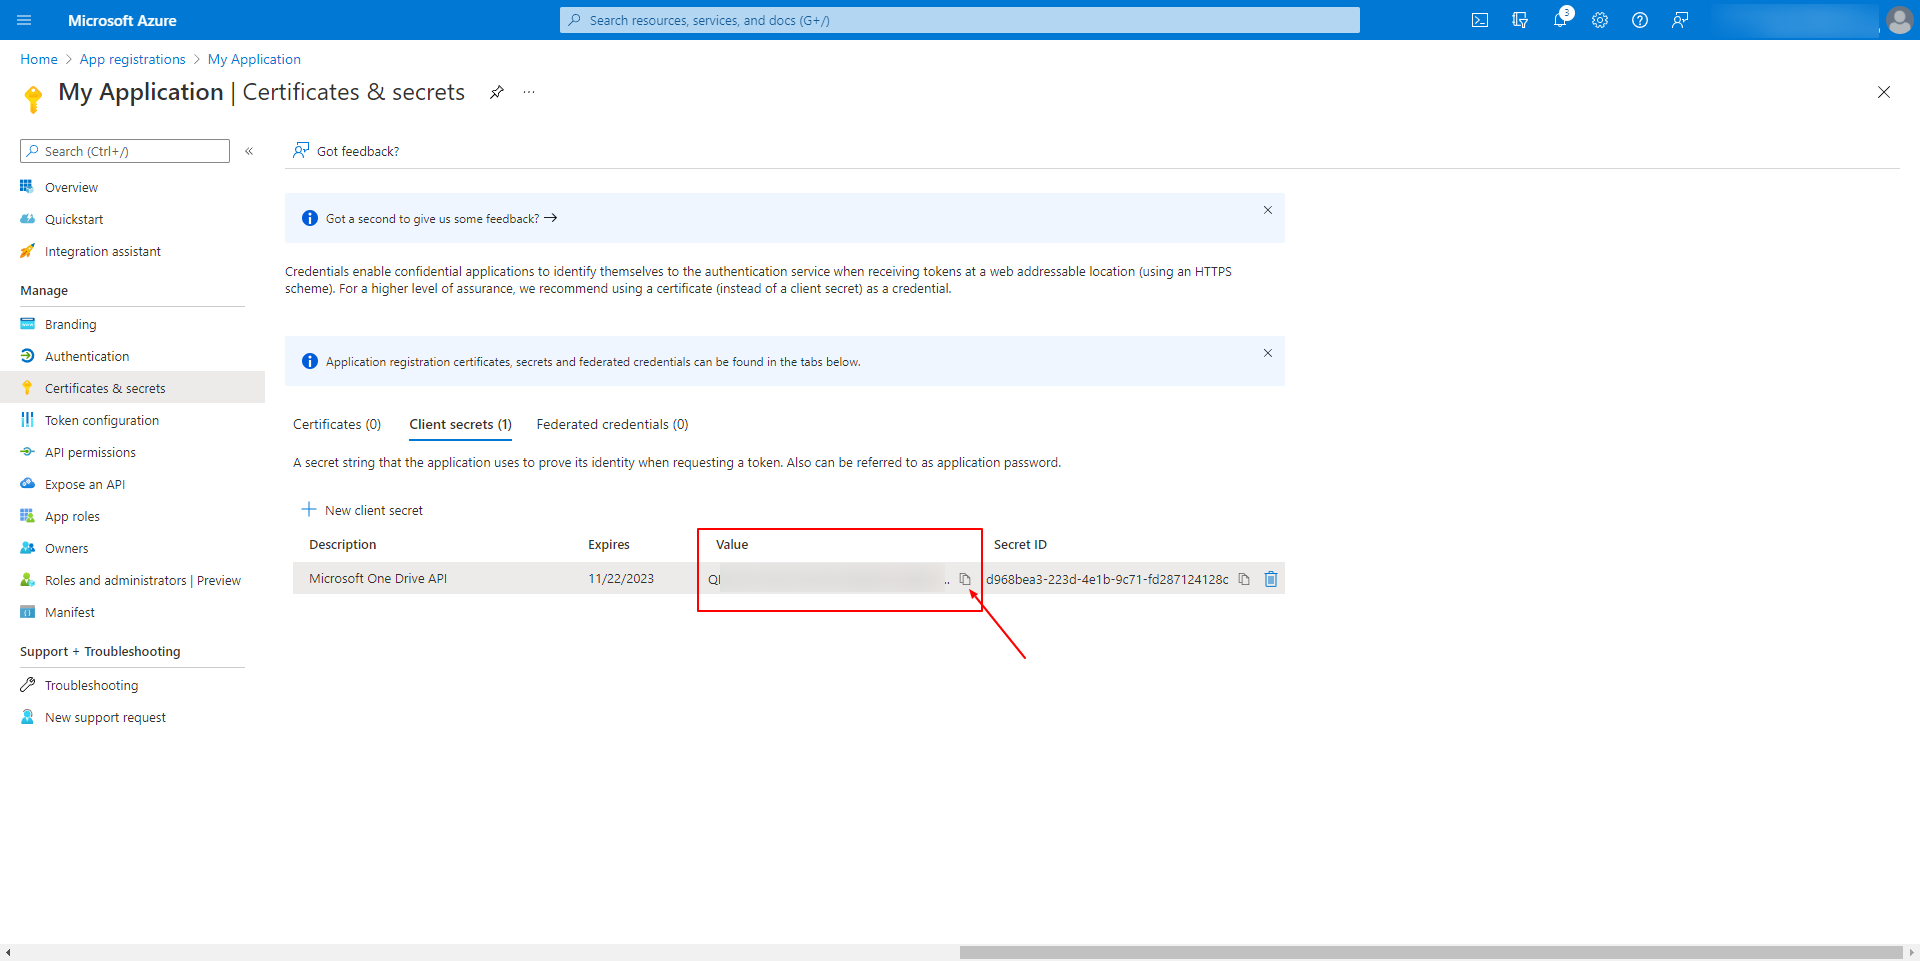
Now you can see the new secret added in the list as displayed in above image. Now you need to copy the Value of this secret which is your Client Secret.
Now you have both the Client Id and Client Secret for your One Drive General Setting. Fill this details to the One Drive General Setting and click on Authorize button and you will get the Access Token. Save the Configuration by clicking on Save button on ARForms Cloud Storage General settings page.
Amazon S3 Configuration
After activating the plugin, you will be able to see Amazon S3 Configuration from “ARForms” → “Cloud Storage Configuration” .

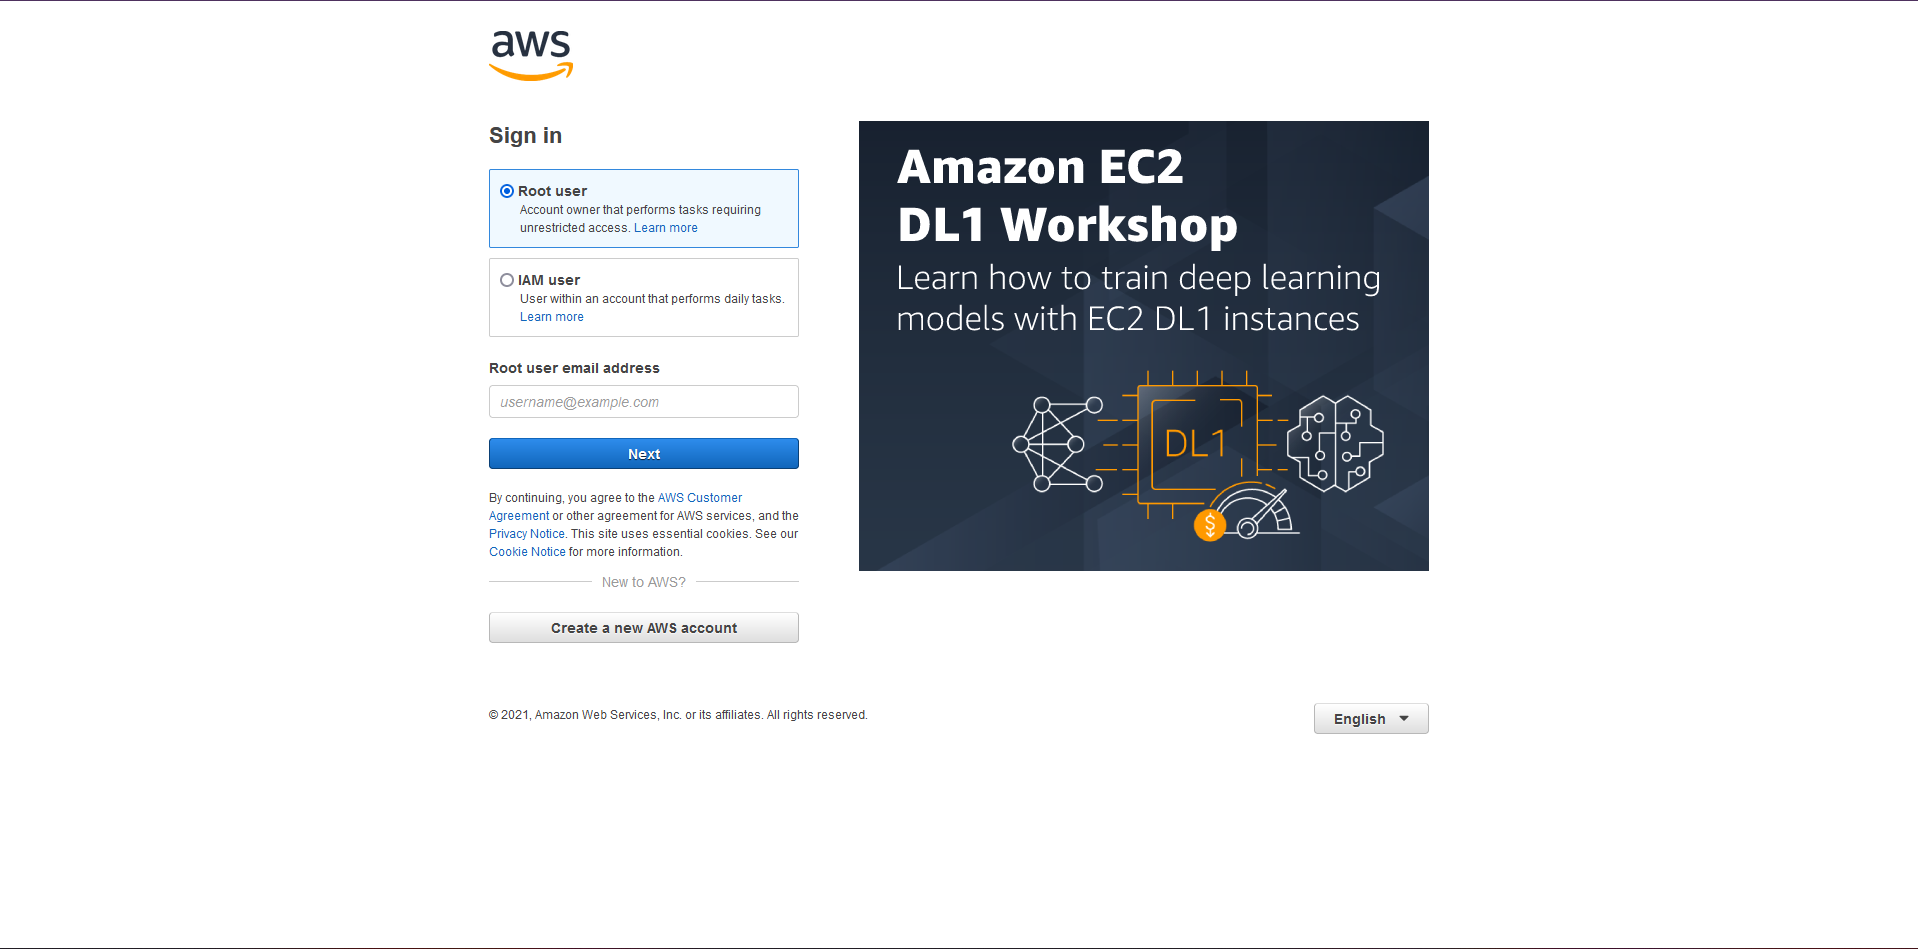
Go to the Amazon AWS Website.
Select Root User and provide the email address of root user for login to amazon s3 account.
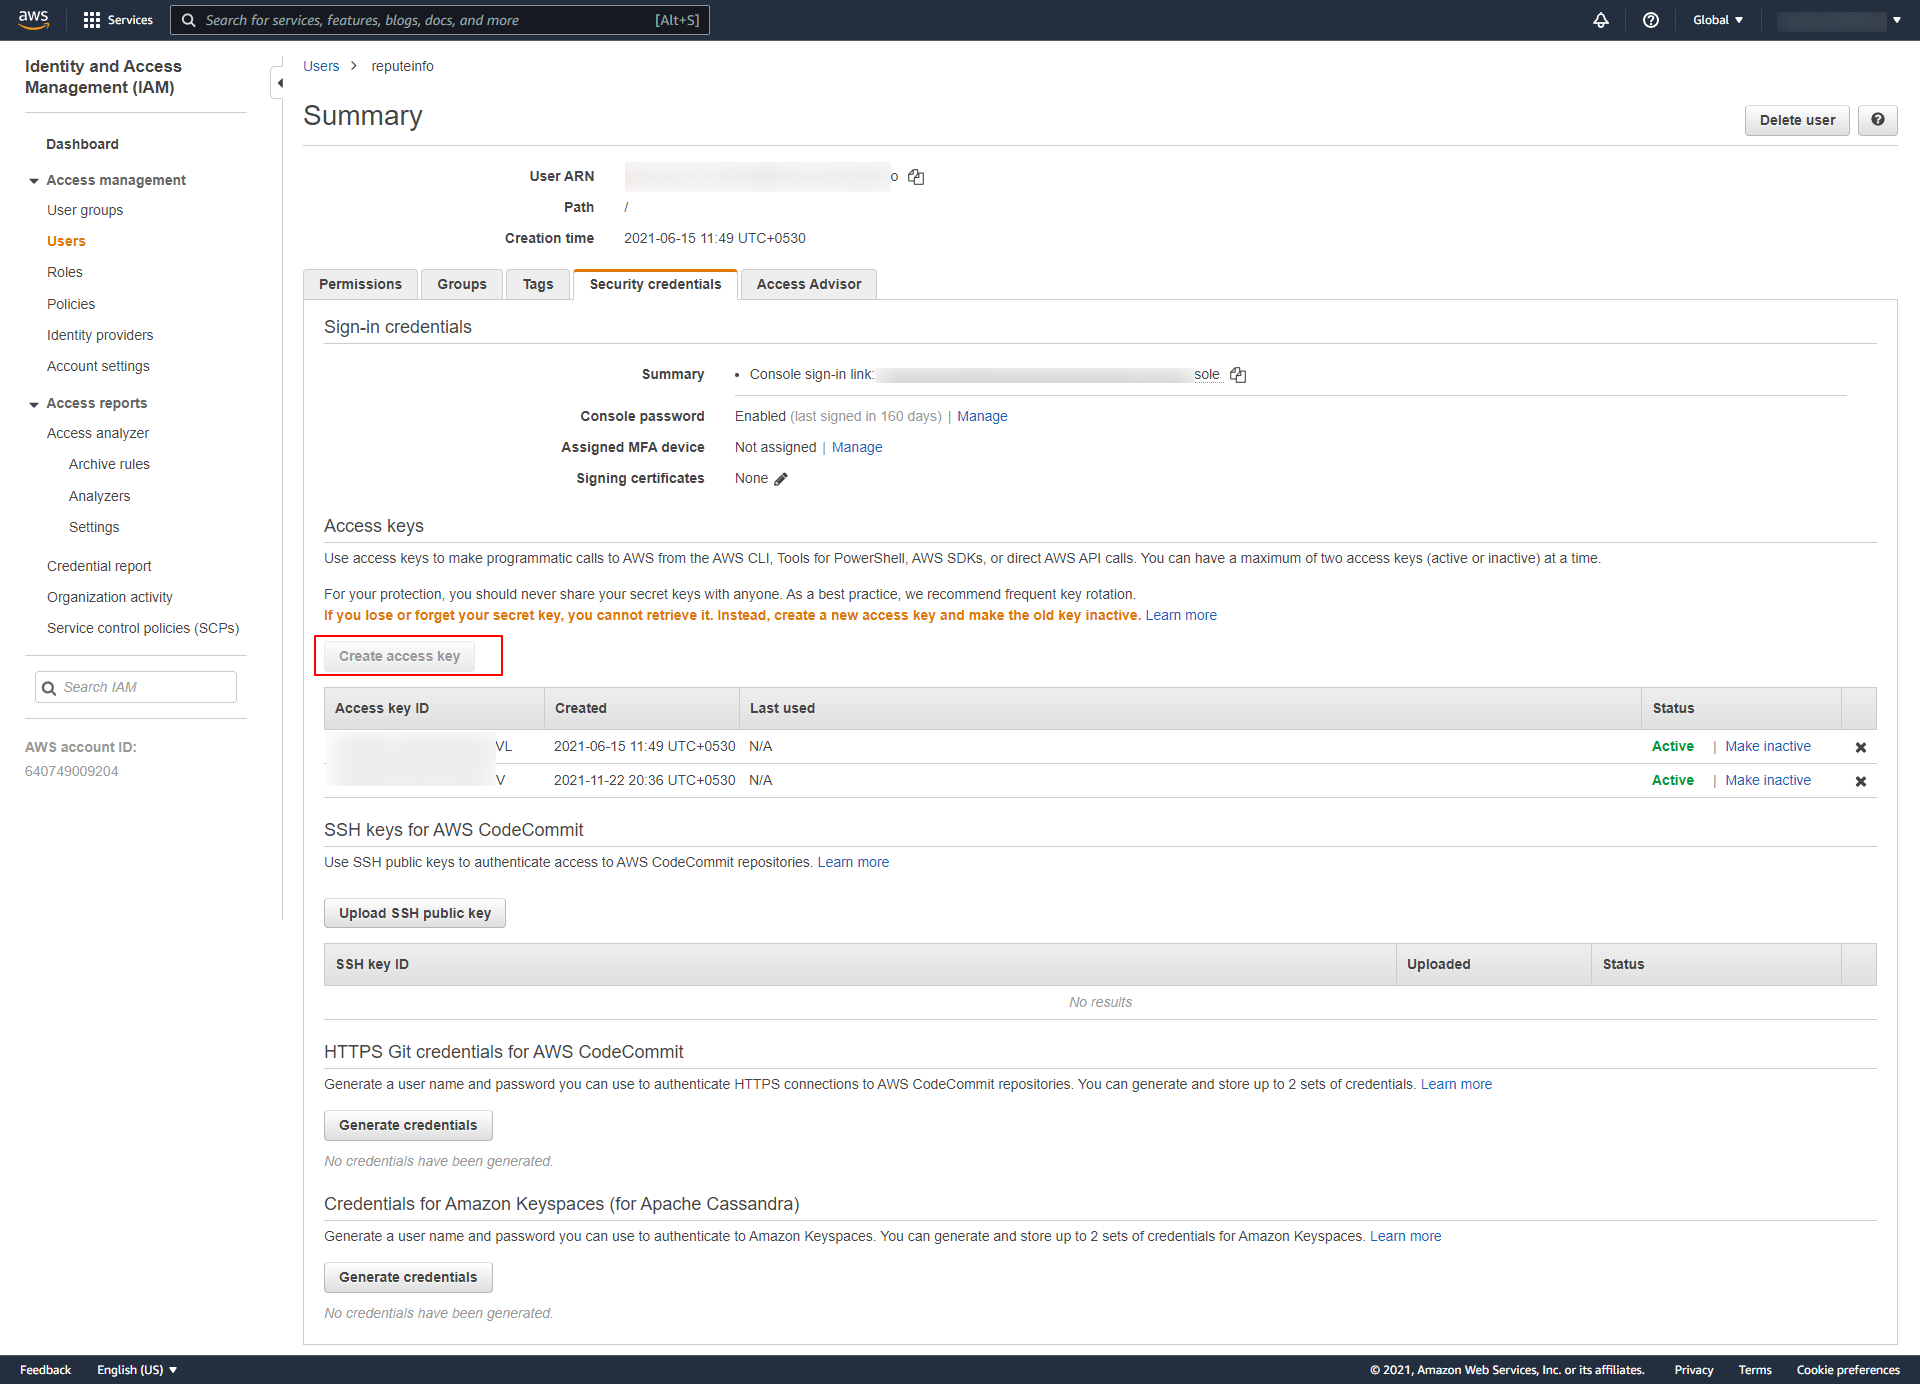
From the AWS Management Console click on Security Credentials from the top right corner user icon of the page .

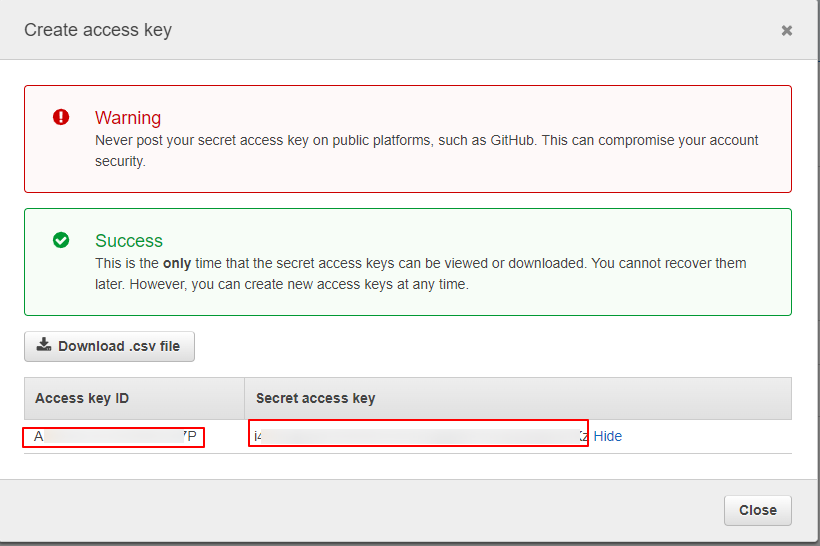
Click on Create Access Key and create new access key as displayed in below image. After Successfully created Access Key and Secret Access key.
Click on Create Bucket Button as displayed in below image.
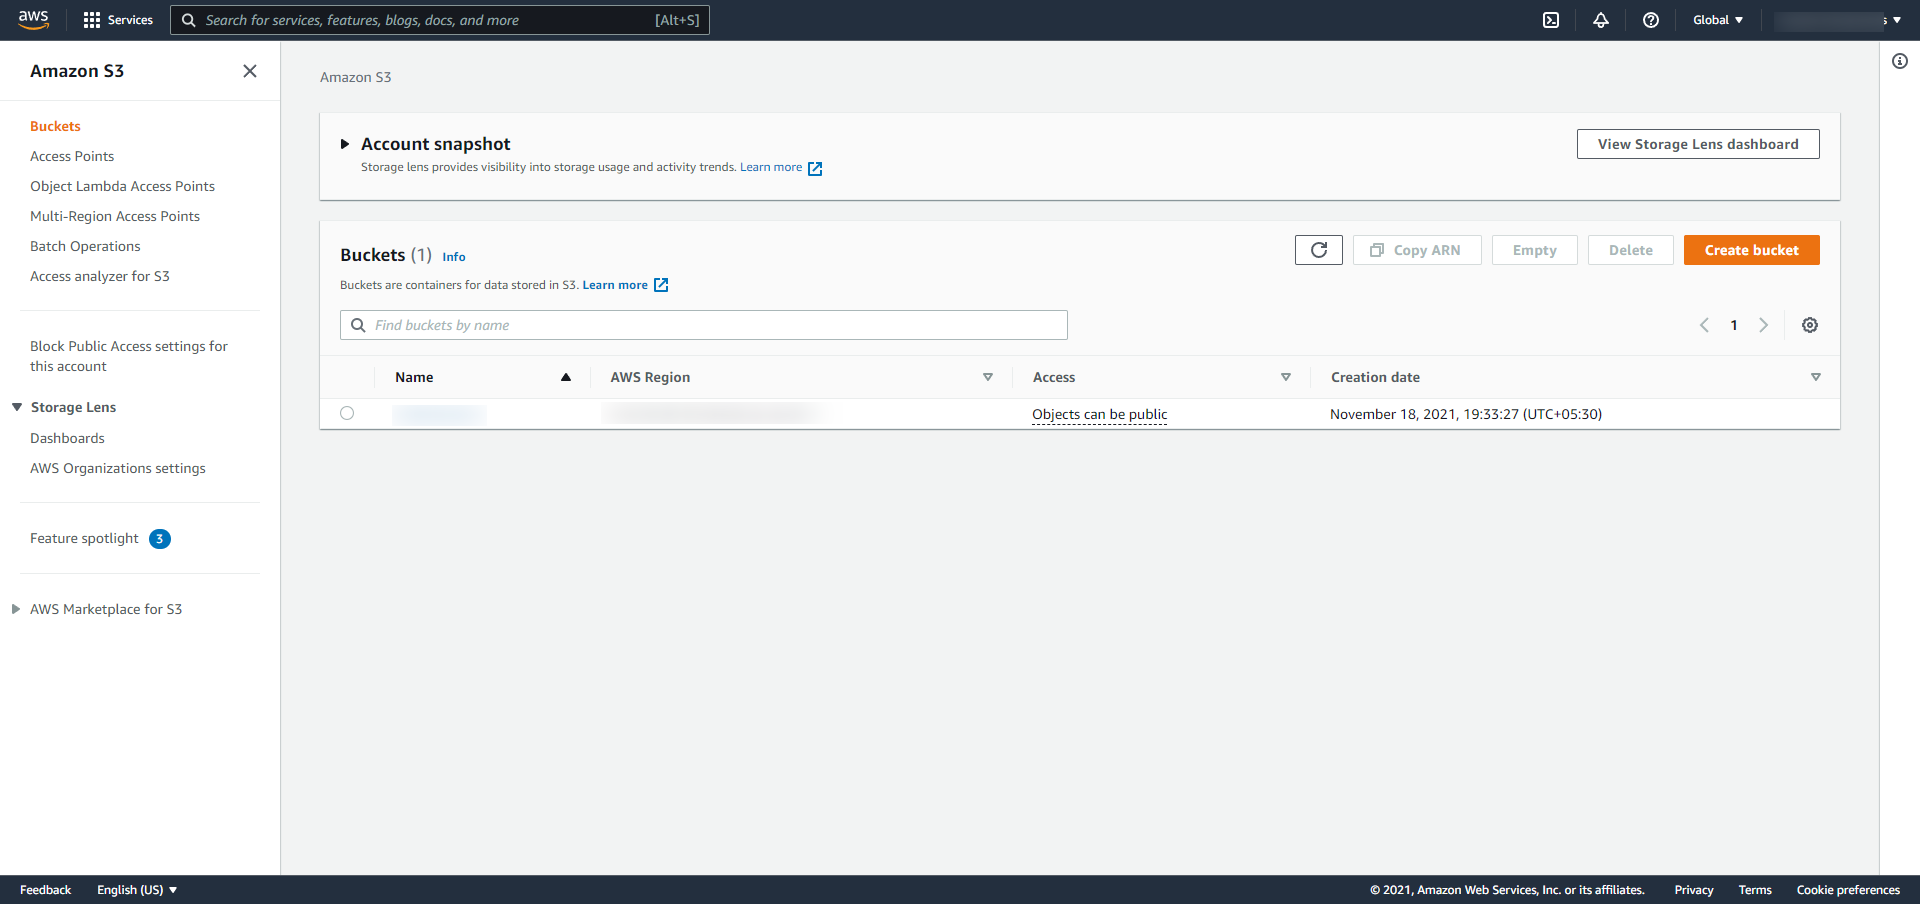
At the General configuration page of new bucket creation, fill the name of new bucket and select the AWS region from dropdown as displayed in below image. After successfully creation of bucket you will get AWS Region as in image.

Cloud Storage Configuration
After setting up Cloud Storage Global Settings, you need to configure cloud storage setting under “ARForms” → “Add New Form” → “Submit Action” → “Configure Cloud Storage” . as displayed in below screenshot
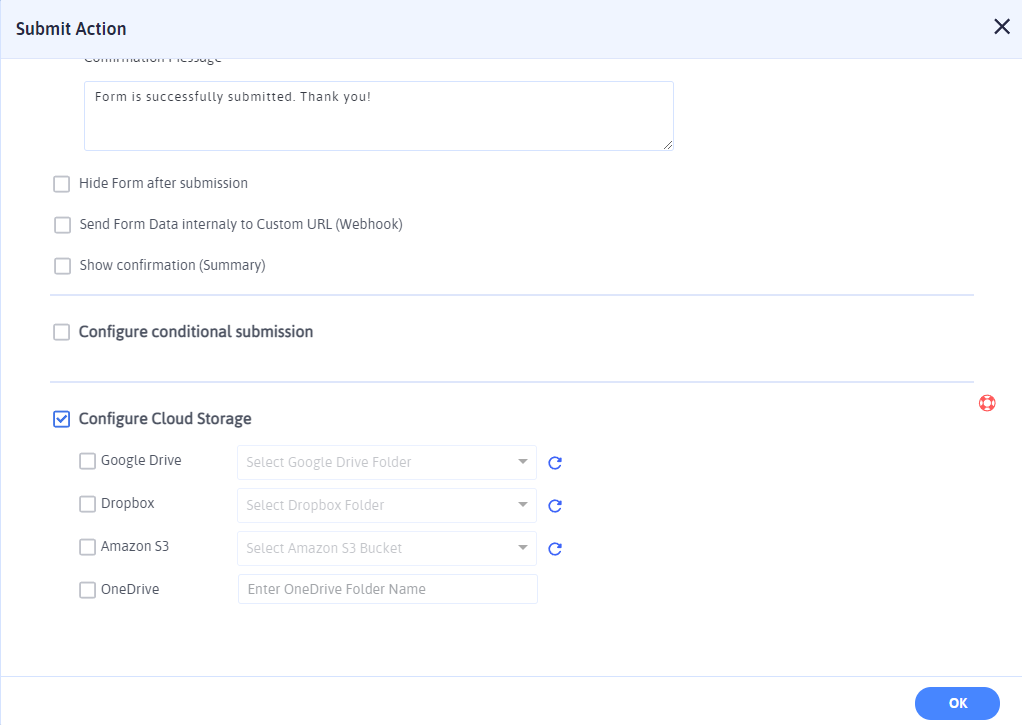
To upload files to cloud storage platform you need to enable the Configure Cloud Storage from Submit Action block of ARForms Editor. Now you can have 4 cloud storage platform configuration options. Enable the cloud storage platform option in which you want to upload your files. Select or Type the folder name in which you want to upload your files then click Ok and save the form.
In previosly configured form you can update the selected folder list by clicking on Refresh Button at the right end of the select folder field as displayed in above screen.