Home > Omnisend
Omnisend
ARForms Omnisend Add-On is a powerful and intuitive extension designed to seamlessly connect your ARForms submissions with your Omnisend subscriber list. Effortlessly capture and sync contact data—including name, email, phone number, gender, birthdate, and more—immediately after a form is submitted.
This add-on empowers you to automatically create or update subscriber profiles in Omnisend, apply custom tags, and manage consent preferences for both email and SMS channels—directly from your ARForms dashboard, with no custom coding required.
Built on Omnisend’s robust API, the integration supports dynamic field mapping to ensure complete flexibility and control over how your form data is structured and delivered.
With real-time synchronization, the Omnisend Add-On ensures your marketing lists stay accurate, up-to-date, and ready for segmentation and automation across all your Omnisend campaigns.
Note: For optimal performance, please use ARForms version 5.0 or higher, PHP version 5.6 or higher, and WordPress version 4.5 or above.
Key Features of ARForms – Omnisend Integration
- Streamlined, user-friendly interface
- Effortless API key connection with Omnisend
- Advanced field mapping with full flexibility
- Supports both Email and SMS marketing preferences
- Real-time syncing of contact data after each form submission
Steps For Installation And Activation
You can install the plugin using either of the following methods:
- Install via FTP:
- Download the plugin from
CodeCanyonand extract it. You should find a folder namedarformsomnisend. - Upload the
arformsomnisendfolder towp-content/plugins/on your WordPress site. - Activate the Omnisend Add-On For ARForms plugin from the WordPress admin panel under the Plugins menu.
- Download the plugin from
- Install via WordPress Uploader:
- Download the plugin from
CodeCanyon. - Log in to your WordPress admin panel.
- Navigate to
Plugins → Add New → Upload Plugin. - Click “Choose File”, upload the plugin ZIP file, and then click “Activate Plugin” once the installation completes.
- Download the plugin from
After activating the plugin, a new Omnisend option will appear under the Email Marketing Tools tab in ARForms → General Settings.

How to Configure Omnisend Add-On
Follow the steps below to configure the Omnisend Add-On with ARForms and start syncing your form entries with your Omnisend contact list.
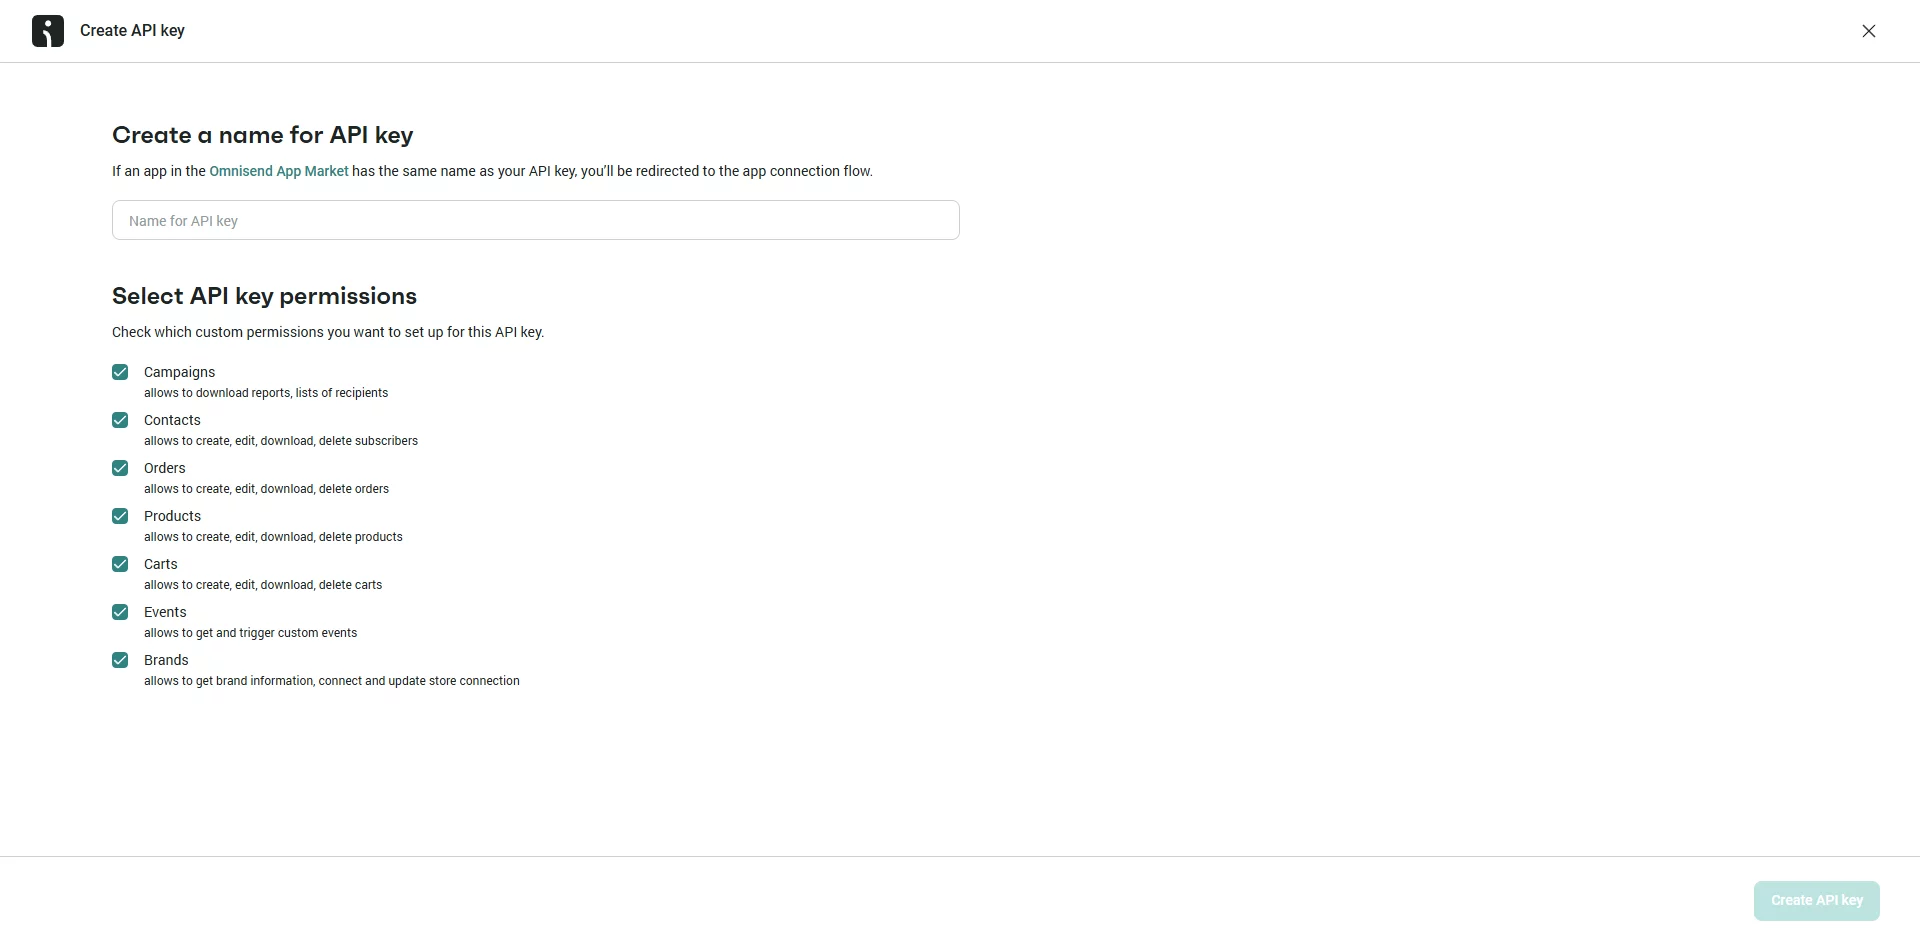
Step 1: Generate API Key from Omnisend
- Log in to your Omnisend account.
- Go to Store Settings → API Keys from the left sidebar.

- Click on the Create API Key button.
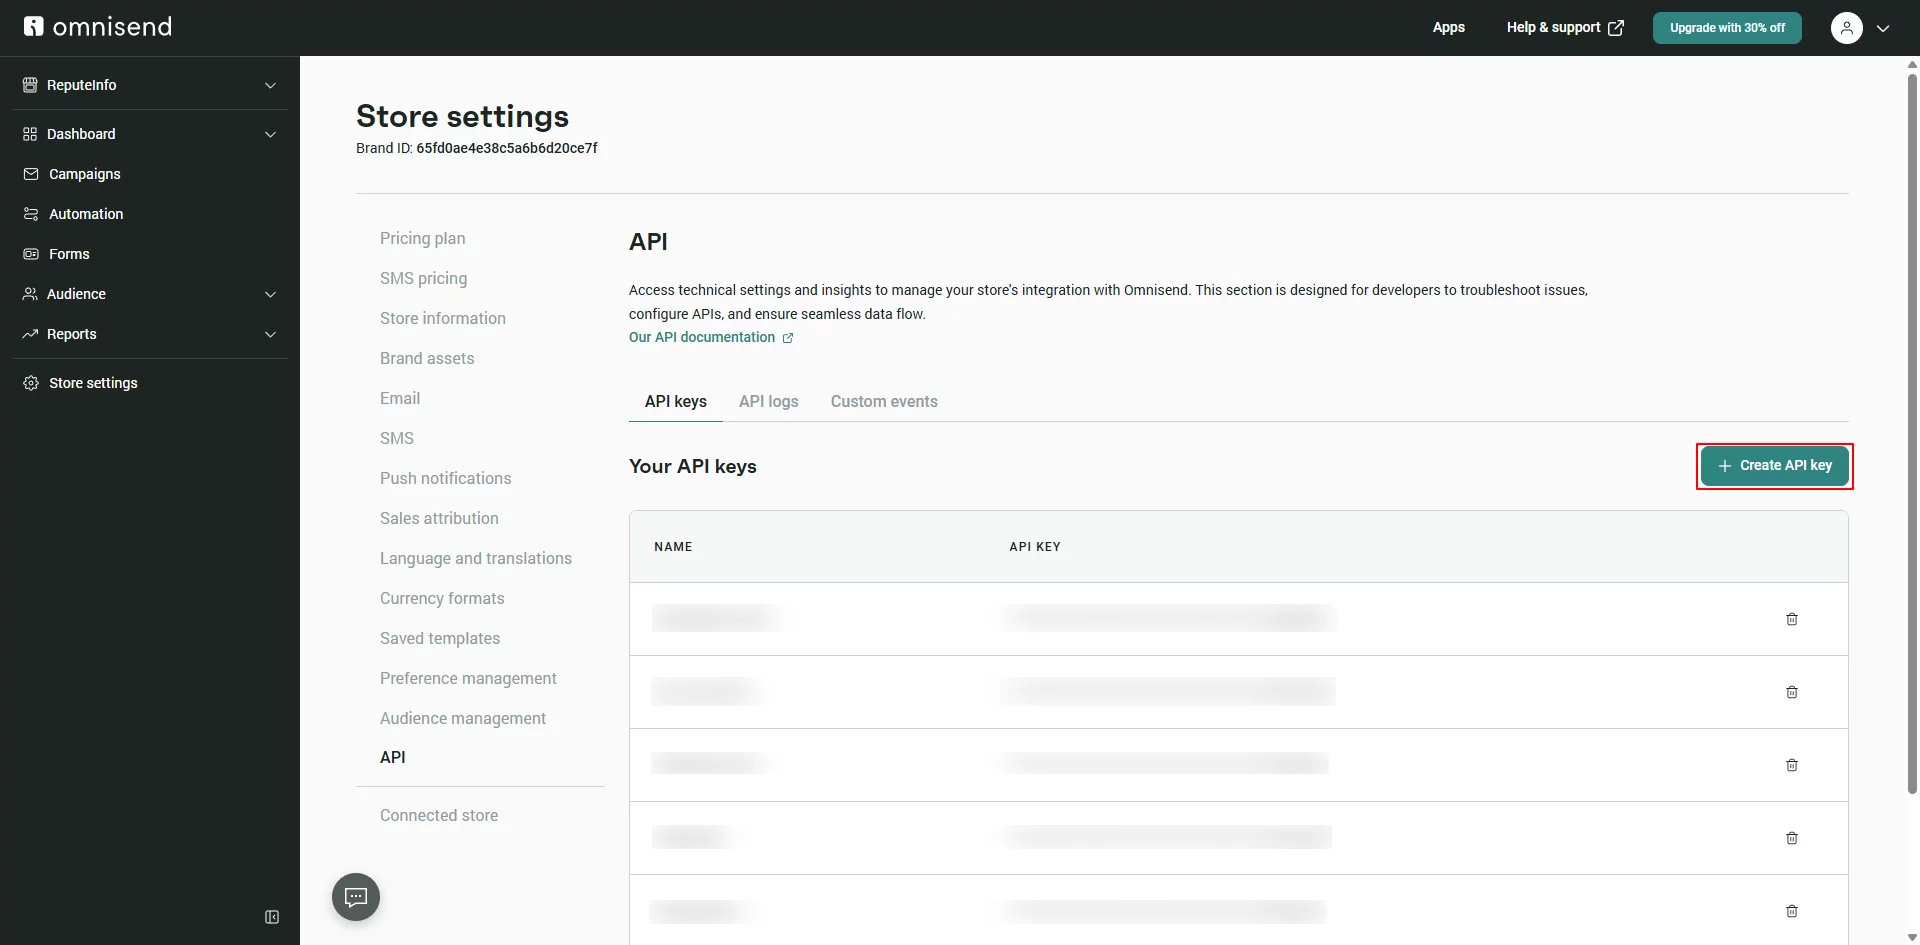
- Enter a name (e.g., “ARForms Integration”) and select necessary permissions—typically full access to contacts.
- Click Save and then Copy the generated API Key.
Step 2: Connect API Key in ARForms
- Go to ARForms → General Settings → Email Marketing Tools.
- Select the Omnisend tab.
- Paste the API Key you copied from Omnisend.

- Click Verify and Save to establish the connection.
✅ Once verified, ARForms is successfully connected to Omnisend.
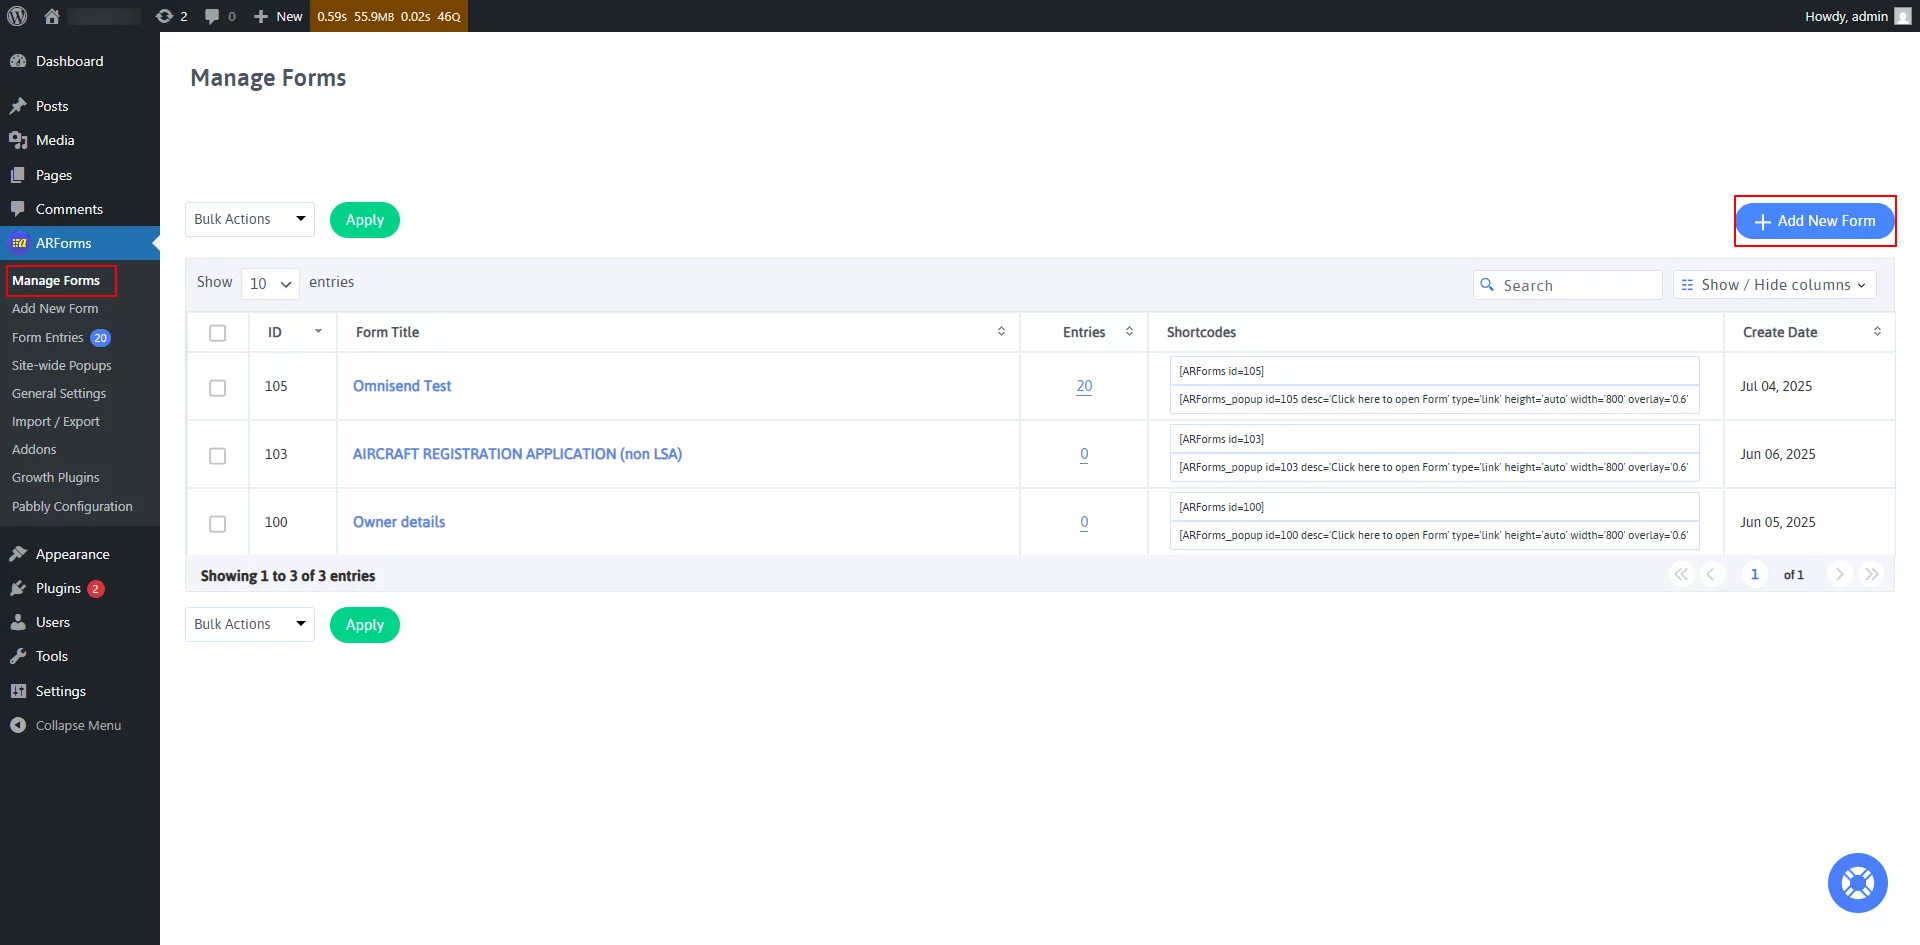
Step 3: Enable Omnisend in Your Form
- Navigate to ARForms → Manage Forms and either create a new form or edit an existing one.
- Click the Opt-ins menu from the form editor toolbar.
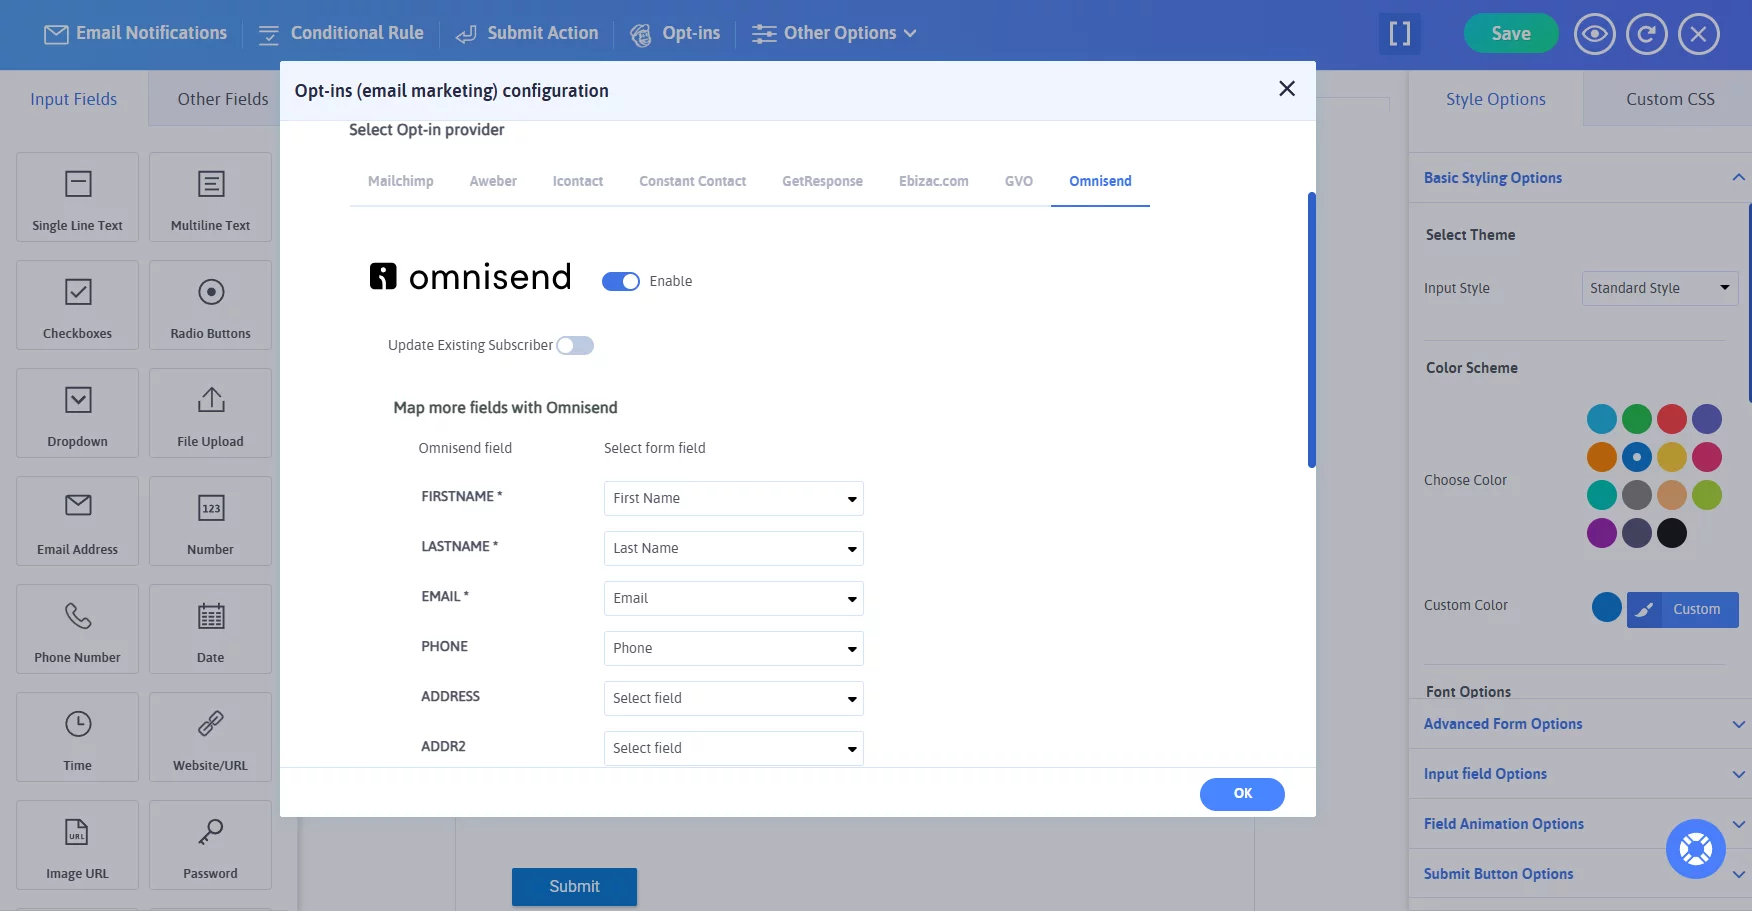
- In the popup, enable the Omnisend option.
- Map ARForms fields (e.g., Name, Email, Phone, Birthdate) to the corresponding Omnisend fields.
- Optionally, enable the Update Existing Contact option to update contact details in Omnisend upon resubmission.
This addon streamlines your lead capture process and ensures your Omnisend audience is always updated. Whether you’re building your list or running personalized campaigns, the ARForms Omnisend Add-On makes your workflow smoother and more efficient.
Change Log
Version 1.0
- Initial Release..