Home > Pabbly
Pabbly
ARForms Pabbly Add-On is a robust and user-friendly extension that allows you to integrate your ARForms submissions directly with Pabbly Connect workflows. Easily automate data transfers and trigger actions in connected apps right after form submission.
With this add-on, you can send ARForms data via webhooks to Pabbly in real time, enabling dynamic workflow automation for lead management, email marketing, CRM updates, and more-without writing any code.
The integration supports selective field mapping and custom key names, ensuring precise control over how your form data is formatted and delivered to Pabbly Connect.
Whether you’re syncing form data with Google Sheets, CRMs, or email tools, the ARForms Pabbly Add-On provides a seamless, scalable solution for automating your digital processes.
Note: Please meet the minimum requirement of PHP version 8.3, WordPress version 6.5, and ARForms version 7.1 or higher.
Key Features of ARForms – Pabbly Integration
- Easy-to-use Webhook-based connection with Pabbly Connect
- Trigger real-time workflows directly from form submissions
- Supports custom parameter mapping via Webhook Child Key
- Works with all ARForms fields and multiple forms
- No coding knowledge required
- Flexible, secure, and lightweight integration
Steps For Installation And Activation
You can install the plugin using either of the following methods:
- Install via FTP:
- Download the plugin from
CodeCanyonand extract it. You will find a folder namedarformspabbly. - Upload the
arformspabblyfolder towp-content/plugins/in your WordPress installation. - Activate the Pabbly Add-On For ARForms plugin from the WordPress admin panel under the Plugins menu.
- Download the plugin from
- Install via WordPress Uploader:
- Download the plugin from
CodeCanyon. - Log in to your WordPress admin panel.
- Navigate to
Plugins → Add New → Upload Plugin. - Click “Choose File”, upload the plugin ZIP file, and click “Activate Plugin” once the installation completes.
- Download the plugin from
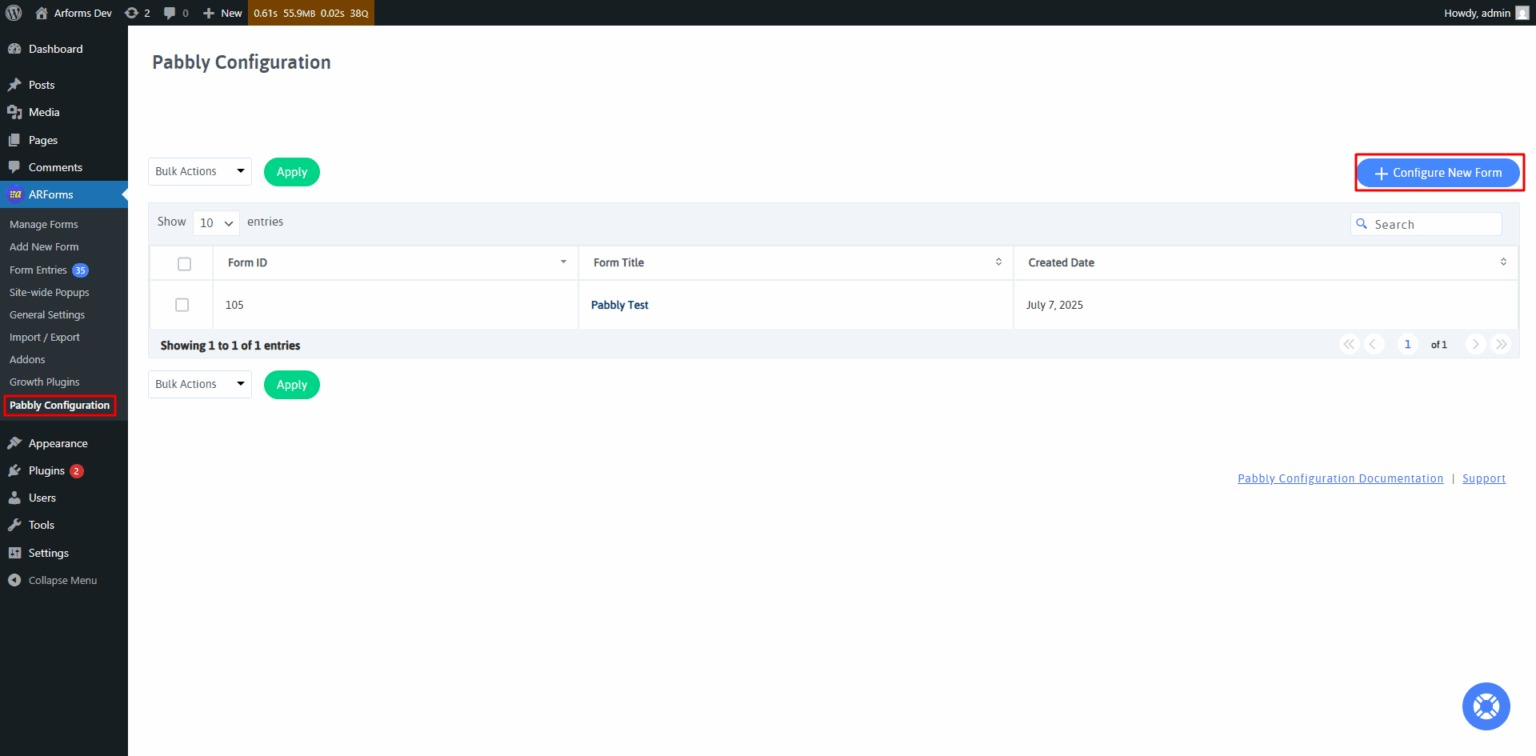
After activating the plugin, a new Pabbly Configuration menu will appear under the ARForms section in your WordPress dashboard.
How to Connect ARForms with Pabbly
Follow the steps below to create a Pabbly Connect account, configure your Webhook, and link it with your ARForms form.
Step 1: Create a Pabbly Account
- Visit Pabbly Connect.
- Create a new account or log in to your existing account.
Step 2: Create a Workflow in Pabbly
- Click the Access Now button under the Pabbly Connect section in your dashboard.

- Click on Create Workflow.

- Enter a workflow name and select a folder if needed, then click Create.

- In the Trigger section, select ARForms.

- Copy the generated Webhook URL. You will use this in the ARForms Pabbly configuration.

Step 3: Configure ARForms with Webhook URL
- Go to ARForms → Pabbly Configuration.

- Click on Configure New Form.
- Select the ARForms form you want to connect.
- Paste the Webhook URL from Pabbly into the Webhook URL field.
- Select the fields you want to send to Pabbly Connect.
- Optionally, set Webhook Child Key to customize parameter names.
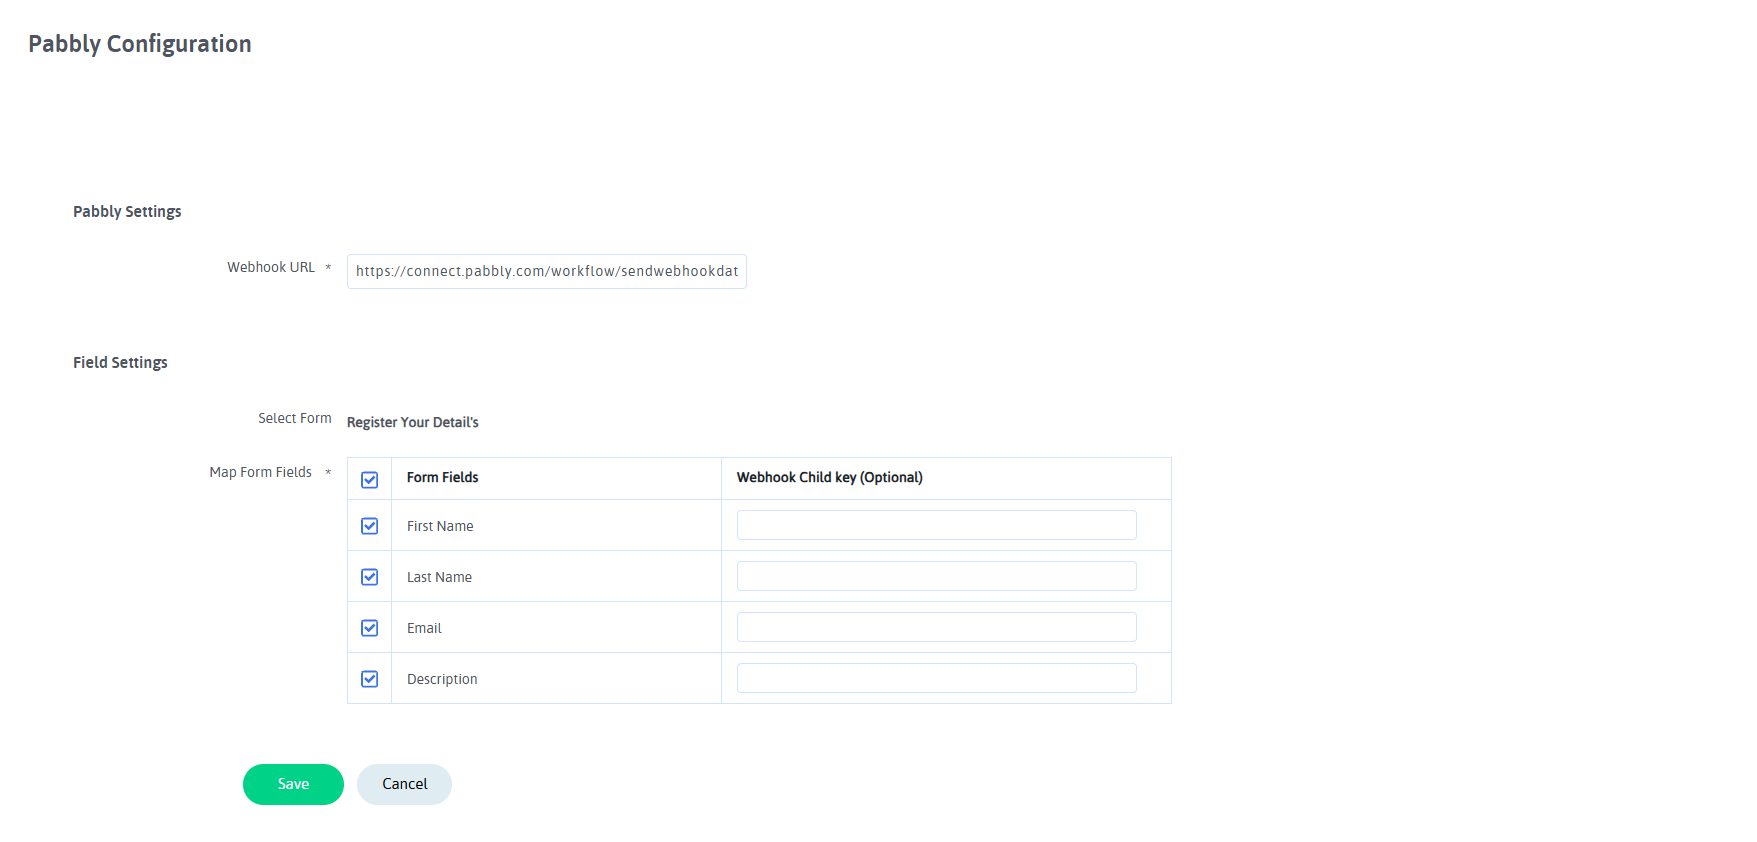
✅ Once saved, your ARForms form will start sending submissions to your configured Pabbly workflow.
Change Log
Version 1.0
- Initial Release.