Home > WhatsApp
ARForms – whatsapp Add-On is a robust extension that connects your ARForms submissions directly to the WhatsApp Business Platform. Instantly send automated, template-based WhatsApp notifications to both site administrators and users right after a form is submitted.
This add-on supports two official gateways: the **WhatsApp Business API (from Meta)** and the **Twilio API for WhatsApp**. You can configure notifications on a per-form basis, allowing you to send order confirmations, appointment reminders, or welcome messages. Dynamically map your form fields to WhatsApp template placeholders to personalize every message with the user’s submitted data.
The integration is built to handle complex scenarios, including delaying notifications until after a payment is successfully processed and supporting multilingual templates if you use the ARForms Multilanguage add-on.
With real-time messaging, the ARForms – whatsapp Add-On elevates your customer communication, ensuring your audience receives timely and relevant information directly on their preferred messaging app.
Note: For optimal performance, please use ARForms version 6.7 or higher, PHP version 7.2 or higher, and WordPress version 6.0 or above. A valid WhatsApp Business Account is required.
Key Features of ARForms – WhatsApp Integration
- Dual Gateway Support: Choose between the official WhatsApp Business API (Meta) or Twilio.
- Separate notifications for Admin and User on a per-form basis.
- Fetches your pre-approved WhatsApp templates directly via API.
- Dynamic placeholder mapping to personalize messages with form data.
- Delayed sending for payment forms—sends notification only after successful payment.
- Seamless integration with the ARForms Multilanguage Add-On for translated templates.
- Built-in debug log for easy troubleshooting.
Steps For Installation And Activation
You can install the plugin using either of the following methods:
- Install via FTP:
- Download the plugin from
CodeCanyonand extract it. You should find a folder namedarformswhatsapp. - Upload the
arformswhatsappfolder towp-content/plugins/on your WordPress site. - Activate the ARForms – whatsapp Add-on plugin from the WordPress admin panel under the Plugins menu.
- Download the plugin from
- Install via WordPress Uploader:
- Download the plugin from
CodeCanyon. - Log in to your WordPress admin panel.
- Navigate to
Plugins → Add New → Upload Plugin. - Click “Choose File”, upload the plugin ZIP file, and then click “Activate Plugin” once the installation completes.
- Download the plugin from
After activating the plugin, a new Whatsapp Notification section will appear in ARForms → General Settings.
How to Configure WhatsApp Add-On
Follow the steps below to configure the WhatsApp Add-On. The setup involves two main parts: configuring the global API credentials and then enabling notifications within a specific form.
Step 1: Configure Global Gateway Settings
First, you need to connect ARForms to your chosen WhatsApp provider.
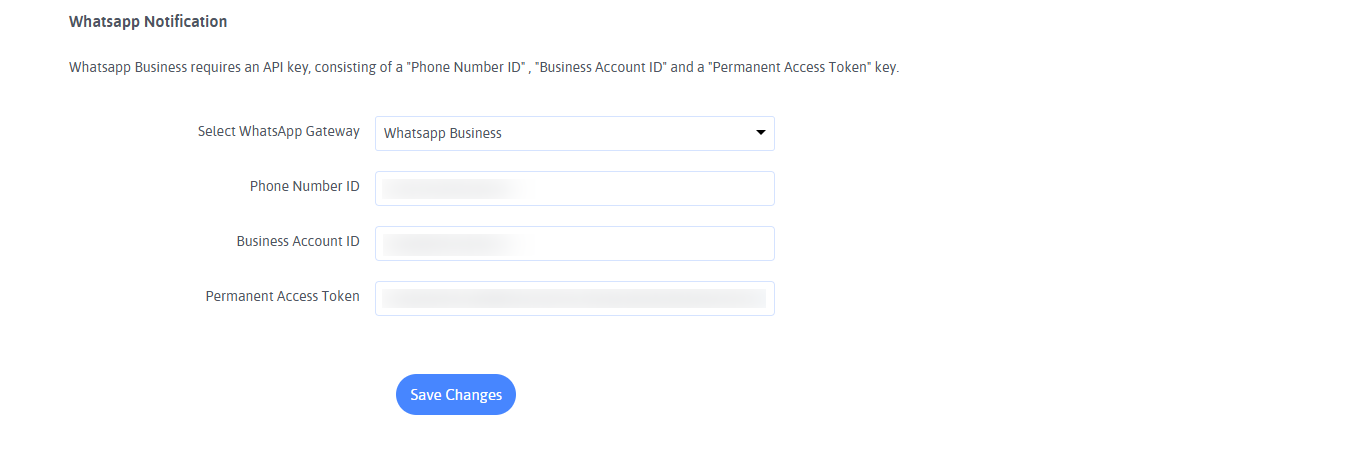
- Go to ARForms → General Settings.
- Scroll down to the Whatsapp Notification section.
- From the Select WhatsApp Gateway dropdown, choose either Twilio or Whatsapp Business.
Option A: Configuring WhatsApp Business (Meta)
- Select Whatsapp Business as your gateway.
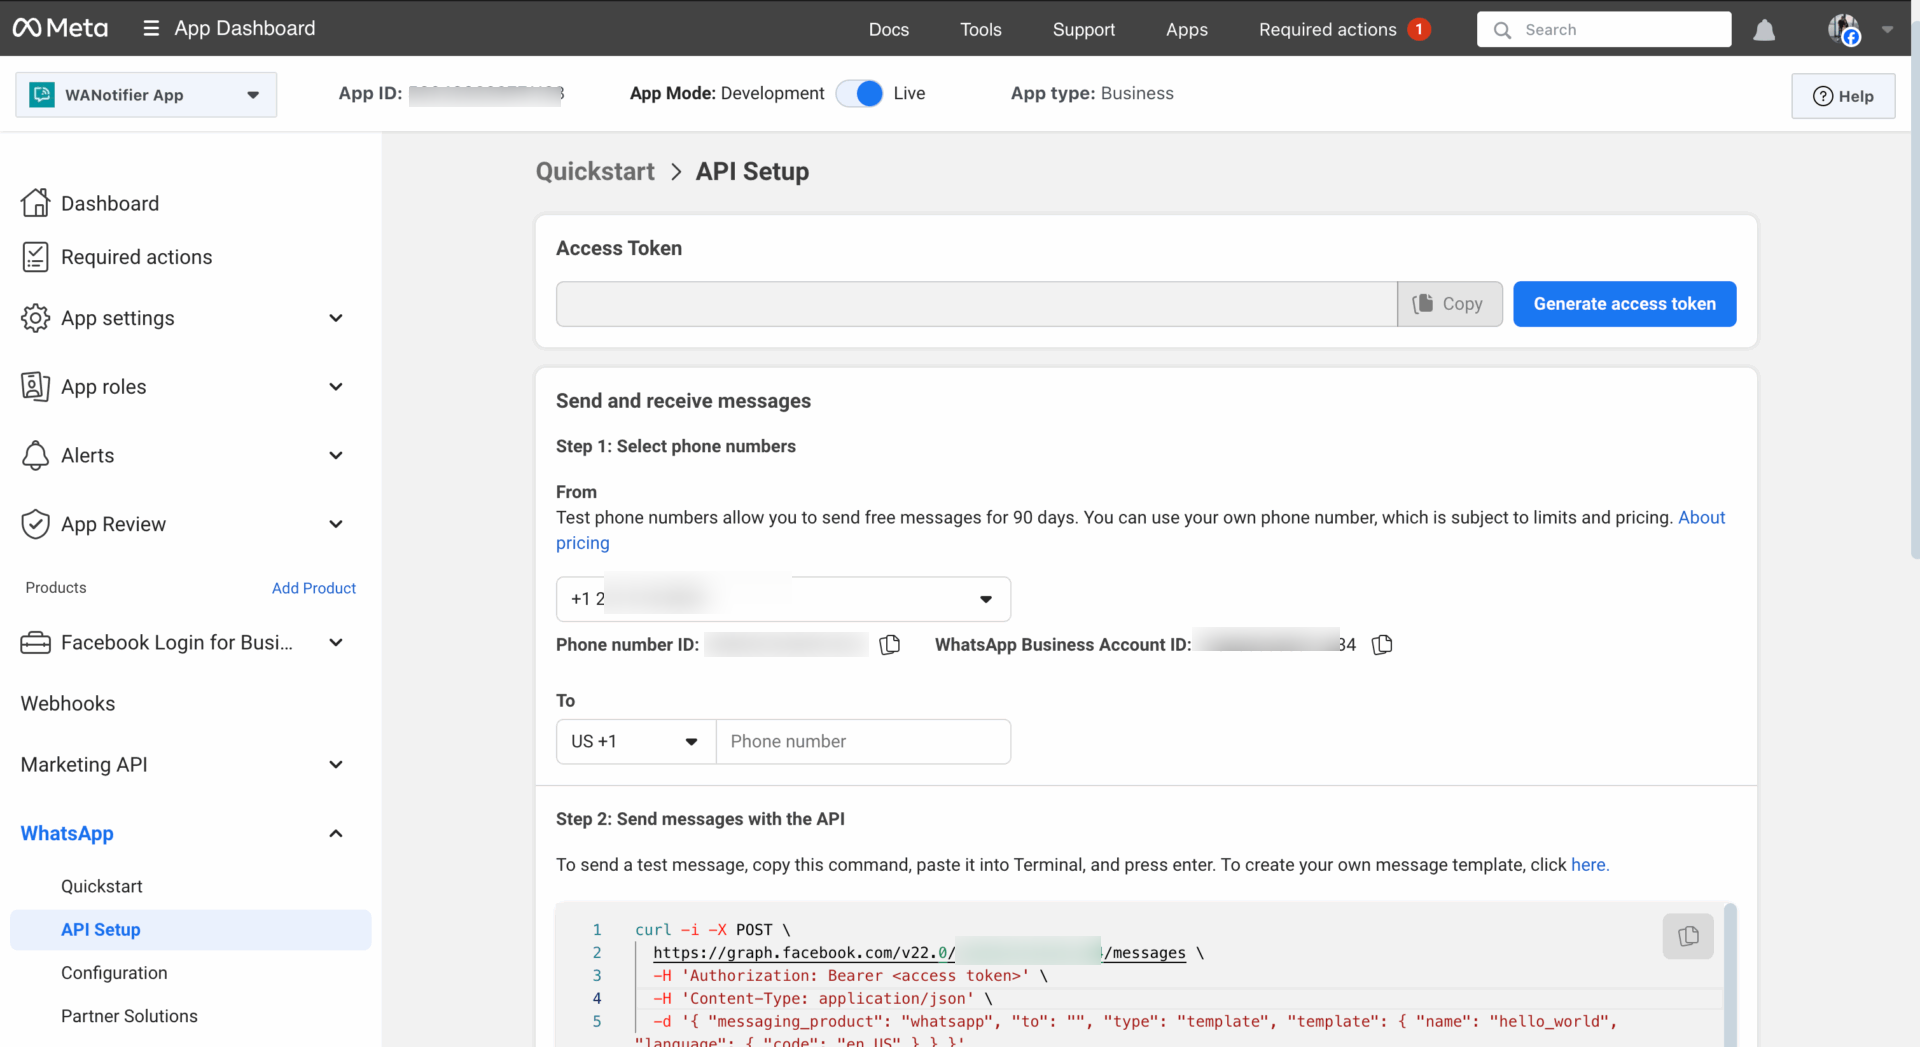
- Log in to your Meta for Developers account and navigate to your app’s WhatsApp → API Setup page.
- Copy the Phone number ID and paste it into the corresponding field in ARForms.
- Copy the WhatsApp Business Account ID and paste it into its field.
- Generate and copy a Permanent Access Token and paste it into the final field.
Option B: Configuring Twilio
- Select Twilio as your gateway.
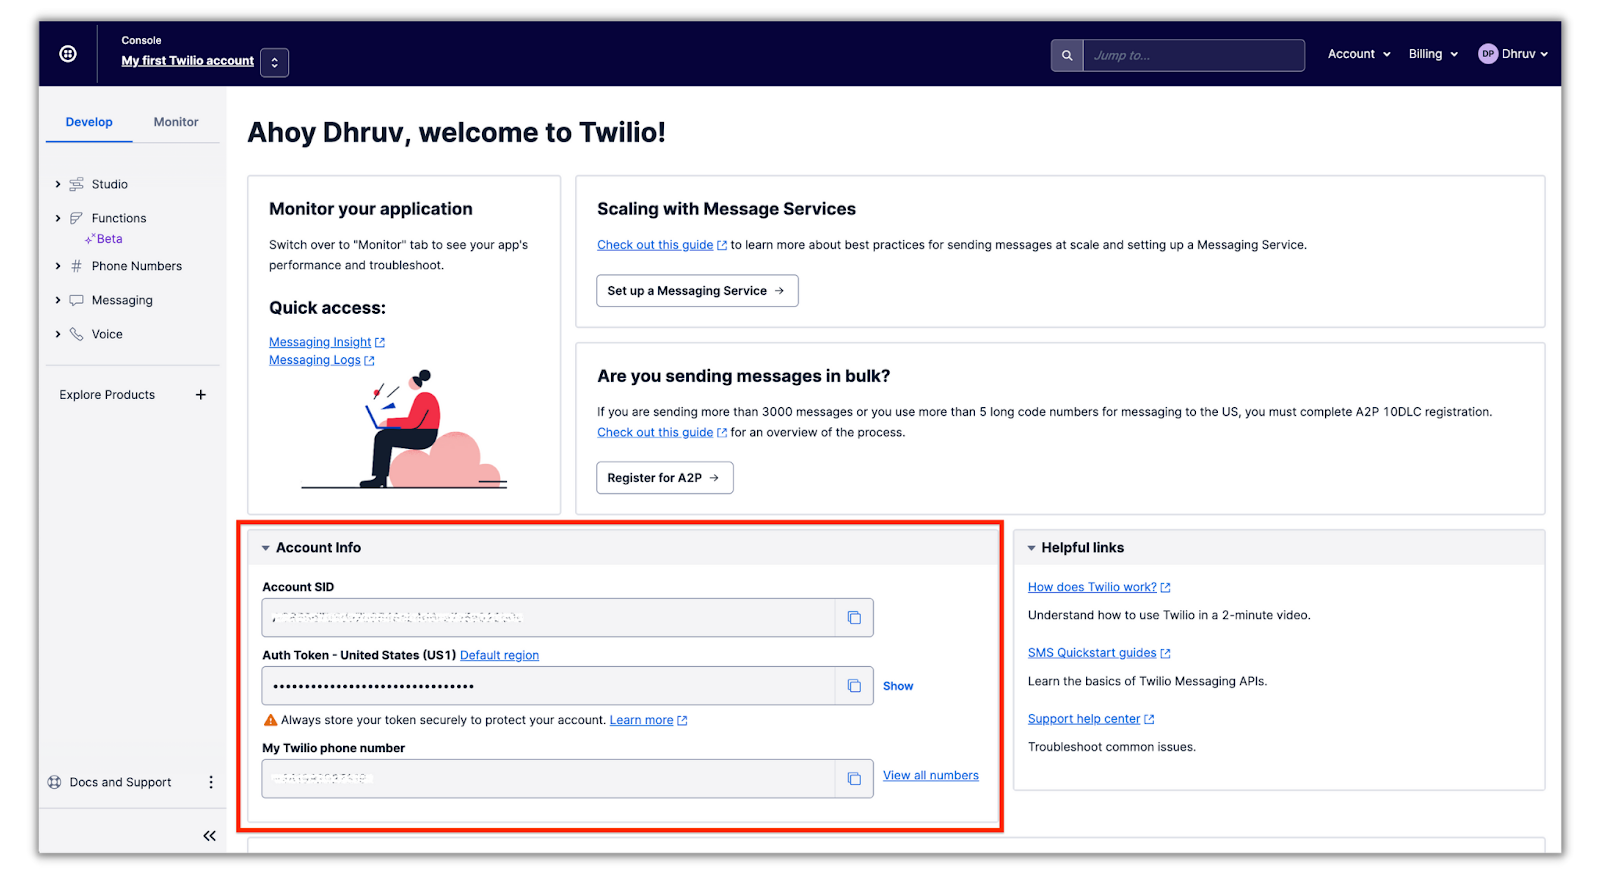
- Log in to your Twilio Console.
- Find and copy your Account SID and Auth Token from your dashboard and paste them into the corresponding fields in ARForms.
- Navigate to your WhatsApp senders to find your Twilio phone number, which acts as the Service ID (e.g., `whatsapp:+14155238886`). Paste this into the Service ID field.
- After entering your credentials, click Save Changes. The add-on will connect to the API and fetch your approved message templates.
✅ Once saved, ARForms is successfully connected to your WhatsApp provider. You can now configure notifications in your forms.
Step 2: Enable WhatsApp in Your Form
- Navigate to ARForms → Manage Forms and either create a new form or edit an existing one.
- Click the On Submit Actions tab from the top form editor toolbar.
- Click on the WhatsApp icon to open the configuration panel.
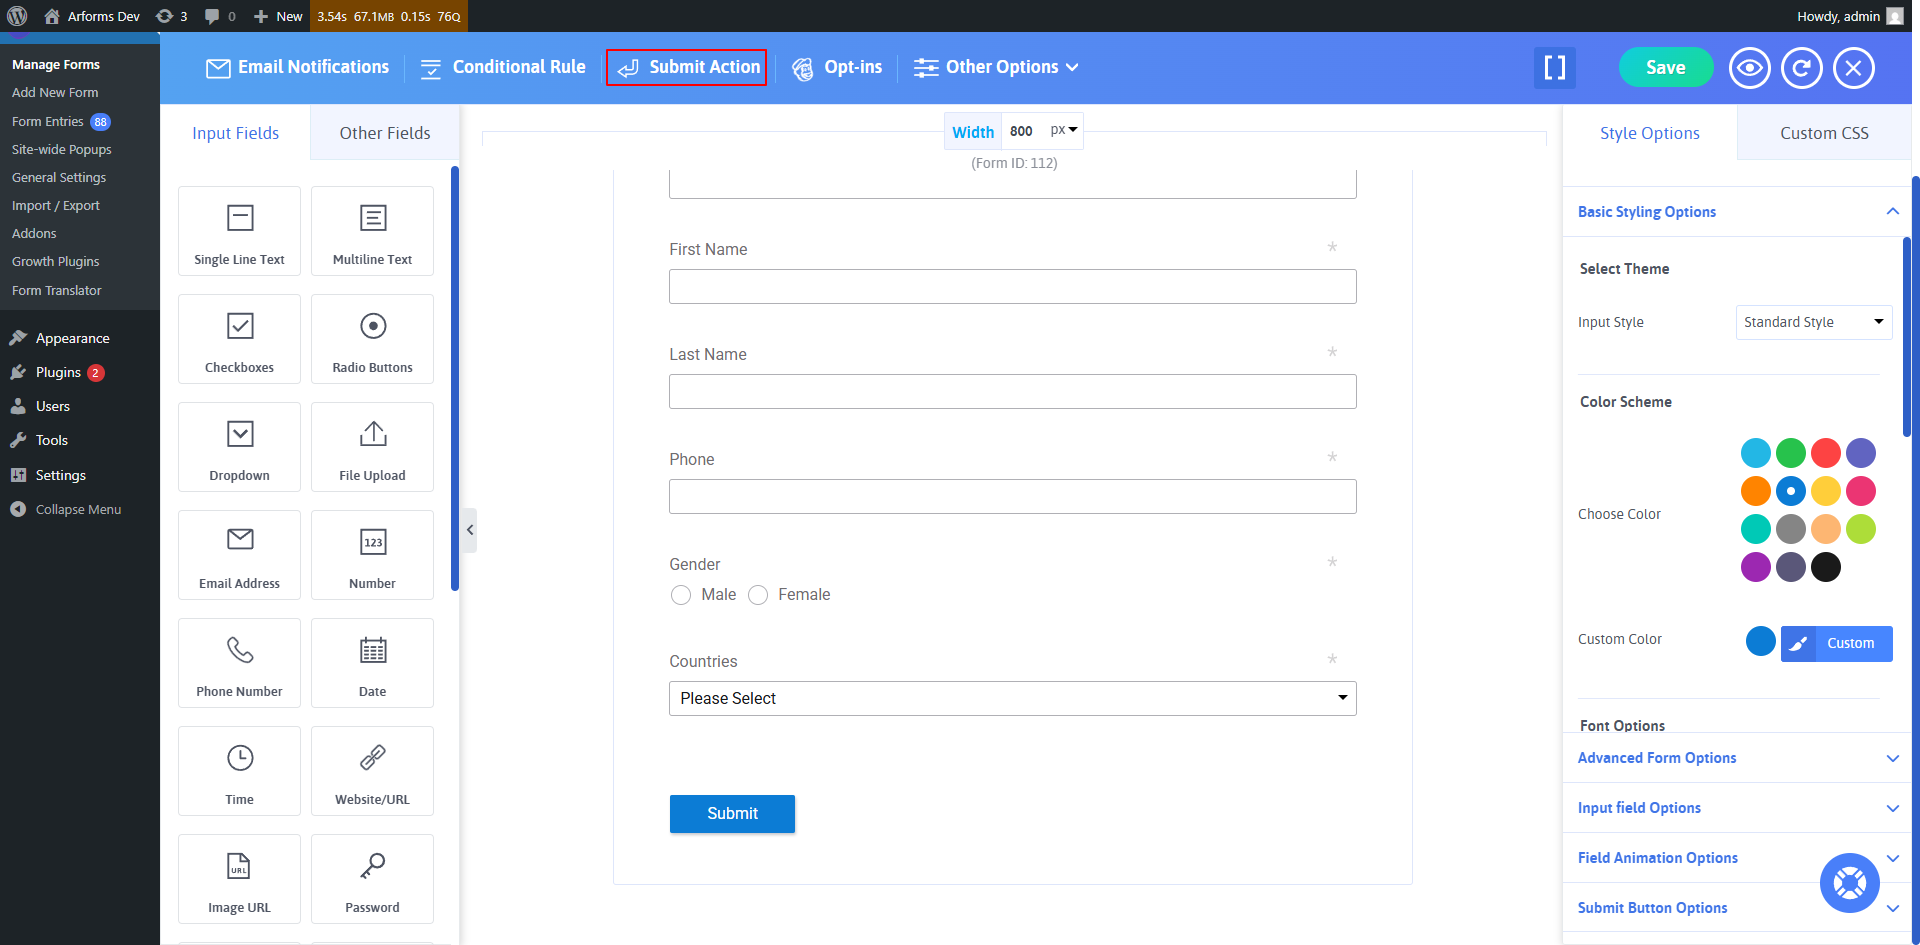
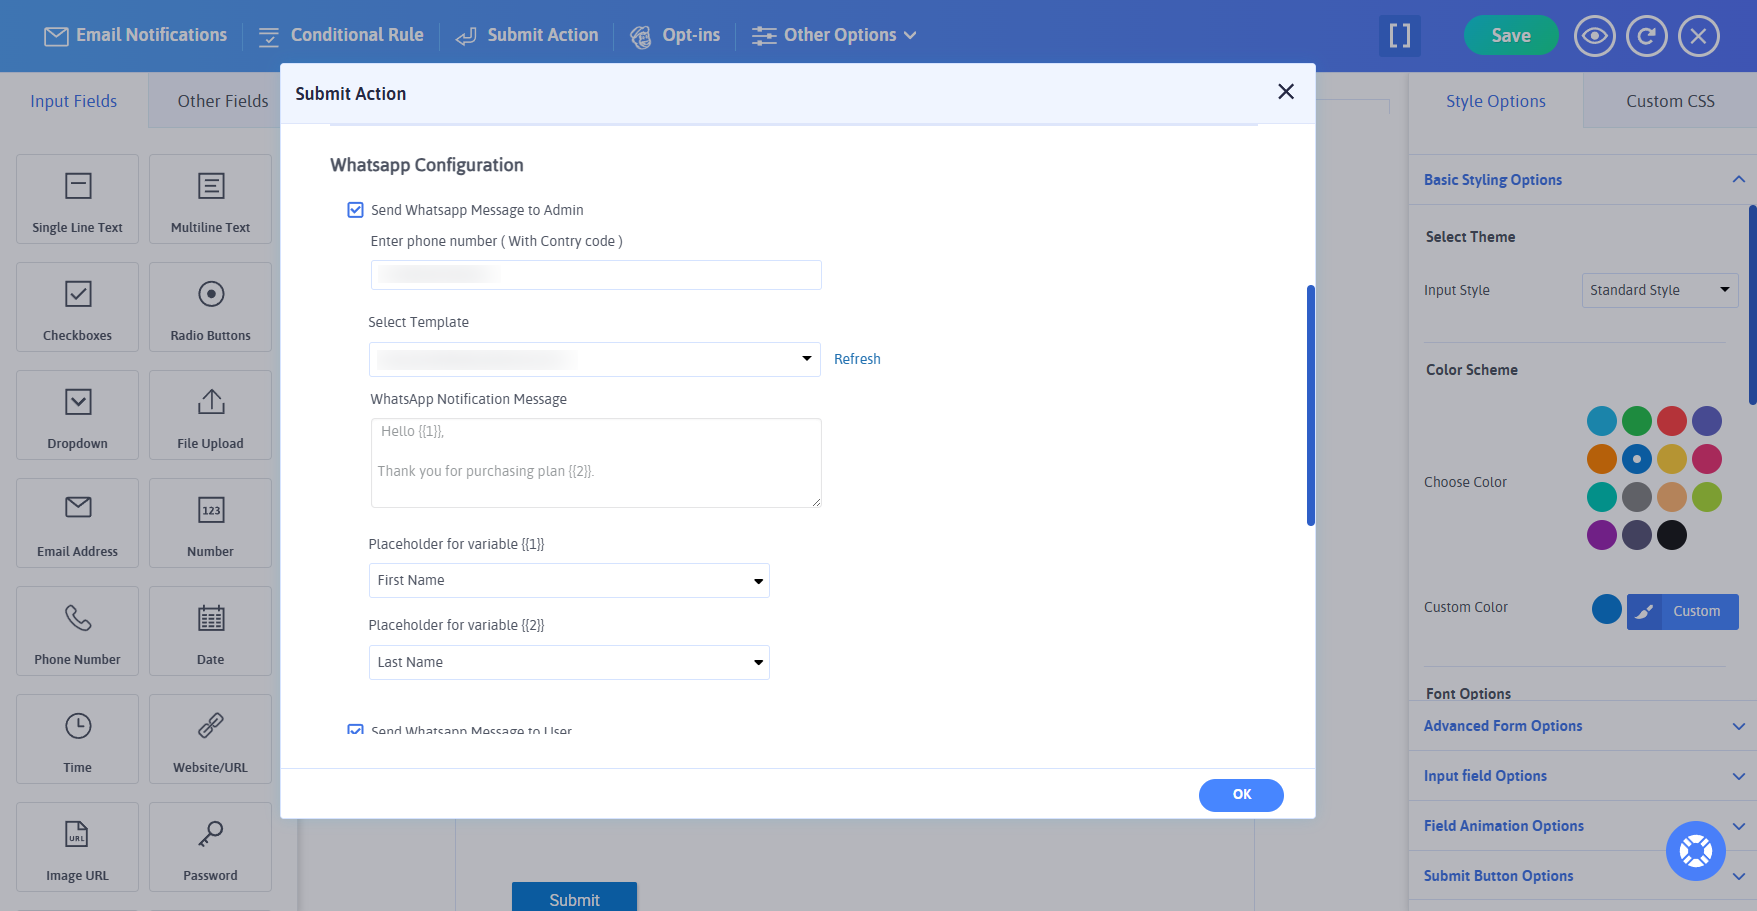
- You will see separate sections for **Admin Notification** and **User Notification**.
- To set up Admin notifications:
- Enable the switch for **Send WhatsApp message to Administrator**.
- Enter the administrator’s phone number in international format (e.g., `+15551234567`).
- Select a pre-approved message template from the dropdown.
- To set up User notifications:
- Enable the switch for **Send WhatsApp message to User**.
- In the **To Number** dropdown, select the form field where the user will enter their phone number.
- Select a pre-approved message template from the dropdown.
- Map Template Placeholders: After selecting a template, the addon will display its content and generate fields for each placeholder (e.g., `{{1}}`, `{{2}}`). Map each placeholder to a field from your form.
- Once configured, save your form.
This add-on automates your communication workflow, delivering instant and personalized messages. Whether you’re confirming a purchase or sending a warm welcome, the ARForms – whatsapp Add-On ensures your message is delivered reliably.
Change Log
Version 1.0
- Initial Release.