Home > Zoho CRM
Zoho CRM
Zoho CRM For ARForms plugin provides you to quickly create contacts for your related Zoho Account using the power and flexibility that ARForms provides.
Zoho CRM For ARForms plugin integrates your form entries and Zoho API into a single process. You can create contact in Zoho Account immediately after form submission from ARForms. This addon requires at least version 5.6 of ARForms. Please make sure that your ARForms plugin is up to date before installing this extension.
Note:Please meet the minimum requirement of PHP version 5.6 and WordPress version 4.5
Steps For Installation And Activation
You can install plugin either of these two methods.
- New install via FTP
- New install via the WordPress Uploader
a. Download the plugin from CodeCanyon, and extract it. You should find a directory arformsZoho.
b. In your WordPress installation, upload arformszohocrm to wp-content/plugins/
c. Activate the "Zoho For ARForms" plugin through the Plugins menu from WordPress admin panel.
a. Download the plugin from CodeCanyon
b. Log in to your WordPress admin panel
c. go to Plugins -> Add New -> Upload
d. Click on choose file and browse the download package from CodeCanyon. When the plugin uploads successfully, click on Activate Plugin.
e. After activating the plugin, you will be able to see “Zoho” inside“Opt-ins”.
f. In General Setting you will able to see “Zoho” in Email Marketing Tools option where you can configure Zoho List using Zoho credentials..
Interaction with Zoho CRM
First of all login to your Zoho account. For a login to Zoho account click here.
If you do not have an Zoho account then Create Zoho account.
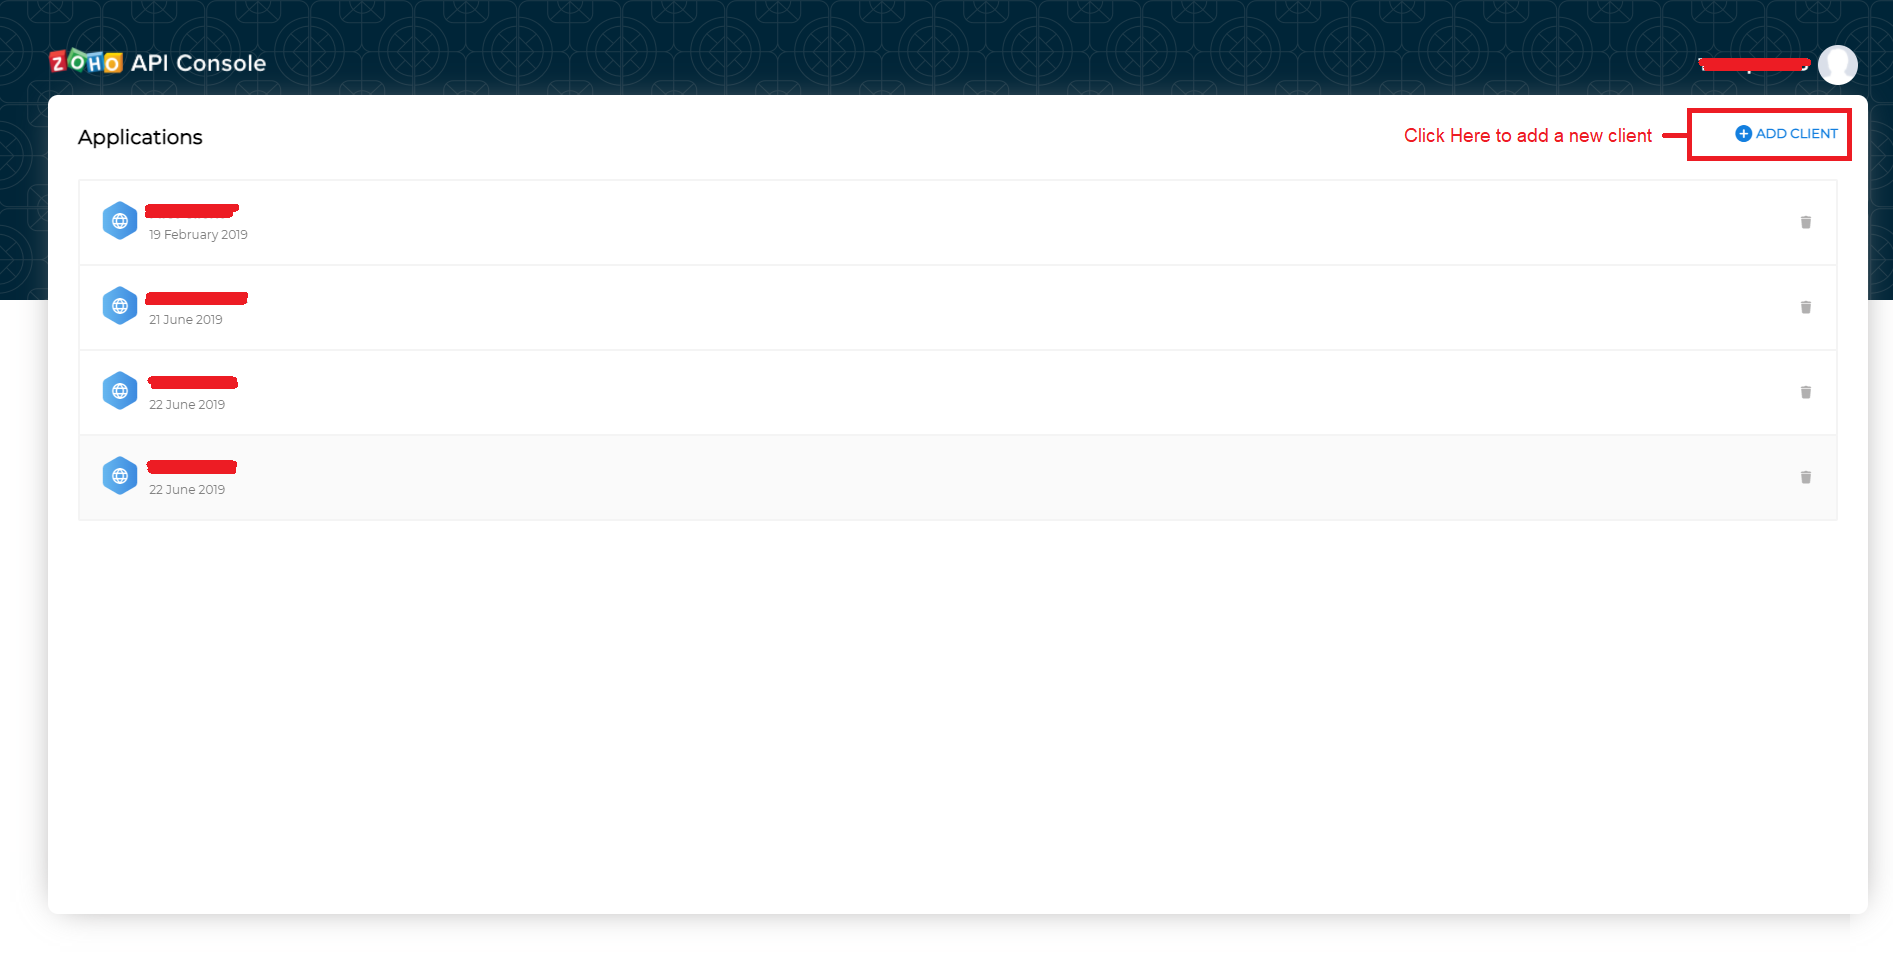
Follow below steps to get your Client ID and Client Secret
- Click on “ADD CLIENT” option at top right corner of the page.
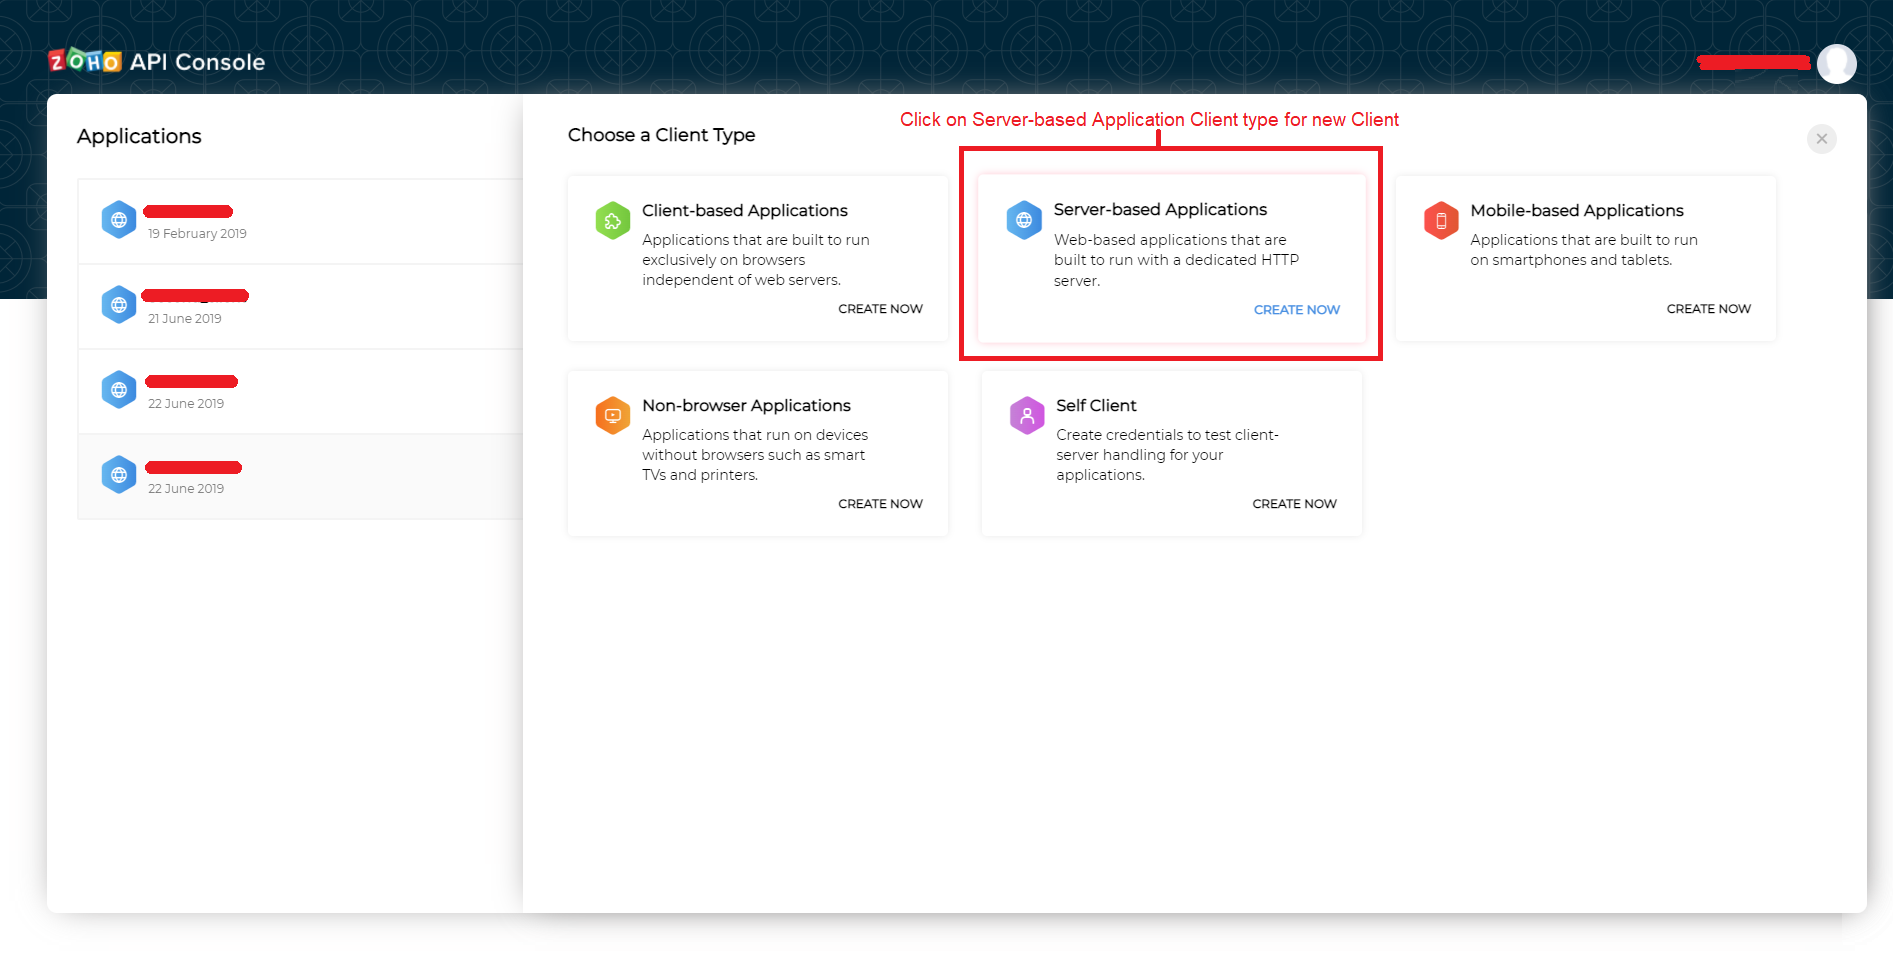
- Click on “Server-based Applications” from Choose a Client Type popup.
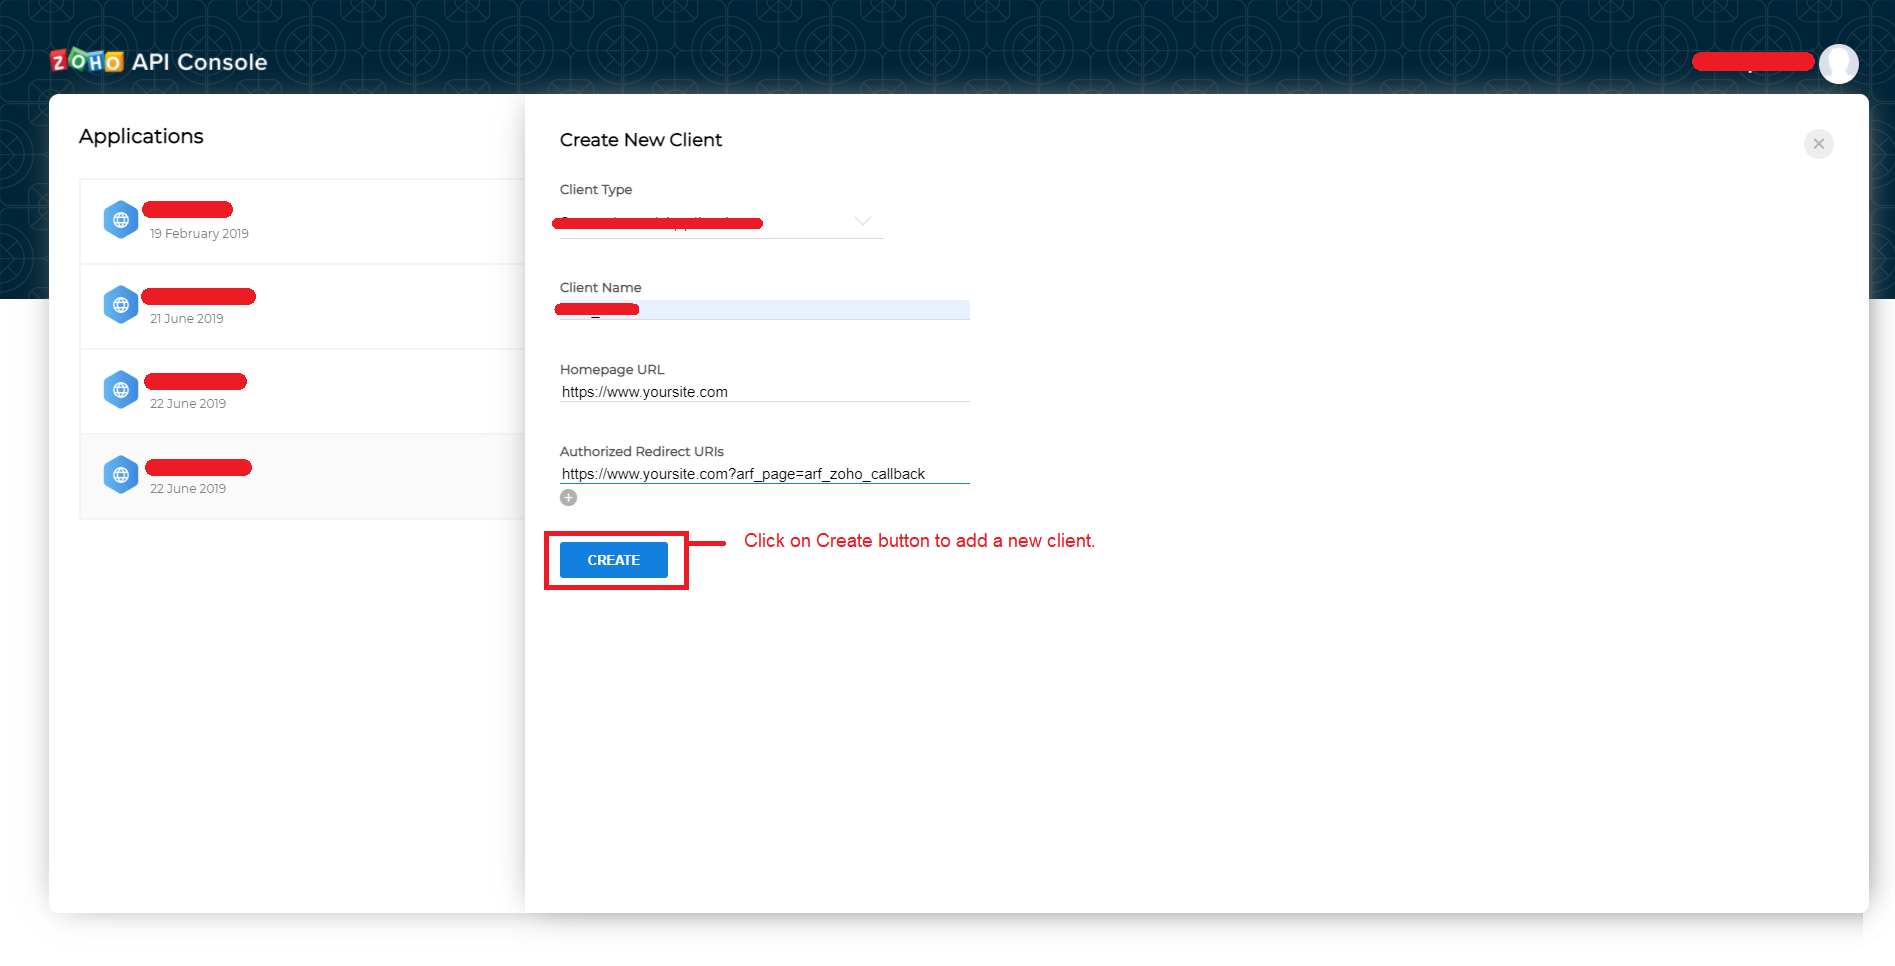
- On Create New Client popup, Enter Client name in Client Name textbox, Enter your website Homepage URL in Homepage URL textbox, Set https://www.yoursite.com?arf_page=arf_zoho_callback in the Authorized Redirect URIs
- Click on “Create” button at the end of the fields.
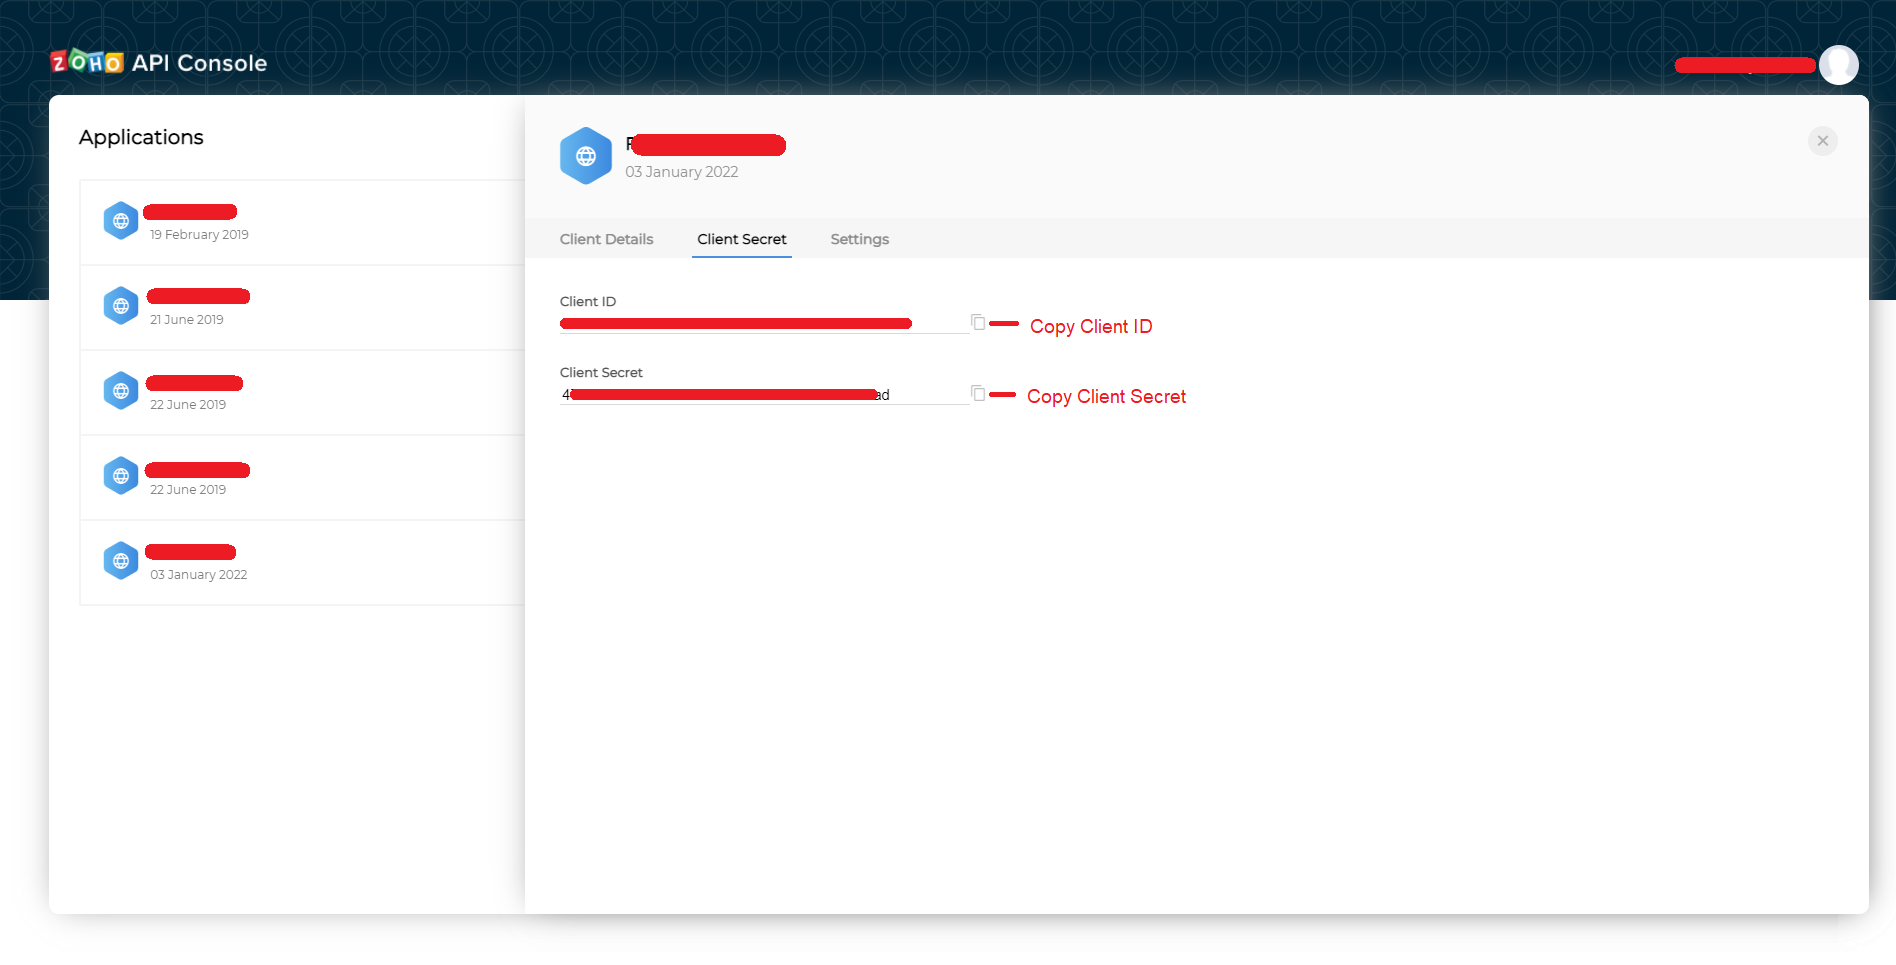
- After successfully added a new client you can see the newly added client’s details where you get the Client ID and Client Secret under the Client Secret tab.
Zoho CRM Configuration
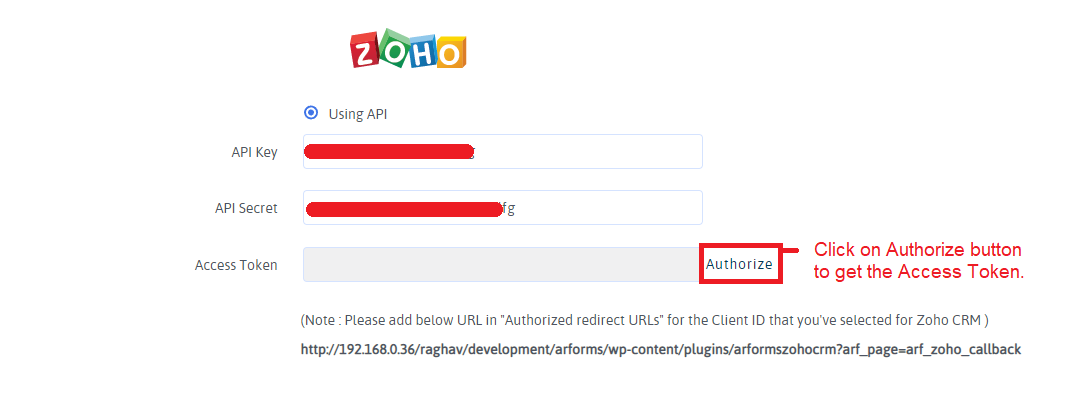
After getting the Client ID and Client Secret, Copy that Client ID and Client Secret and fill them in ARForms > Global Settings > Email Marketing Tools > Zoho.
After Filling Client ID in the Client ID and Client Secret in the Client Secret textbox, click on Authorization to get the Access Token and Click on Save Changes button at the bottom of the page.
Form level configuration with Zoho CRM
After configured Zoho CRM in Global Settings, you need to configure Zoho CRM for the form to add contact in the Zoho Account.
First, create a new form or Edit existing form.
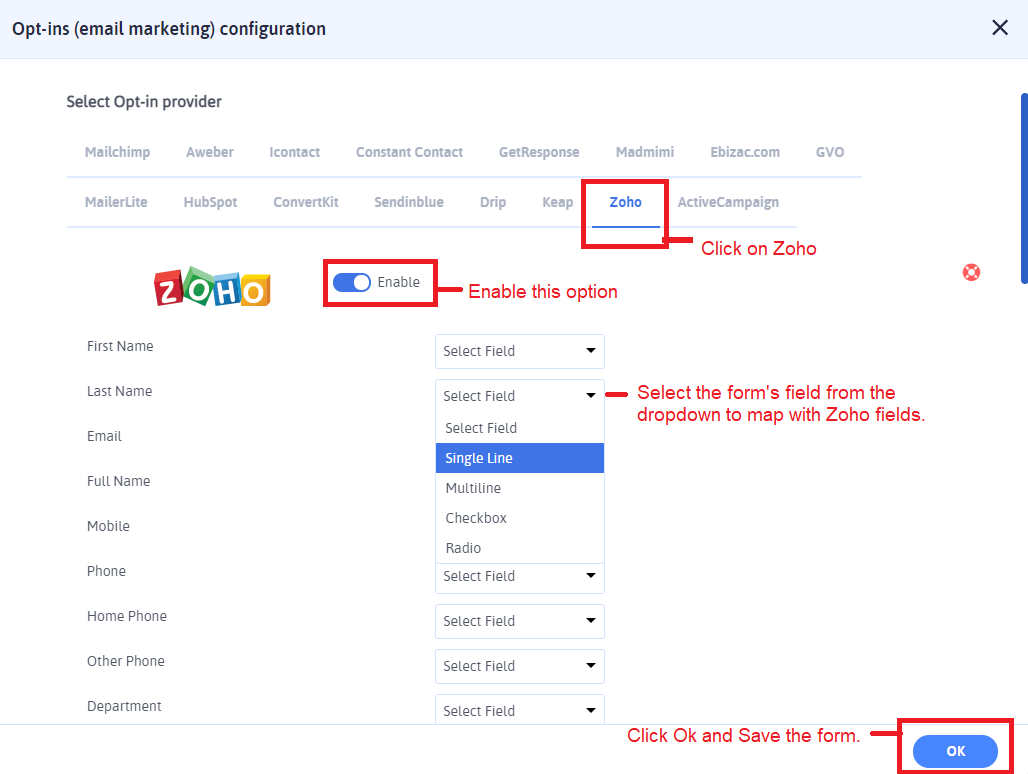
Click on the “Opt-ins” menu from the top bar. You can see ‘Zoho’ in the tab and Enable the Switch to enable the Zoho CRM.
First of all, Map First Name, Last Name, and Email fields in the dropdown. Map other fields as per your requirements.
Save the form.
Now when the user submits that form, the contact will automatically create to your Zoho account.